How To Structure Flutter App When Using BLoC Pattern

This entry is part 1 of 2 in the series Developing Flutter Apps with BLoC Pattern

When using BLoC as the state management technique for your Flutter app, your best bet is to open a folder called packages and put all of the code for all of your BLoCs into it.

BLoC in Packages Folder

I’ve got this idea from Felix Angelov and it serves me well. Previously, I had bloc code in folder blocs, screens using it in ui/screens, repository for data in /repositories, models in /models and so on. The idea of blocs in packages folder is the opposite: act as if you were really creating a standalone package for someone else to use, like you were going to publish it on pub.dev.

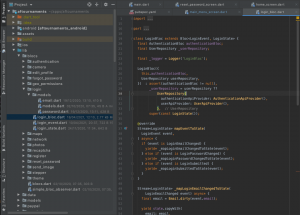
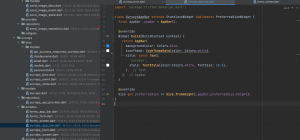
Bloc architecture in Flutter apps

Bloc architecture in Flutter apps

The image above shows a mix of blocs in their own folder /blocs and the blocs that are in the /packages folder. The former are the legacy code and they are being transferred to the /packages architecture.

Basic BLoC Structure with Models

The basic blog will be the same regardless of the encompassing folder. In the image below, we see a Login bloc with models for email and password.

Single bloc in Flutter app

Single Login bloc in Flutter app

There is not much code for this bloc at this place as the rest of it is dispersed throughout the entire app. This becomes error prone and tiresome after you have a few dozen of these to handle.

Structure of Specific BLoC Files in a Package

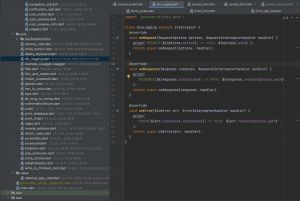
Now let us see what does a bloc within a package look like:

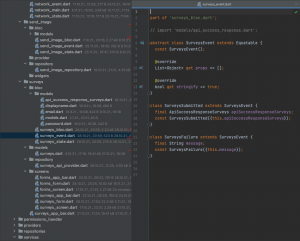
Bloc under packages has much more code because it is centralized

Bloc under packages has much more code because it is centralized

A much better approach, I must say. Everything is tucked away in its own folder or subfolder; if you do not want to see it, it easily becomes invisible.

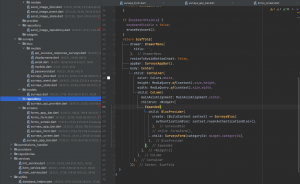
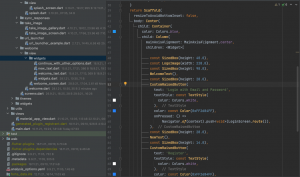
This approach favors really small pieces of code. We will show on screen only surveys_screen.dart, and here is what its code looks like:

Surveys screen using a Bloc architecture

Surveys screen using a Bloc architecture

Notice that the screen that we want to show, SurveysBloc, is within a BlocProvider. It provides the environment for the actual form on the screen, which is in SurveysForm widget.

Also note that even a very small widget such screen title gets its own file and class SurveysAppBar in surveys_app_bar.dart:

Surveys appBar in its own class and file

Surveys appBar in its own class and file

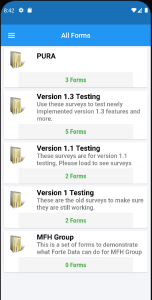
If you were wondering what does the app or the above code do, here is the screen it produces:

Forms screen with bloc structure in a Flutter app

Forms screen with bloc structure in a Flutter app

The exact functioning of the bloc code deserves a blog post of its own, so let us now turn to the additional structure of the app.

The UI Folder — Graphics Elements on the Screen

User Interface elements get their own folder. There will be, typically, three subfolders in it:

screens The majority of your apps files will be in these folders.
themes Usually, there are three or four files here, one for themes in general, the others to specify the concrete values for the theme.

Using themes with blocs is extremely easy, once you set it up, you can forget about it and still have it working like a charm.
widgets The heart and soul of Flutter, the widgets are small parts of screen property that are neither very complicated nor long. Not a full blown class and not just one line of Text.

Good candidates for widgets are app background, button text style, customized buttons of all kinds, euro sign, avatars and so on. If you use the same widget in two places in the app, put it into its own file and place into this folder.

Structure of Screen Folders

Here is what a typical structure of  screens files looks like:

Welcome screen structure of files

Welcome screen structure of files

The widgets specific for the Welcome screen are WelcomeText and NewText so we place them here, in the /widgets subfolder. Notice that there is a /view subfolder beneath /welcome and that there is /widgets beneath that /view. It is granularity once again — if you are working on the Welcome screen, you will find all of its files in one place and if not, you just look at the closed subfolder and scan on to something else to fix.

The utils Subfolder

The utils are the files that are not widgets — that is, have no presence on the screen, but still have some useful function. Basic examples are delete keyboard, dio logging or hex to color conversion. You can also use utils to convert latitude and longitude to string, control input data with regex, create a singleton and so on.

Here is what it looks like in a larger app:

Utils folder with BLOC structure of a Flutter app

Utils folder with BLOC structure of a Flutter app

These are the main parts of a Flutter app structured around the BLoC pattern. Code is taken from one of my apps I create for customers. If you want your app to be structured in this way, please contact me here or on LinkedIn.

Posted in Flutter, Programming | Tagged , , , , , , , | Leave a comment

From Endpoint in Postman to Flutter Screen and App

When developing APIs, the usual procedure is to test them with Postman, from the comfort of your own desktop. Once you have everything nailed on the server and you are content with the results in Postman, here is what you can do to turn the API call into a screen or widget in Flutter.

The Task: Send Email to the User for the Forgot Password Option on Login Screen in Flutter

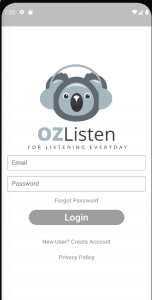
The problem we are going to solve is how to send an email to the user for the Forgot Password Option on the Login screen in a Flutter app. Here is what it looks like on screen:

Forgot Option Login screen in Flutter

Forgot Option Login screen in Flutter

Provided that the user has already entered their correct email address in the Email field, tapping on Forgot Password option should execute a API call.

Endpoint in Postman

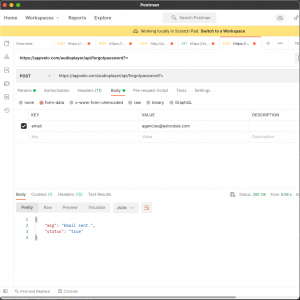
Here is what the API call in Postman looks like:

Endpoint in Postman for Flutter

Endpoint in Postman

We know that the call is good because Postman returned JSON with msg and status, and they were both ok.

The next step is to implement that call with Flutter instead of Postman.

Flutter Code for the API Call

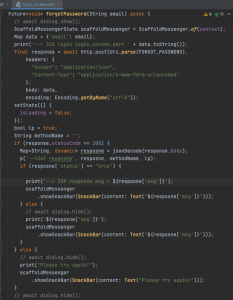
Instead of reproducing lines and lines of code, we’ll just show the call in an image:

Calling the API point in Flutter

Calling the API point in Flutter

The Postman hands us the JSON in plain sight but in Flutter we have to catch it up as response to a HTTP call. Then we have to analyze it by parameters, in this case msg and status. If status was ok (and provided the entire API call was successful, as denoted by returning 200 as the HTTP code from the server) the server moves on to send the email.

The Action: We Receive an Email

And we get this in an email:

Email message after an API call

Email message after an API call

Or, if the status was not ok, we would get an toast like message at the bottom of the screen, telling us that we should try again or something like that.

This article has shown you the typical stuff Flutter developers do when implementing API calls into the app. We have not shown the exact techniques, for example, how to analyze the return from the API call, how to decode that JSON (and it can really complicated) and so on.

For quotes, contact me through email or LinkedIn.

Posted in Dart, Flutter | Leave a comment

How To Convert Objective C App To Flutter

Here is what I generally do when converting Objective C apps to Flutter:

1) Compile the current code you have with Xcode 13.1 (the latest version I am now using)

That will give me an insight into what the app does, what is the flow of screens, the user’s journey and so on. Will actually serve as a wire frame to look up to.

2) Files and Conversions

The next task is to change file name all to lowercase characters as that is not acceptable on Android.

3) Converting Images

After that, transposing iOS images with their @ chars into images acceptable to Flutter (there is a well defined procedure but it does take some time and effort).

4) Form the project in Flutter

At this step we would have all the files that the app needs in shape and form that the Flutter can use.

5) Screen by Screen Conversion

If you want to change something, upgrade the app, use new API calls etc this would be the time and place to do it.

The good news is that I have ton of codes in Flutter for all of the mundane tasks such as user registration, log in, log out, menus and so on. It is more of a customizing process instead of developing everything from scratch just for your project.

6) Testing

I would send you a new version of the once a day or at least 2-3 time a week, depending on various factors. I expect you to actively take part in this phase and guide the development process to the end.

7) Opening Accounts or Using the Existing Accounts on Google Play and the App Store.

I need to have access to the App Store Connect to get the sertificates for development and distribution.

8) Preparing Listing For the aAp

You would have one for the existing app, obviously, but expect things to change and that should be reflected in the listing right away.

9) Submitting the App to the Stores

This is as far as I go — I cannot guarantee that the app will be accepted but if there are problems, I will stay with you and change the app so that it can be published.

For quotes, contact me through email or LinkedIn.

Posted in Dart, Flutter, iOS, Objective C, Programming | Leave a comment

Flutter BLoC Example and Data Connection Checker Plugin

This entry is part 2 of 2 in the series Developing Flutter Apps with BLoC Pattern

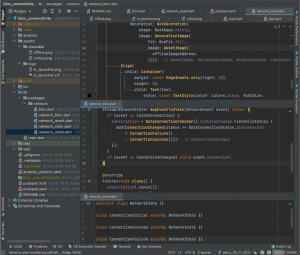
Flutter BLoC Example Connectivity

Flutter BLoC Example Connectivity

Flutter BLoC Example for Checking Data Connectivity

Checking whether there is Internet connection at any given time is a hallmark of a professionally crafted Flutter app. Here is a Flutter BLoC example using a well known DataConnectionChecker plugin.

In What Types of Apps Can We Use this Flutter BLoC Example for Checking Connectivity

Some apps have checking of the Internet signal as definitive requirement. For instance, the app for fishing tournaments: anglers go to the middle of the lake or river, catch the fish, make a photo of it and then release. The tournament consists of sending the images of the fish to the server, where the judges approve or ban each particular image, for each angler. It is unlikely that there will be Internet connection in the middle of the lake, so the app should store the images on the device for later use. Once the device is in the reach, the app will upload the images and the corresponding geographical coordinates automatically.

Survey apps require similar functionality. The survey may take place in the heart of the forest, with no Internet in sight (literally). Again, once the device is in the reach, it should upload the surveys automatically.

Data Connection Checker and BLoC

In general, all Flutter apps will benefit from the type of code presented in this article. Wrap each API call with this code and your app will not stop working if there is no Internet connection. Instead, it will send an appropriate message and continue working in offline mode until the connection is present again.

We shall use a check connectivity plugin called DataConnectionChecker (data_connection_checker) in conjunction with BLoC — Business Logic Components.

From BLoCs, we obtain

— readable source code,

— data accessible from various parts of the app,

— UI elements to show the state of the connectivity, with

— automatic refreshment of the screen.

The complete code is here: Use BLoC and Data Connection Checker Plugin in Flutter to See Whether The Device is Connected to the Internet Or Not

The DataConnectionChecker will send http request to some of the most stable IP addresses, like the ones in Google, and if there is at least one positive ping, it is maintained that the device is online. The plugin does not check wi-fi access, as all by itself, it is not a guarantee that there is Internet connection behind it.

The BLoC + DataConnectionChecker App That We Are Making

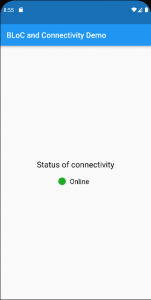
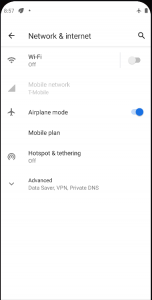
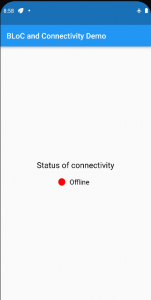
Here is what it looks like when running. On the left, the device is connected to the Internet and the green circle and text Online is present. Middle screen — we are turning AirPlane mode on, meaning there will be no Internet connection until we turn that switch Off again. The third screen shows the state of Internet connection when Airplane mode is off — the red circle and word Offline.

Connected to the Internet

Airplane mode shut off

Disconnected from the Internet

main.dart

Here is the code for the main part of the app. The MultiBlocProvider part is crucial: we can have as many BlocProviders in it as we want; here, we have just one, NetwordBloc, in its separate BlocProvider. We make NetworkBloc active by add a listen connection, and as its child, we show ConnectivityShow as the next screen.

ConnectivityShow.dart

In this file we present the results to the screen, as seen in the above text.

BlocBuilder connects NetworkBloc with NetworkState, and the state can be ConnectionFailure or ConnectionSuccess. In the if statement, we decide whether to show green or red circle — device is connected or it is not.

Definition of BLoC for Connectivity

A BLoC in Flutter is a collection of at least three files, the names of which end in _bloc.dart, _event.dart and _state.dart. In this case, we decided to start these names with “connect“, so the files are network_bloc.dart, network _event.dart and network_state.dart. Here they are:

network_event.dart

In all bloc files, we will first define an abstract class, followed by classes that inherit it. The extended classes can — but do not have to — have internal states. In this case, ListenConnection has not internal variable, while ConnectionChanged has one internal variable, connection of type NetworkState.

network _bloc.dart

The “bloc” part of BLoC pattern is where the action happens. It connects events to states, in this case, it uses the DataConnectionChecker plugin to listen to its state. If connected, the state becomes ConnectionSuccess and vice versa, if disconnected, the state becomes ConnectionFailure. It is these states that we check in file ConnectivityShow.dart.

network _state.dart

The NetworkState class is also abstract and contains the three most basic states — “initial”, “success” and “failure”. Many blocs wil have at least five or six states, for example, the authentication bloc could have states

AuthenticationInitial AuthenticationResetPassword
AuthenticationFailure AuthenticationInProgress
AuthenticationSuccess

and so on.

Posted in Flutter, Programming | Tagged , , , , , , , , | Leave a comment

Flutter All the Way!

Another Flutter related job on Upwork completed successfully.

The client is in the web sites business and wanted to know whether they should extend themselves into the apps business.

And if they should, would Flutter be a good starting point of their career as a mobile apps provider?

The answer, from me, was emphatically, YES!

In three years of exclusively using Flutter for creating mobile apps, watching the transformation from Flutter RC1 that I started with, towards Flutter 2.0 of this year, was an astonishing experience.

Flutter really shines now and can produce versions for Android, iOS, web and and PWA (automatically), while the versions for native desktop macOS and Windows are in the works.

For me and my customers, Flutter all the way!

Upwork congratulation on a job well done

Posted in Programming | Leave a comment

How Can I Help You Install Your Finished iOS App to the App Store

The procedure describe in this article is the same for any language that you may use to develop an iOS app. I mention here Flutter, but you can substitute Objective C, Swift or anything else, it doesn’t matter. This procedure is between you, me, Xcode and you App Store Account.

So let it be Flutter, for the sake of this discussion. We also suppose that you have your app tested, compiled without errors, and that you may have even published on the Play Store as well (or any other Android store for that matter).

Ready to go and you just do not want to learn all the ropes right now, or you may not be that technically inclined. (Let me assure you that it is in your best interest to learn do all of this on your own, however, in the beginning it may be tough, I know.)

What needs to happen is as follows:

1) You first send me your project in Flutter, I compile it and hopefully, there will be no problems there. If I cannot compile the app for any reason, the proceudre stops right here and you are back at square one. Or, you can engage me to further test and improve your app, who knows.

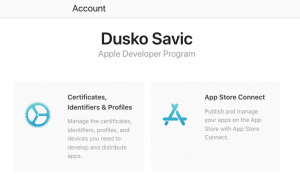
2) You then give me access to your App Store account, yes, the very account at developer.apple.com. It sounds scary, but that is the only way I can help you.

Two accounts for developper.apple.com

If you have Enterprise account, then you can mark me as an administrator and will have enough privileges to access the Certificates part of the account. Otherwise, with just a normal account, you cannot delegate that access to me so I have to impersonate you for a few minutes in the eyes of Apple.

3) Apple will require me to enter a six digit code that they will send to your Apple device or computer. We need to be online at the same time, say on Upwork, Skype, or email and as soon as you get the six digit code, you retype it to me. I enter it and then get access to the Certificates part of your account, where I create the certificates the app needs to have to be published. I then download them to my mac and work from there.

The process sometimes is smooth and sometimes not at all, so we may kind of struggle with it for a couple of minutes. Those who persevere will be rewarded, though.

With that six digit code I can go to your Certificates part of the account and generate the certificates needed.

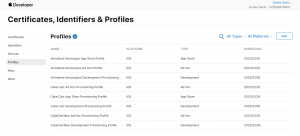
Each app can have several profiles

4) I will need another six digit code from you as I have to create a new user in Xcode, with access to your account. So we will need to be online for 10-15 minutes of time continuously.

5) Then I can compile your app with the proper certificates and if everything goes well, the app will be uploaded to the App Store Connect part of the developer account. It will have to wait for an hour or two in order for the execution file to be processed on the Apple servers.
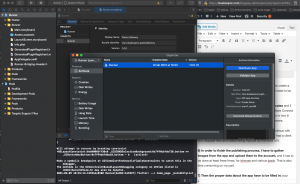
Here is one of those steps illustrated, creating an Archive of the app:

One of the steps to send the execution file to the Apple servers

In a sense, my services can end right here if you want to continue with the publishing process on your own. However, I have never had a client who stopped here and stated doing that just for the kicks of it.

6) In order to finish the publishing process, I have to gather images from the app and upload them to the account, and it has to be done at least three times, for iphones and various ipads. That is also time consuming on my part.

7) Then the proper data about the app have to be filled in: your physical address, site address, privacy policy link, price, availability and so on. If you do not have all these data and you did not provide them to me, now would be a good time do complete it, as the app cannot be published without these details

8) Only then can I submit the app on your behalf and wait for the Apple team to respond — accept it or refute it, at their will.

After that, this job and milestone should be over. It is not my responsibility to help you further unless you want to pay for that kind of help something more.

You can then change the login details for the developer account so that I do not have access to it any more and I will transfer the developer certificates to you so that you can go on developing without me in the future.

You will have the app uploaded to the store account and after a few iterations, it should be published officially in the App Store.

This needs several hours of work, at price of $35 per hour.

Or, you can learn do all of that for yourself, which, believe me, if you are a serious developer, is the only way to go.

Kind regards, Dusko

Posted in Programming | Leave a comment

SendImage App to Upload and Approve Images

Here is how you can organize yourself a business with modest costs of creating a repository site and two mobile apps, for Android and iOS. The idea is that

  • the app user produces content,
  • uploads it to the site,
  • you judge it on some grounds, and
  • if it is a competition, somebody gets a prize.

Instead of competition or tournament, you can create a marketplace and sell their wares to the other users of the app.

So what do all these tasks have in common:

  • take an image of an order sheet on paper, send it to the site where the admins approve it or reject it and/or wait for payment to ship the goods,
  • music producers upload music instrumentals to the site, the admins approve it to the market and then other users, the artists, purchase and download it for their own use,
  • anglers upload the images of the fish they catch, upload it to the referee and get prizes at the fishing tournament they previously applied to?

Here is the infrastructure of the whole system.

User Roles at the Back End Site

The site serves as a repository for the data that are being sold, and gives you total control of your business. You can see financial reports, add or ban users, approve or reject the goods they want to sell and so on.

There can be several kinds of admins. One (or more) are the super admin, the one that can do everything to everyone in the system. That would be your role in the beginning, assuming you both start the business and strive to implement it.

Other admins will have less authority. In case of selling music, there can be a “music acquisitions editor” which will listen to the songs and veto them or approve. If selling merchandise, that kind of admin would see whether the order is well prepared and whether the delivery can proceed. In case of fishing tournaments, the referee will see to that that the fish is well measured, that the image is not tampered with and so on.

User Roles at the Mobile Device

There can be one or two or three user roles on the device.

The site admin can enter the mobile app as well and work from there. That is possible but not advisable, as all that functionality is all placed at the site, which will probably be used on larger screens.

In case of tournaments, just one user role is sufficient — the uploader. The other possible role on the device would be a free on-looker, watching the leader boards, cheering and so on.

In case of ecommerce app, besides the uploader, there will also be the consumer. The consumer will be able to browse the catalogue and buy something from it.

User Groups on the Server

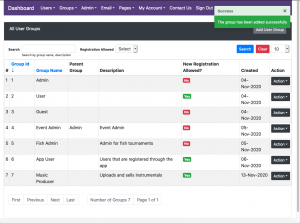
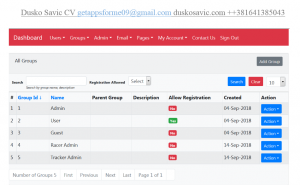
Super Admin can make new groups and the user in each group can do certain things in the system. Here is what the groups might look like:

duskosavic.com Admin groups on the apps server

Admin groups on the apps server

Here is what these types of users can do:

Group Id Name
1 Admin, typically this will be the super admin
2 User normal member of the site
3 Guest this is the visitor of the site
4 Event Admin for an events planning site
5 Fish Admin for fishing tournaments
6 App User registers through the app on the device and uses the server through the app only
7 Music Producer could be a user which uploads and sell music through the app

Normally, you will need 3-4 roles, 5 at max. In the music app,  groups 6 and 7 would be the “consumers” and the “uploaders”, respectively. Here is a possible arrangement of groups for the fishing tournament app:

Group Role
5 the admin on the site
3 visitor of the site who can watch the leader boards live without paying
6 “tournament participant”
7 “tournament founder”

sds

Upload Image to the Server

Here is what the main menu screen looks like on the device. Button NEW ORDER will upload the image. After the upload is finished, the referee on the server will approve it (or not) and when we tap on the mobile screen again, sometime later, it will show that the image is approved.

The main menu screen is on the left. After tapping the NEW ORDER button we arrive at screen on the right:

school basics, main menu screen, upload orders on paper

Upload image to server

duskosavic.com, start uploading the image

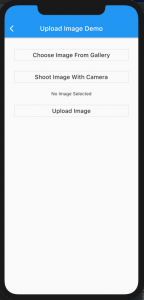
The first screen to upload image to the device

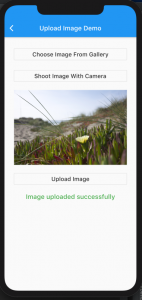
We can choose to upload one of the prerecorded images with Choose Image From Gallery, or we can take a photo on the spot (Shoot Image with Camera). Since this is the simulator, we use the first option. The consequence is that we have images of flowers, waterfalls and landscapes to upload, but for the purposes of this article, it should be just fine.

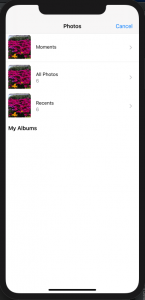
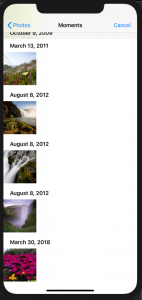
So tap on Choose Image From Gallery and get to these two screens:

Upload image – select from the gallery

duskosavic.com, app to upload image to server

Select concrete image from the list

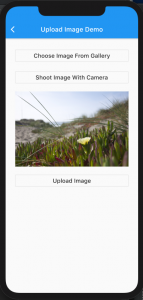
In the next screen, the image is chosen and all we need is to tap the Submit button to send to the server.

duskosavic.com, upload selected image to server

The image is chosen and needs be sent to the server

duskosavic.com, uploaded image to server

Image is successfully uploaded to the server

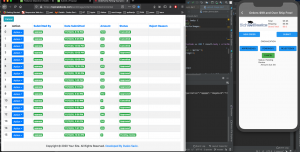
The Admin has received en email that there is a new order, or image, or whatever other file is being submitted and can go to the special part of the server to intervene. Here is what it looks like both at the server and on the device:

duskosavic.com, image is on the server, waiting to be approved

Uploaded image waiting to be approved

Note that on the device there is one entry under the Pending button. It appeared automatically, as the app knows that the image was uploaded and reads the state of the server. For now, there is just one entry, but in general, all three columns can contain multiple entries at the same time.

The latest upload is at the bottom, No. 15, Amount of 0 and Pending review. To review it, click on Action button and then on Edit:

duskosavic.com, edit uploaded image and review it

Edit and review the uploaded image

This is the Approve or Reject Order Form screen:

duskosavic.com, upload image to server

The review / edit screen called Approve or Reject Order Form

The admin on the site can then do one of the following:

  • Leave it as Pending Review, which is the default state after the upload,
  • Make it Approved, meaning that the image is well formed, readable, has enough content and information to be let into the system,
  • Make it Rejected, in which case one of the two radio buttons bellow, Bad picture or Unreadable order will also be sent to the device as the explanation of why the image is rejected,
  • Finally, it can be Cancelled, which here means it is not in the order forms circulation, perhaps, it was turned into an order and thus became part of another table in the database.

This case is about order forms on paper, shot with the device and sent as an entry document into the server. In fish tournaments, the options would be different, as would be the case in an ecommerce site and so on.

Supposing we make the image Approved and click on the Submit button on the server, this is what we would get both on the server and on the device:

duskosavic.com, approved image on server and on the device

Approved image on server and on the device

We see at row 15 a green entry is  in column Approved. Buttons Pending and Approved on the device now contain different numbers as the device reads data from server and tallies everything up.

Tapping on green Cancel button for each entry will make it Cancelled on the server; the entry won’t be visible any more.


Posted in Apps As a Business, Programming | Leave a comment

What Do You Need For Your First Mobile App and Web Server

Once you have found me, I read you job requirement, maybe we then talked on Zoom or Skype, and agreed to do it together, there will be a list of things to do, sites to visit, accounts to open and so on, in order to build an infrastructure for the new app.

The Importance of Having Accounts in the App Stores

As the owner of the app, you will need to reserve place for your app in the app stores. There are two main platforms, Android by Google and iOS by Apple, and they both have their own app stores. The app stores are important because each phone and table comes with icons for their respective store. On Android, there will be an icon for the Google’s Play Store, as it is officially called, and on the iPhone and iPad, there will be an icon that leads to the App Store, as the Apple’s app store is officially called.

App Store Icon

App Store Icon

Play Store Icon on Android devices

It is very easy for users to tap on those icons, get to the store and search for the apps. On Android, you can download and install apps from other sources, be it from a direct link, from the other “app stores” with Android apps and so on. On iOS, the only way to install a new app is to visit the App Store and download it from there.

Again, it is not mandatory, but most of the Android apps are installed from the Play Store. For commercial use, it is a must to launch the app in the stores. You cannot ignore them because they are giving you free access to potential users of your apps. The stores are just like a “normal” search engine but for apps only. You should craft the app presence in the store so that  visitors can find it through searching directly in the store.

Creating a Developer Account in Google Play Store

You can start by visiting this link:

https://play.google.com/apps/publish/signup/

In the end, it will ask you to $25, once in a life time, so it is kind of cheap as compared to creating a developer account in the App Store, where you will be charged $99 each year.

It can take up one week to get your new account ready. In times of crisis, it may take even longer.

Creating a Developer Account in the App Store

You can start creating your iPhone developer account by visiting this link:

https://developer.apple.com/enroll

and click “Start your Enrollment’.

The official Apple documentation is here:

https://developer.apple.com/programs/how-it-works/

As mentioned, the yearly fee for Apple Developer Program is $99. You should be paying it as long as you want to have your apps in the store.

Be careful though, if you want your company to be the owner of the account. The sites will ask for different documentation in that case and it will take longer for the application to come through. Be prepared to supply various documents, both personal and for the company, and send the photos of them to Google and Apple.

So, if you want to publish your app, say, in the next three or four weeks, you should better start getting these accounts just about now.

The Email Address For the Accounts

You can use any valid email address for the account, in both stores. You may use one and the same address for both accounts, or they may be completely different. A practical way of doing it is to create a special Gmail address and use it only for the communication with the stores.

Since I will be creating the app for you, I will need to see those messages from the stores say, if the app is not admitted to the store, if a continued conversation with the support is needed and so on. So it is best not to mix this address with any standard personal address that you own.

If you are in the company, one person can create the Gmail address and then give access to other persons. In general, I require that I be given access to it to, as your developer. That will cut down your support time and be just more efficient way of communicating with the stores.

Please note that you can give me login details of your Gmail account but Google will send a special code to your phone and you will then send the code to me. In that way I will be able to enter the email account.

Access to the Stores Accounts

As your developer, and especially if this is your first app, I’ll be filling in all the details that the stores need to publish the app. Once you have access to your account, the next step is to “let me in”, by inviting me as your administrator.

Click here to read documentation how to add me as a developer to Google Play account.

Click here to read documentation how to add me as a developer to your App Store account.

In case of Apple, I will also need to enter your Certificates part of the account and for that, you will need to give me access to the entire account. When I try to enter, Apple will send you a six digit code and you have to send it to me and then I’ll be admitted to the account. Seems that that the permission is only valid for a month, so if I need it again, the entire procedure needs to be repeated.

For this exchange to succeed, we both have to be online at the same time, so we have to adjust the time zones correctly. I am in Belgrade, Serbia, Europe, at GMT+1, so if you are in the USA, it will be my afternoon when you start your business day.

Also note that you will need to supply the six digit code at least two times and sometimes even three times, as I have to

  • enter the account,
  • create the certificates and then
  • download and import them into Xcode.

When importing into Xcode, it will ask for the code for the second time. The problem is that the codes that the Apple is sending are valid for only a couple of minutes, so you have to send them to me real quick and I have to enter them without error, also real quick.

Domain For the App

In general, it will be best if you purchased a special domain name for hosting of the app.

Popular apps may have millions of API calls to the server every month and you should be able to step up your hosting later on down the road. It will be much easier if your sites were separate from the very start. Suppose you have a normal WordPress blog, maybe with some sneaky plugins, maybe you already have payments on that site as well and it is just wise not to risk stopping that money making site because of some problem with the back end of the app.

For domain name, go to your usual domain registrar. Be careful though, some sites, say, GoDaddy will try to make you buy both the hosting and the domain name with them, while you may find out that you can host your app somewhere else, with much more bang for your buck.

Hosting For the App

If your app is any good, it will store and read its data from a remote server, which is actually the same as a web server for sites. So you need to shop for hosting. If you have hosting that is working for you, and you know how to create a server, a MySQL database, install PHP and the such, then just stay at the same hosting company and I’ll adjust. Centos, Ubuntu, or Debian, it does not matter to me, I am equally at home with all of them. I’ll need login details for the server, its password, FTP access, MySQL password and access and so on.

If you do not have any hosting preferences now, let me suggest you buy hosting at DigitalOcean.com, which is where I host both my own sites as well as servers for my own apps. You can click on my referral link here and get $100 in credit over 60 days for hosting, or you can just click the direct link here.

Once you have created your DO account, click here to add my account to your team.

After that, whenever I log into my original account, I will be able to log into your account and then work in it.

At DigitalOcean.com, prices start at $5 for the simplest (but powerful) SSD hosting and then go up to hundreds of dollars of worth if you want to. Since this is your very first app, just pay 5 bucks to enter the game and if the app gets really popular, and gathers millions of users, you will always be able to step up the hosting both with DigitalOcean and with any other large hosting company.

Setting Up Your Apps Server

In general, I’ll set up a LAMP stack on the server, create the databases for the app and install my membership site which will be your main hub for all things connected to your app. It will become a kind of an app center, where you will see everything that is going on with your users, with the usage of your app and so on.

The acronym LAMP means that following pieces of software will be installed for you:

  • Linux operating system,
  • Apache as the web server,
  • MySQL as the database, and
  • PHP, the object-oriented scripting language.

Previously, the “P” in LAMP always used to mean PHP, but now it can also mean programming languages Perl or Python.

Just to be clear, I always use PHP for the apps servers. The reason is a flavor of PHP, called CakePHP. It is a framework, kind of a new language written using the original PHP, so you can both write code in pure PHP as well as in CakePHP. CakePHP is excellent in structuring your code and it will make using the database in MySQL a breeze. Over the top of that I am licencing a special plugin written in CakePHP, which is called User Management Plugin. That plugin sets up the structure of your apps site.

User Roles in Your Apps Center

There are five user roles that you get from the get go (and you can still define your own, if needed).

Here is what typical set up for user roles looks like:
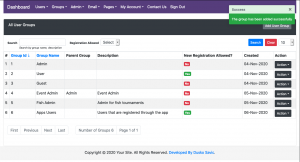
Roles in App Center

Super Admin Role

You, as the owner of the app, will be the omnipotent Admin (or, we can call you a Super Admin if you like that feeling of grandeur around you). The super admin can do everything they want:

— add new users, both for the site and for the app,

— edit their data,

— delete them from the site and/or app,

— set up technicalities of the site: which time zone the site will operate in, whether to use http: or https: as site address and much, much more,

— create groups of users,

— create subgroups of existing groups,

— send emails, either individually, or to a selected group of users,

and so on.

Here is how the Super Admin might allow for using Facebook account for sign in to the app:
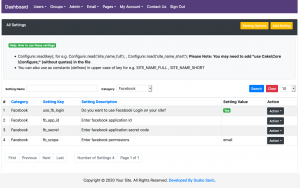
Setting up Facebook account for Sign In screen

User Role

User role in this context is the user of this web app, that is, being the member of the membership site that the apps center actually is.

To become a user of the site, you have to register yourself first. Here is what a sign in screen looks like (Sign Up screen is similar and shown here).
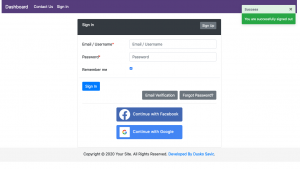
Sign In with email address, Facebook or Google accounts

NOTE. The Facebook and Google buttons will be seen only the Super Admin had already had managed to set them up in the Settings section, as shown above.

Usually, this role is for the consumer — someone who enters the site, reads, listens, watches, comments and so on, like in Facebook, YouTube and the like.

If you were, say, creating an app for fishing tournaments, this type of user could see the results, watch videos, cheer up the members of the team they are supporting and so on.

In an astrology site, this type of user would be able to create a natal chart, read the delineations, compare two charts and so on.

If case of an events manager site, this type of user would be able to see which events are being planned, buy tickets, reserve their place in the venues and the like.

Guest Role

This is the visitor of the site, no registering needed.

If your site is the dedicated apps server, the guest will not be able to see much when they come to the site. This role actually is for the user of the mobile app and serves only to allow access to the back end server, when the API is called from the mobile app.

On the other hand, if you wanted to, you could create your own pages on the site that this type of user could see. This framework I am using is quite flexible, it can also be a membership site, a back end server, and a plain normal site for the usual visitors.

App User Role

This is the user that has registered through the app. That would be the majority of users in the web server anyway.

Super admin also has the ability to manually register this type of user, if there is need.

Admin Role

This role is weaker than the Super Admin but stronger than the User role. In the beginning, there may be just one owner of the app and he or she would be doing all the admin chores. Given time and provided the app would become popular, there might occur a need for additional hands. Maybe you are selling merch and there is a place for an admin that will oversee that, but still not have all the rights of a Super Admin. The Admin Role is exactly that place in the middle — have some authority in one part of the business, but not overall.

What will exactly the Admin be able to do, will depend on Super Admin’s decisions. There may be on Admin for ecommerce, and another for customer support (customer admins are apps users in this case), and yet another for advertisements, and so on. Super Admin can always create new Admin role and define what the role will be able to do or not.

In one of the images above, there are groups called Event Admin and Fish Admin.

Sites For Login Buttons

If you want the user to sign up or sign in using Facebook or Google cookies, you can. You have to register your apps as if it were a native part of Facebook and / or Google. For Facebook, go here:

https://developers.facebook.com/

Go here

https://developers.google.com/identity/sign-in/web/sign-in#create_authorization_credentials

to get Google authorization credentials.

If your app is using Firebase, here is how to claim space for your app over there:

https://console.firebase.google.com/?pli=1

Please bear in mind that you are working with three separate apps:

  • the web app on the server,
  • the Android app, and
  • the iOS app.

To sites such as Google, Facebook, Twitter, and Apple, these applications will be totally separate and you will have to obtain codes for each of them separately.

Once you have the codes, send them to me and I shall deploy them into the source code and other data of the apps — it has to be done only once per app.

Testing the App During Development

Once the first phase is done, i.e. the project in Flutter is formed and some coding has been written, a testing phase begins. You will, naturally, want to see whether am I working on your app, and what is the progress. The best way to see it is to install the app on your phone. Every day or maybe every other day, depending on the circumstances, during the business week, I will send you new versions of the app, for inspection.

Receiving New Versions Through Diawi.com
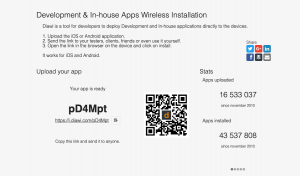
Diawi.com

This the easiest way of receiving new versions. You get a link and type it in your browser on the mobile device. The link is short so no problem entering it. It will then ask you to allow installing the app on your device, and that’s it.

This will work on Android right out of the box. For iOS, you have to supply the UDID code of your iPhone or iPad. With that,  I go to developer.apple.com, enter the UDID code and create a development certificate. Then it will work but just on devices with those UDID codes. If you want to test on two or more devices, just send me all the UDID codes of those devices.

This procedure has to be done just once, and if you change the device for testing, then I have to enter the new UDID code and so on.

The link for downloading the app through diawi.com will last for a couple of hours, so be sure to download it as soon as possible.

Receiving New Versions Through the App Stores

Both stores have sophisticated procedures for testing. You can gather thousands of testers and get their feedback, which is a must for popular games, for instance. If you are just starting and nobody has heard of your app, you may relay on friends and family for testing, at first.

In theory, you should devote a lot of time to testing. In real life, especially when just starting, not so much, so in most cases this phase is often skipped. But you can still use the testing parts of the stores to get the developing app to download “from the Internet”.

Using Git Sites to Test the App

If you are technically savvy, you can set up a project on one of the git-based sites. The most popular are GitHub, GitLab, and BitBucket. I have been working with all these sites so you just create the project and let me in, so to speak. In time, I shall be posting new source code as it is written and tested out. You can then download source code to your computer and — after you have installed Flutter and one of its editors — you can compile the app and run it on a device that is attached to the computer.

You do not have to do that right away and you can even be totally not interested in having the source code for the app at your disposal.

Or, you may set it up at the end of the development just to have to source in one place.

If you do set up your git account somewhere (or you already have it somewhere), ask for my address on that site and then give me access to the project.

Publishing the App in the Stores

Finally, that day will come. The app is tested and I am going to publish it to the stores for you. There is quite of lot details to all of it, and the most important part is to write the store listing — the text that explains why the visitor of the page should download the app. Let me repeat it: the only function of the listing, images etc. is to make the user want to download the app and try it out. So the listing has to be really successful in convincing them to try out the app.

I shall upload the images for the listing and both stores will allow you to put up a video. On the Play Store, it is a normal YouTube video, while in the App Store, you can have three videos up to 30 seconds long. In first iteration, many app owners choose not to produce any video, although that is highly recommended, of course.

In both stores, there will be a delay between uploading the listing and the actual existence of the app in the store. Apple is well know for the scrutiny of the submitted apps, while Google used to be more relaxed. That has changed so it is getting more difficult to publish the app on the Play Store as well.



Posted in Apps As a Business, Programming | Leave a comment

Screen Types For Your Mobile App

Screen designs and apps built by Dusko Savic for clients in the last three months

Figma to Flutter — Lessons Reservation System

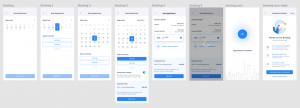
This is a large app that I was one of the contributors for. My part was to create 8 screens for calendar entries (the app connects language tutors with pupils) for language lessons through the app.

Here is an image of eight screens in Figma and the task was to write them in Flutter:

The task was to make these eight screen come live in Flutter

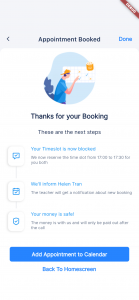
Here are the screens I wrote:

Bakery Delivery App for iPad

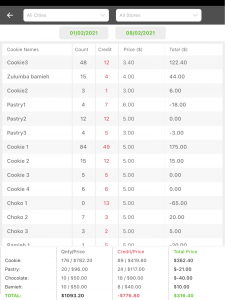
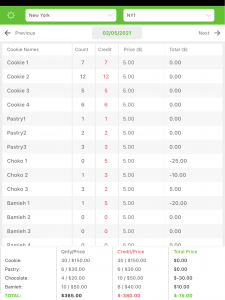
This is the Reports screen. The bakery drives the goods on particular days to a store in a city and the app stores the cakes and pastries sold. Here we see the report within a week, with totals at the bottom of the screen. The totals are per class of goods — cookies, pastries and so on. There is a local database beneath the app.


This image shows daily scores for a city and a shop:

Mantra Counter

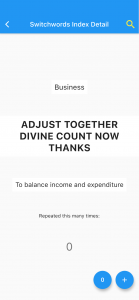
It is an app that I have developed for myself only and it is not published (intentionally). The idea is that repeating a mantra can activate the Law of Attraction and produce the desired result. The app contains about 300 mantras and here is how one of them looks like:

Each time you state a mantra, you press the button and see how many time you have to repeat yet.

Fishing Tournaments

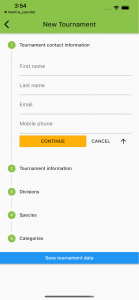
Here is how you can define a tournament on the mobile device and send it to the web server to store:

This screen is using something called “stepper”, which comes handy when the user has to enter several groups of data in, well, steps.

Horoscope App

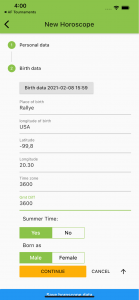
Enter your data in a stepper:

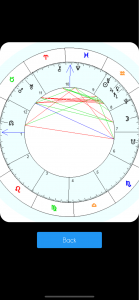
Fetch data from my astro server and get the image of the chart:

Posted in Apps As a Business, Apps Marketing, Flutter, Graphics for apps | Leave a comment

Android and iOS Mobile Apps To Acquire User Data On Remote Locations

Maybe you are a field technician and repair home appliances, or upgrade cable network hardware, or do gardening on the spot of client’s yard… You will need a mobile app to gather the following data:

— client data, such as name, address, type of repair, the date and time,

— GPS location of where it happens,

— take phots / images on the spot and send it to the server as a proof of repair, transaction etc.

— send codes for “I have arrived”, “I am leaving”, “Repair done”

— receive network information such as the state of system in general (in case of repairing home TV set up, whether the signal is being emitted or not),

— where do I go next — what is my next assignment and are there any changes in the schedule?

All this has to tie in into a larger database of clients and events on the server side and there must be a set of apps running on the server that take care of the database, messages etc.

In larger organizations, the mobile app will have to just receive the signals and send data from the premises. In case you do not have the server side yet, we can work to provide you both with a server database and the mobile apps. The server would need an interface, a kind of a membership site where a few people are the admins and others become members by registering and logging into the apps on the devices.


Posted in Programming | Leave a comment

Apps Portfolio for DuskoSavic.com

Here are some of the more recent apps we have been doing for clients.

GibEnviro Android

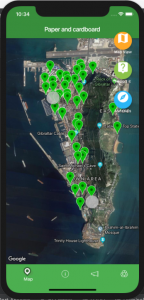
GibEnviro is the application written for the Environmental Agency of Gibraltar. If you find or see anything wrong in the streets of Gibraltar, this app will let you send a photo via email to the Agency. It also shows a map of garbage collectors on the peninsula, so you know where you are. If you want to go bathing, it will tell you the current state of the beaches — healthy to bath in, or not.

TimeShare SellBOX Calculator iOS

Calculators for the timesharing industry.

Les Chancons Francaises Android

A selection of the best and most popular French songs from the sixties.

Gastritis Help iOS

Recipes from alternative medical disciplines to help you heal gastritis.

Posted in Programming | Leave a comment

Submit A Claim to the App Name in the App Store

Submit A Claim to the App Name in the App Store

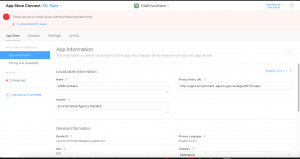
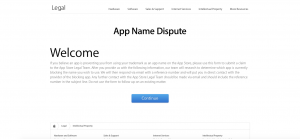
This the the App Store account with name GibEnviroNew. We want to claim the name of the app as it used to exist in the Store a while ago.


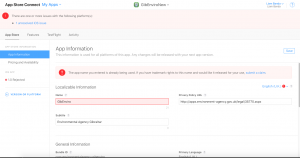
Change the name to GibEnviro, press Tab to focus on the next button and click on Save, in the upper right part of the window. This is the screen you are going to get:

Click on link submit a claim and get this window:


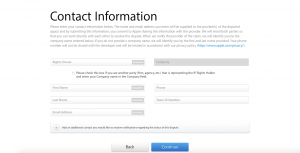
Read that and click on Continue. This is the next screen, where you enter your contact information:

Enter you data and click on Continue.


Posted in Programming | Leave a comment

Backend Web Servers For Mobile Apps, Using PHP and CakePHP

All my apps run from a web server, using special technology.

The server actually is a membership site. It has one or more admins, and it also has users, guests and any other kind of user roles that the app needs.

Apps users become members by entering their data within the app itself. As long as they do not uninstall the app, they will have access.

“Users” of the web server are actually the admins for the “mobile users”.

To write the database in the server, we first analyse the screens in the app, then stop developing on the mobile and design web server functionality, then write PHP code to create JSON for the apps, and only then the apps can access the data on the server.

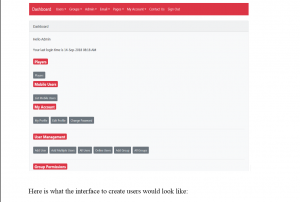
Server Dashboard

Here is what the server dashboard may look like:

server_dashboard.png

Server side dashboard for admins and user alike

Here is what the interface to create users would look like:

server_create_users.png

How to create users on the server

Apps Server Functionality

For the sake of clarity, I discuss here another app that would track orders from cafes and beans shops. There would be this apps server through which a company would manage orders and their fulfillment.

The apps server has the following functions from the get go:

— users can register from the site itself (if you want to provide that kind of functionality)
— there are three different user roles:
— admin, the boss around the site and mobile apps,
— users of the site, which usually act as admins for the mobile users
— guests of the apps site, if you want to have people look around the site for some reason.

Mobile users would register and login through their devices and stay logged in unless they log out on purpose. Mobile apps talk to the server through PHP function calls and the server returns values as JSON, which the apps interpret and show different screens or messages as the result.

Note that the process is the same for tracking cafe orders and showing news for the NFL players.

Upload Images From Mobile Device to the Server

I have code to upload images from mobile to apps server, which would be a nice touch for the personnel working on the back end of the app. For instance, have the image of the shop or have the image of the shop manager.

On the server, a typical user could enter, edit, store in the database entries about the shops:

— personal data for the shop manager,
— address / physical location of the shop
— send email to admin when a significant event in the system occurs

It is also possible to track orders from the shops and there are two ways to do it:

— the managers who order also have your app, with their predefined roles, and can order directly through the app, or

— they print or write orders on paper, take a photo through the app, send the image to back end personnel of the web app, who then approve.

Have Your Own Apps Server?

Every mobile app should have its server to store the data about users, to retrieve these data to the apps, to have more control on behalf of the apps owner and so on. Let me know if you wanted to have your own apps server!

Posted in apps server, Flutter | Tagged , , , , , , , , , , , , | Leave a comment

Why Flutter is Superior For Mobile Apps Development

I develop with Flutter only and here is why:

Write once and deploy twice, on Android for its millions of users and on iOS for the money you can earn.

This can save a lot of development money if done right.

Advantages of Developing Apps in Flutter

Extremely Fast App Development – offers features such as HotLoad and HotRestart, speeding up the testing process for the programmer; bottom line, you get the app faster and pay it less.

Faster Running of Applications – it draws directly on the screen, which is not the case with React Native.

Reduced Efforts of Testing – you can test one source code and not have to test on Android separately and on iOS separately

Access of Native Features – Through socalled plugins Flutter code can access native code for Android and iOS, be it Java, Kotlin, Swift, or Objective C.

Excellent User Interfaces – dozens of visual vidgets – this is where Flutter bestes all other languages and framework for mobile design

Reactive Framework – which executes much faster than in React Native

Good for MVP (Minimum Viable Product) — it is possible to create a mock of the app first, in Flutter, then connect it with the databases and servers. This speeds up the creation of design and, later, apps significantly.

Disadvantages of Flutter

Need to learn a completly new framework (Flutter) and language (Dart)

Needs continuous support – but it has it, since Flutter is invented in Google

Limited libraries – the number of existing libraries is still smaller than for other languages

Not supported by web browsers – currently runs only on mobile operating systems Android and iOS.

If you want to develop a new app or revive an old app, click here to send me a message! Once I learn what kind of an app you want to have, I’ll return with a quote within a day.

Example Apps I Wrote in Flutter

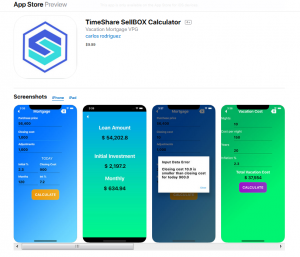
Here is an example app TimeShare SellBOX in the App Store, I developed for a client using Flutter:

sellbox_app_store.png

TimeShare SellBOX app written in Flutter

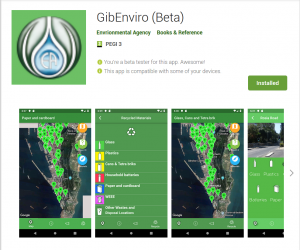
And here is another one called GibEnviro, in the Play Store. If you have an old app you need to revive and expand, then this article how I turned a legacy buzztouch.com app into Flutter may be of interest to you.

gibenviro_play_store.png

App GibEnviro in the Play Store

Posted in Flutter | Tagged , , , , , , , , , , , , , , , , , , , , , , , , , , , , , | Leave a comment

App Icon Missing on iPhone SE

The app icon for an app I was developing was missing for entire three days. I have no idea why it did not show when all other apps had their icons neatly placed on my iPhone SE with iOS 12.2. I certainly did not do anything to hide it and it could be seen from Devices and Simulators in Window menu of Xcode 10.2.

Frustrating.

I found the solution here: Do the Home Screen Layout Reset:

Settings -> General -> Reset -> Reset Home Screen Layout -> Reset Home Screen

After that all icons showed up, including the one that was missing.


Posted in iOS | Tagged , , | Leave a comment

Changing App Icon with flutter_launcher_icons Plugin

Installing app icon in Flutter is much easier than in Android and iOS taken separately. With a plugin called flutter_launcher_icons you install the same icons in dozens formats in one turn. First install the plugin under dependancies in pubspec.yaml file:

flutter_launcher_icon

Install flutter_launcher_icon plugin in pubspec.yaml

Then add the second part:

dev_dependancies_launcher_icons_plugin

Install second part of flutter launcher icons plugin under dev_dependacies

In image_path you put the address of the icon that you want to become app icon. In this case, it is called iTunesArtwork@2X.png. (That’s a typical iOS name for app icons, btw.)

This is how it looks in Android Studio project pane:

icons_in_fluuter_and_ios

Position of icons in Flutter project and ios directory

In folder icons I put four png files that the graphics designer of the app gave me. You can also see position of Appicon.appiconset folder in ios folder of Flutter project. It contains various images of basic icon app, which the plugin produced automatically.

Now comes the best part: install that icon as app icon by going to terminal in Android Studio and execute the following command:

flutter pub pub run flutter_launcher_icons:main

It is always the same so I put it into comments and copied from there to the terminal window. This is what happens when the command is executed:

launch_app_icons_change.png

All icons for ios and Android will be changed in one swoop

Now we can transition to Xcode by right click on folder ios in the project window and we see this:

from_flutter_to_xcode.png

How to go to Xcode from Flutter Android Studio

Click on further and see what the icons look like in Xcode:

xcode_appicon_assets.png

What the icons look like in native Xcode view

If you are just starting out with Flutter, come again to this blog, it is all about Flutter.

If you have problems developing your app, I can help. Let me know here.

Posted in Android, Flutter, iOS | Tagged , , , , , | Leave a comment

How To Rewrite Buzztouch Apps in Flutter

This article is about rewriting Buzztouch apps using Flutter as the framework of choice. It will be highly technical in content, so if you only want an old app rewritten, without actually knowing how it is done, let me know here.

The Internal Structure of Buzztouch Apps

You define a Buzztouch app “in the cloud”, defining screens on special buzztouch server, then downloading the entire app to the desktop computer. The download consists of source code in Java for Android and Objective C for iOS. For 99% of the users, that source code is black box that is fed into Android Studio in case of developing for Android platform, or into Xcode for iOS. There usually are some warnings and errors and the majority of problems that the user would have in the development of an app is located there.

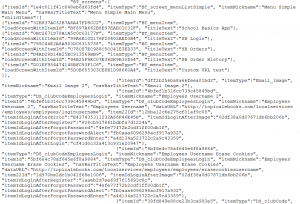
json_in_the_buzztouch_cloud.png

JSON based definition of Buzztouch apps in the cloud

The source code of the app then reads the description of the screens you previously defined on the server and that “description” actually is in JSON. The Buzztouch server lets you copy all the JSON for the app at once through an option called JSON Data or Config Data, depending on the version you were using. Using JSON to get data from the server is nothing new and most apps will use JSON as well. What is unique about Buzztouch is that the entire app is defined through that JSON file so if we want to rewrite it in Flutter, JSON file is the starting point.

Structure of Buzztouch JSON File

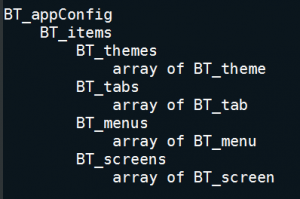
This is the global schema of a typical Buzztouch JSON file:

elements_in_btconfig_json.png

Element chierarchy in Buzztouch JSON file

There is one config variable in the beginning and it contains, again, exactly one array of BT_items. If the app does not use themes or tabs, these subarrays would be empty. Each app must use menus for navigation and screen to which to navigate, so the variable BT_menus and — especially — BT_screens are never empty.

I’ve seen apps with almost 8,000 BT screens and BT_items, all entered manually. Regardless of the size, if the JSON compiles properly, we shall be able to use it as starting point for regenerating the app with Flutter.

This sounds easy and is easy… until you start pondering how would you do that on your own. Reading JSON with Dart is difficult to learn if you want to start from the very beginning.

What Does Reading JSON Files Look Like In Flutter?

Reading and parsing JSON files single-handedly gave me so much trouble that I wrote my own Dart generator code for JSON (technically, it’s a site in PHP)! Here is what the input would look like:

flutter_childItem_class.png

PHP code to generate ChildItem class in Flutter

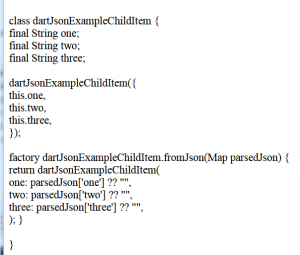
This would be the result:

example_childitem_in_flutter.png

Example ChildItem Class in Flutter, to read JSON

This code I would copy and paste in the appropriate class for reading and parsing JSON data.
Now realize that for each plugin there would need to be one such class and the prospect of rewriting Buzztouch app have lost its appeal!

After that I, luckily, found app.quicktype.io, and reading Buzztouch JSON just became bearable. Here is how that looks like.

How To Import Buzztouch JSON File Into Flutter and Dart

Flutter is the framework for creating mobile apps and Dart is the programming language underneath. Actually, we import that JSON into Dart and yes, it is up to the challenge — it will swallow the JSON and interpret without problems provided we use a site called QuickType to generate Dart code for the JSON at hand.

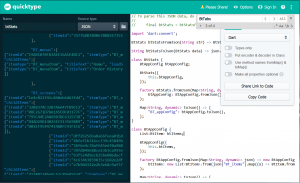
Off we go to app.quicktype.io and paste the entire JSON into the left side of the screen. Select Dart as the languge of choice in the upper right of the browser screen and you will get Dart code to read the entire JSON.

app_quicktype_io_json_to_dart.png

Turning JSON code into Dart with app.quicktype.io site

Problems With Code Generated From App.Quicktype.Io

Although each BT JSON file has the same basic structure, the code that the site outputs will differ from app to app. It means that using this approach it is impossible to AUTOMATICALLY create a Flutter app from JSON file. Each variation of JSON will result in a slightly different Dart code because of the presence of plugin variables.

When you enter data into a Buzztouch screen working on Buzztouch server, you actually enter value for a varible, which is held in the cloud until the app reads it from the JSON file. If the screen has, say, 8 fields to enter in total, but you enter only three insted of all eight, the JSON created will contain only the fields with values and will not contain code for non-values. So the Dart code generator will not know about the missing five fields, will not take them into account and the code generated would become different after a while.

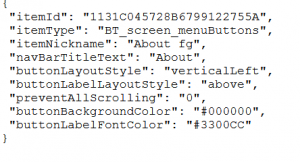
Here is what a JSON for a plugin looks like if no data were changed in the cloud:

json_before_parameters.png

JSON code before parameters were changed

Let us now change the values:

change_parameters_in_the_plugin.png

Change parameters in the plugin fields

This will be the resulting JSON:

new_json.png

New JSON has more fields than in the beginning

To counter that, and because I wanted to have a general mechanism to interpret every possible Buzztouch app, I went ahead and entered all the fields in all the plugins I needed for the GibEnviro app and submitted that for quicktype.io. The code generated was surprising, as it contained one large class of data instead of dozens of smaller classes for each plugin.

There’s about 100 parameters in that class and the result is that I had only one (albeit that large) class to pass around all the plugin parameters in the Flutter app. So writing the classes that emulated Buzztouch plugins suddenly became a normal programming task. The input is just one class with all the parameters and the code in the JSON directs which screen is to be shown next.

Interpreting Data for One BT Plugin

If you have ever looked into the source code for a buzztouch plugin, you have seen reading the parameter value and then interpreting it according to the size of the screen. Code in Flutter / Dart is no different. There will be only syntactical differences, let’s take Susan Metoxen’s well-known plugin Menu With Image as an example. The following line will read the value of parameter listRowBackgroundColor from the JSON file in this.screenData and will assign it to variable listBackgroundColor — this is in Java for Android:

Another such line, but this time from Objective C:

Finally, the code in Dart could look like this:

Here scr denotes that large class with 100 parameters, and one of these parameters is headerImageHeightLargeDevice. The value returned will be a double — that’s Dart’s parlance for floating point variables. Note that I wrote function returnValueDouble and that it looks like this:

That’s just so that you finally see some Dart code. Dart is a relatively easy language to learn (if you already know several other computer programming languages, that is!).

To interpret BT values from JSON I had to write several other routines, especially for handling colors. But it is done, there are no more suprises so it is possible to use the same code to interpret many classical BT plugins.

Which Buzztouch Plugins Are Available in Flutter Right Now?

To develop GibEnviro, I had to use more than a dozen of plugins. Here is a partial list:

 Menu With Image  WB_screen_menuImage  screenMenuImage()
Menu Buttons BT_screen_menuButtons btScreenMenuButtons()
Place Call BT_placeCall BT_screen_map
Screen Map BT_screen_map btScreenMap
Send Email BT_sendEmail btSendEmail
XIB Button Menu JM_Xib_button_menu jmXibButtonMenu()
Share Email BT_shareEmail btShareEmail()
Alert View JC_AlertView jcAlertView()
Custom URL BT_screen_customURL btScreencustomURL()
HTML Doc BT_screen_htmlDoc btScreenHtmldoc()
Email Image Email_image emailImage()
Send Email BT_sendEmail sendMail()
Share Email BT_shareEmail btShareEmail()
Location Item BT_locationItem btLocationItem()
Map Location BT_mapLocation btMapLocation()

These plugins — actually, in Dart, they are classes — are functionally the same or similar to the “original” Buzztouch screens. They are not completely identical but are “good enough” for this app.

What About Other Plugins Which Are Not Mentioned Above?

All plugins from Buzztouch can be rewritten in Flutter although that may not be the route to success. There are some things that are better done in Flutter directly without reading plugins data from the server. Take Splash screen as an example. That code executes once in the beginning of the app, will take on the screen for a couple of seconds and then be gone. It is much simpler to change that number of seconds in the app directly then to go to the server, find two places where the Splash screen is referenced, change the values, experiment with it and so on.

The point is: whatever the plugin was for, it can be done better and nicer in Flutter.


gibenviro_app_starting_screen

GibEnviro app, the starting screen

If your app needs a plugin that is not mentioned here, I can, of course, add it to the stable. After all, I spent four years of my life writing BT plugins in Java and Objective C, and I can also do that in Flutter. But the point is this: why only rewrite the app plugin by plugin — why not improve the app to modern standards, both visually and with usability in mind!?

Send me a message through email if interested in upgrading your old apps to Flutter.

Posted in Android, Apps As a Business, apps server, Programming | Tagged , , , , , , , , , , , , , , , , , , , , , , , , , , | Leave a comment

How To Deal With Rejection Clause 4.3 – Design

Rejection clause 4.3 — Design

In late 2017 Apple started rejecting apps under the Clause 4.3 Design. You would get a notice like this:

———————-
Guideline 4.3 – Design

We noticed that your app provides the same feature set as other apps submitted to the App Store; it simply varies in content or language, which is considered a form of spam.
———————-

This is a reason for endless controversy. Apple wanted to eliminate hundreds of thousands of apps created with so called app builders, which produce the same code for each app. Thousands of honest developers used those code generating machines to create apps in the same line of business, thus certain app studios specialized for restaurant apps only, for e-commerce apps only, and so on. The apps were technically the same but the content would be totally different and original, catering to the different types of users.

With Guidline 4.3 Apple started throwing out the baby with the water. Thousands of jobs were being destroyed in one sweep, both for apps developers and their customers, who were suddenly left without apps or new versions of the existing apps. The outcry from developers was so loud that one USA Congressmen officialy asked Apple to reconsider, to which Apple had to explain publicly what they really wanted:

each app should be on its own paid account (which would, as one could expect, bring much new revenue for the Apple itself)

and each app should be “original”.

Assuming everybody with different code but identical app footprint were a spammer, they also started suggesting this:

———————-
When creating multiple apps where content is the only varying element, you should offer a single app to deliver differing content to customers. If you would like to offer this content for purchase, it would be appropriate to use the in-app purchase API.

Alternatively, you may consider creating a web app, which looks and behaves similar to a native app when the customer adds it to their Home screen. Refer to the Configuring Web Applications section of the Safari Web Content Guide for more information.
———————-

The suggestion from the second paragraph above, creating a web app instead of a native app, is out of the question. You would have to do everything again: open (and pay for) a new account for Safari development, pay a developer to develop the app from scratch, and so on.

Sometimes Apple will issue this rejection clause even if the app is totally fine but you already have a series of similar apps in your account. If you do not upgrade them often, rejecting a new app is an Apple way of telling you that you need to change things.

So do appeal to Apple’s decision and keep changing the app so that in the end it is accepted. And keep upgrading and changing other apps in your account — that will only bring more downloads to you!

Rewrite Your App in Flutter?

Going through old apps is not easy. Maybe the code used to generate them is too old and will even not compile in the latest Xcode. Meybe the idea behind the app is worn out — there are no more customers for that?

Maybe it is, after all, clear that only one or two apps have bright future ahead of them, while the others can disappear without regrets. If you have an app that used to make money back in the day and could still do so if upgraded to the latest trends — let me know. I shall rewrite it in Flutter and will even give you my own apps server as the backend for the app.

Click here to send me an email. Describe what you have and I’ll get back with candid opinion (no strings attached). 

Posted in apps server, Flutter, iOS | Tagged , , , , , , , , , | Leave a comment

How To Remove Alpha Channel (Transparency) From Images When Uploading App to the App Store

Finally, your app is uploaded to the App Store Connect, you have the latest build processed and you are uploading images — the last step before Submitting for Review. You need some 40 images and there is no time to lose processing them.

And then you get a message

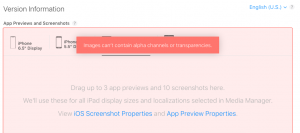
Images can’t conatain alpha channels and transparencies.

images cannot contain alpha

Images can’t contain alpha channels or transparencies

So how do you remove alpha channels and transparencies from the images you want to upload to the App Store?

The standard app Preview used to have ability to bulk read images and save them without alpha channel. Not any more.

You can use GIMP or similar “simple and manual” piece of software to remove alpha channel one by one image, 40 times in a row.

If you have it, you can use PhotoShop and make a macro. That will solve the problem but you have to have it first.

There must be a better way and it is called Alpha-Channel-Remover on GitHub by bpolat.

I downloaded the source code, ran it through Xcode 10.2 and Voila!, the MacOS app came running.

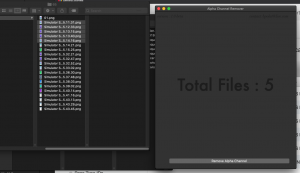
I then copied five files from the folder I gathered the images from the simulator and it showed there were 5 images in it.

alpha_channel-_remover.png

MacOS app Alpha Channel Remover does one thing only, but in a best possible way

Clicking on button Remove Alpha Channel will do exactly you expect it to do: the files will be overwritten with a new version but without alpha channels in it. And these files will upload without problems to the App Store.

Win – win – win and many thanks to bpolat!

Posted in iOS, Programming | Tagged , , , , , , , , , , | Leave a comment

Missing Purpose String in Info.plist File After Uploading Binary to App Store Connect

Occasionally, when you upload a binary to App Store Connect, you will one such message:

Dear Developer,

We identified one or more issues with a recent delivery for your app, “TimeShare SellBOX Calculator”. Please correct the following issues, then upload again.

Missing Purpose String in Info.plist File – Your app’s code references one or more APIs that access sensitive user data. The app’s Info.plist file should contain a NSPhotoLibraryUsageDescription key with a user-facing purpose string explaining clearly and completely why your app needs the data. Starting Spring 2019, all apps submitted to the App Store that access user data will be required to include a purpose string. If you’re using external libraries or SDKs, they may reference APIs that require a purpose string. While your app might not use these APIs, a purpose string is still required. You can contact the developer of the library or SDK and request they release a version of their code that doesn’t contain the APIs. Learn more (https://developer.apple.com/documentation/uikit/core_app/protecting_the_user_s_privacy).

It tells you that a string is missing from the info.plist file. To fix this issue, find that info.plist file and insert the appropriate string.

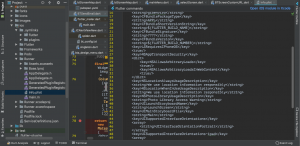
Since we are developing mobile apps with Flutter, the location of info.plist is in ios folder and then in the Runner subfolder. If you are using Android Studio 3.3, the easiest way to get there is by clicking directly. Once you click on info.plist, it will show up in the editor and you will be able to edit it as normal text.

Android Studio for Flutter info.plist

Access info.plist in Android Studio to file in the missing info string

Depending on the missing key, you may need to insert one or more key strings. A typical key string is like this:

<key>NSAppleMusicUsageDescription</key>
<string>We use access to music responsibly</string>

The message “We use access to music responsibly” will show up if the app is running but permission is not granted for some reason. You should, of course, insert a more appropriate message then this, somewhat, bland message.

If you want to “set and forget” about missing strings in info.plist, you may copy the following text into info.plist:


<key>NSAppleMusicUsageDescription</key>
<string>We use access to music responsibly</string>
<key>NSBluetoothPeripheralUsageDescription</key>
<string>We use access to Bluetooth peripherals responsibly</string>
<key>NSCalendarsUsageDescription</key>
<string>We use access to Calendars responsibly</string>
<key>NSCameraUsageDescription</key>
<string>We use access to camera responsibly</string>
<key>NSContactsUsageDescription</key>
<string>We use access to contacts responsibly</string>
<key>NSFaceIDUsageDescription</key>
<string>We use access to FaceID responsibly</string>
<key>NSHealthShareUsageDescription</key>
<string>We use access to HealthShare responsibly</string>
<key>NSHealthUpdateUsageDescription</key>
<string>We use access to health update responsibly</string>
<key>NSHomeKitUsageDescription</key>
<string>We use access to home kit responsibly</string>
<key>NSLocationUsageDescription</key>
<string>We use access to location usage responsibly</string>
<key>NSLocationAlwaysUsageDescription</key>
<string>We use access to location always responsibly</string>
<key>NSLocationWhenInUseUsageDescription</key>
<string>We use access to location when in use responsibly</string>
<key>NSMicrophoneUsageDescription</key>
<string>We use access to mictophone responsibly</string>
<key>NSMotionUsageDescription</key>
<string>We use access to motion usage responsibly</string>
<key>NFCReaderUsageDescription</key>
<string>We use access to NFC reader responsibly</string>
<key>NSPhotoLibraryUsageDescription</key>
<string>We use access to photo library responsibly</string>
<key>NSPhotoLibraryAddUsageDescription</key>
<string>We use access to photo library with write only responsibly</string>
<key>NSRemindersUsageDescription</key>
<string>We use access to reminders responsibly</string>
<key>NSSiriUsageDescription</key>
<string>We use access to Siri responsibly</string>
<key>NSSpeechRecognitionUsageDescription</key>
<string>We use access to speech recognition usage responsibly</string>

Posted in Flutter, iOS | Tagged , , , , , , , , , , , , , , , , , , , , , , , , | Leave a comment

The Milestones Approach to Developing Mobile Apps With Flutter

The Milestones Approach to Developing Mobile Apps With Flutter

Milestone 1 — Creating Flutter Project From scratch

Besides from, obviusly, creating a basic Flutter project to start with, in this phase we gather all data files in one place. Images first, icons, logos, fonts, special characters, gradients, colors… anything that will make your app be different from other similar apps.

Sometimes this step is more difficult than it seems, for example, may require converting dozens of images from one resolution to another and so on.

This is proper time to insert app logo into the app. It is easier in Flutter than in other languages, one must admit.

In this step I also gather all the Flutter plugins needed for the project. It usually is straightforward, in other times, if the plugins are not stable yet, it may require me to write the plugin of my own.

Milestone 2 — Creating the Web Server For the spp

I start with a shell — CakePHP code for a membership site, where the admin can create all other types of users. Then we define data structures that will be seen in the app and turn them into MySQL databases. Then we access these data through CakePHP and enable users of the server to store, edit, and view the data on the server.

In a recipes app, you would have the ability to insert recipes with images and the apps on mobile would read them in real time and show onscreen.

In a sales and orders app, you would record sales done through mobile devices, upload them to the server and then approve of the sales, receipts, or cancel them, postpone them and so on.

Later on, you may allow users of the app to upload images of the drinks they made and then show them in a community oriented part of the app. If the app uploads orders, then obviously you do not share that across the app.

The app server will also send notifications and emails to the registered users of the app. In a restaurant finding app, the server would send an email in the morning so that the customer may book a table in advance.

The emails can be sent to admins of the server as well. Say, once the order arrives from mobile, the admins of the web server may receive an email about it, click a link in email that leads to the order directly, and then process the order accordingly.

Milestone 3 Developing Mock Up — UI Only

This is peculiar to Flutter. It is widget based so creating mock up is prototyping is creating the real user experience for the app. Writing the code without testing is the fastest way to code the app. However, you have to be really experienced in widget making in order to make this approach work for you.

Milestone 4 — Creating iOS App, Connecting Database With UI

Great advantage of Flutter is coding for both platforms at once, but in this phase we still have to differentiate between the two. This is especially true when it comes to testing, as it is done differently on each platform. In particular, in iOS we test with TestFlight and Apple wants to review even that version of the app. On Android, testing is a bit easier.

Milestone 5 — Creating Android App, Connecting Database With UI

Ditto for the Android platform. There are so many form factors on Android that you really have to devote some time to testing it (iOS also has lots of form factors but the process of coding is smoother).

Milestone 6 — Final Testing, Debugging, Submitting and Publishing to the Stores

Now we gather feedback from test users and fix the app, sometimes significantly.

If this is the first time you publish an app to the stores, I can guide you to insert elements of ASO (app store optimization) into the listing, create and upload images and so on. If you already have a system for apps publishing in place, then you may not need all of these services from me.

Posted in Flutter, Programming | Tagged , , , , , , , , , , , , , , , , , , , , , , , , , , , , , , | Leave a comment

How To Publish iOS Apps To the App Store in 2018

How To Publish iOS Apps To the App Store in 2018

Apple is always changing the rules for successful submission of your apps to the App Store. I am creating this article to serve me as a live guide to publishing to the App Store and I shall keep it current. If you want to know when something is new in this regard, consider subscribing to my email list.

The reason I shall keep this infromation current is that I have to publish more than 51 apps in less then three weeks. Having a “how to” document is a must. And by the way, all these apps originate from one and the same template, so we shall see whether Apple will object to that as well.

Simulators Usually Do Not Run Simultaneously

Out of the 8 gigs of memory that my computer has, I can allocate almost 6 to Macintosh software (the rest is used for housekeeping purposes). The more memory a Mac has, the happier we all are, but 6 gigs is not really much. The main problem is using simulators, which slow down the computer and if you try to have three or four of them active at the same time, the Mac will just stop responding. So, it is important to use one and only one active simulator at any time.

If we have another app ready to be published, then fire up the second simulator and gather the images to be published in the App Store listing. Mercifully enough, nowadays Apple will let you upload only one set of images for iPhone and only one set of images for iPad. (You still can create images for all other screen sizes and resolutions, but you do not have to.)

Three simulators under iOS and Xcode 9

Three simulators fired up simultaneously in order to catch graphics

Choosing The Simulators To Work With

For iPhone, the only required screen size is 5.5 inches, while for the iPad, the size is 12.9 inches (second generation). You can choose from one of the several models with size of 5.5 inches and my choice is to use the simulator for iPhone 6 Plus. So fire it up in Xcode 9 and produce the app on computer screen.

Producing App Screen Shots From The Simulator

Normally, I take a shot of the entire screen and paste it into GIMP, which is my graphics processing software of choice. (If you can use PhotoShop, by all means do so. It is way better than GIMP, however GIMP is free, will run on Windows, MacOS and Linux/Ubuntu and just does a good enough job for me.)

Once into GIMP, I’d cut out a rectangle of the simulator screen, past it again with Ctrl-Cmd-V into GIMP as a new image and save it in a file. Once saved, I’d press Cmd-E (or Ctrl-E) and save the image as PNG file, which is the ultimate goal. To upload the image to iTunesConnect however, the image must be of proper dimensions, must not contain alpha channel and must have no layers. To eliminate the latter two I use commands Image > Merge Visible Layers as well as Image > Flatten Image. To change the dimensions, use Image > Scale Image and enter the values for the simulator screen you are working with.

Screen Dimensions

In the past, Apple forced you to take screenshots of all these screens (up to five for each) and then also forced you to cut off the header for some of these formats (but not all).As of March 2018, you can have up to ten images per screen and up to three videos.


Media Manager has new capabilities


In 2018, you can still show what your app looks like in all possible screen sizes, but you do not have to. It is sufficient to supply the values for only two screen sizes, one for iPhones and one for iPads. For iPhones the screen size is 5.5″ and for iPads, it is 12.9″. You can then tell the iTunesConnect to use these supplied values for all other screen sizes, by clicking on link View All Sizes In Media Manager when preparing the new version of the app for submission.

To get screen size of 5.5″ choose iPhone 6 S, 6 Plus, 7 Plus or any other. To get screen size for iPads, use option iPad Pro (12.9 inch) (2nd generation).

Publishing For iPhone X

There is a new option to publish for iPhone X separately. You do not have to submit images for iPhone X but you can if you want to. The resolution required is 5.8 inches.


iPhone X

Now there is a separate option for iPhone X

The Black Stripes on iPhone X

The X poses some new challenges. If you just run your existing app on the X, it will appear with two black stripes, one at the bottom the other at the top of the screen.

Black stripes will appear only on iPhonex, unless you activate field Launch screen file under App Icons and Launch Images in Xcode 9

There are three solutions:

1. Use Launch Image Source, which can be found in Project view, under tab General and in section App Icons and Launch Images.

App Icone setting is crucial for iPhone X, otherwise black stripes will appear on the top and at the bottom of the screen

2. Launch Screen File — specify which class to be shown first.

3. Defining screen sizes programmatically for all menus. My solution is called DS_screenSize and can be obtained from GitHub here.

App Screen Shots With Cmd-S

While in simulator, press Cmd-S and the PNG image of the screen will appear in the right upper corner of the desktop. Sometimes it will appear in the lower right corner, so you should make some room in the right side of the screen for these icons.

Now, when taking shots for size 5.5″, the PNG images will be of the right size, which is 1242 x 2208 pixels. Just drag the newly formed image to the folder of your choice (see below).

We are of not such luck in case of iPad simulator. The images that come out after Cmd-S are of half the needed size and you will have to use GIMP to change their size to proper 2048 x 2732 pixels.

In versions of Xcode before 9, there were several options to scale the simulator window under Simulator View. Now you can scale the window by dragging its corners with a mouse and there is only one option to scale, which is Cmd-1, scale to physical size. The images taken with Cmd-S are always 100% so you do not have to worry about that any more.

Taking Screenshots On the Device

See here how to take a screenshot on your iPhone, iPad, and iPod Touch. You will find the images with the Photos app on the device and then you need to transfer them to the computer from which you are uploading the images to iTunesConnect.

All Files In One Place

I opened a new folder called screen_images and made subfolders, one per app. Each of these subfolders has two further subfolders, called 5.5 and 12.9, denoting screen sizes in inches. When the iPhone 6 Plus simulator is active, the images go to subfolder 5.5, and when the iPad simulator is active, they go to the 12.9 subfolders.

Now as soon as you create a new shot of the screen and it appears on the desktop, drag it to the proper 5.5 or 12.9 folder, until you have five images in each subfolder.

Uploading The App Store Image Icon

In Xcode 9, you must package the image for the app store icon into the project itself. Drag the new image (which must be in size 1024 x 1024 pt) to the placeholder in Finder window for Assets.xcassets. The placeholder is called App Store iOS 1024pt.

If you do not do this in advance, most of the times you will wait for the app to get uploaded to the Store, only to find that you do not have proper icon in place.

If you are adding new files into the Assets.xcassets folder, be sure to import it again into Xcode. The new file must be called

App Store iOS 1024pt.png

Use GIMP to create the missing icon or you can use online services such as makeappicon.com.

Uploading the New Version Of the App To The App Store

While in My Apps portion of the iTunesConnect, click on plus sign near Version or Platform on the left side of the browser window. Choose iOS and enter a new version number of the app. Enter text for field What Is New In This Version? You may already have one such text if you are updating similar apps in a row (we are updating four similar apps here, so we may borrow from the first updated upp when we have one).

Enabling Push Notifications

If your app needs any of the available services, it has to be announced both in the provisioning profile on iTunesConnect as well as within the app itself. Case in point here is Push Notifications. To enable it in the app, go to project editor’s Capabilities pane and activate it. Alternatively, you can manually add the entitlement to your entitlements file.

In the account, go to Certificates, Identifiers & Profiles and go to iOS App IDs. Find the app that you working with and click on it. Click on Edit, scroll down and find the part on Push Notifications. Download both the Development SSL Certificate and the Production SSL Certificate and double click on the downloaded file. It will be inserted into the key chain.

Uploading New Version After Developer Rejected

Occasionaly you will have to delete the version of the app that you have just submitted, correct a thing or two and submit it again. First reject the app and the status will become Developer Rejected. You may do so even if the app is in review.

Erase the current build as described above and activate the new build, then submit for review again. You may need to wait for a couple of minutes till the latest build is processed, and becomes active.

Need Help With Submission Into The App Store?

I can help you if you have problems submitting the app to the App Store. Click here to send me an email!


Posted in Programming | Leave a comment

Upgrade Your Old App To iOS 11

Upgrade your existing app to iOS 11 if you want it to survive!

If you app is 32-bit, say, made in 2014 or 2015, chances are, Apple will stop showing them in the App Store. The existing customer will be able to use them but there will no new downloads — and without downloads, there will be no more fresh money from the app.

The solution is to let me upgrade, develop and maintain your old app. If your old developer is not available any more, or not interested, give me the source code of your app and access as an admin to your account, and watch the magic happen. Within a couple of weeks, your app will be as good as new. If you want the app to modernized, upgraded, and up to the level of what customers will expect in 2018, now is the time to react.

Case study — four apps upgraded to iOS 11 within six weeks

The need to upgrade these four apps was quite obvious. Two of them acted as free samples for the other two, that were avalaible only as paid apps. On October 5th 2017 Apple issued the ultimatum — either upgrade them to iOS 11 or else there will be no new downloads, as the apps would be invisible in the store.

Previous versions of these apps were published mainly in 2014 and 2015 and were never upgraded since. This means the company did not pay for any improvements since then and the apps were generating free money. The need to pay the developer to upgrade the apps was painfully obvious: the pay the developer once and the apps continue to make money on autopilot for another several years to come. The apps were creating profit before the upgrade and will continue to do so after the upgrade.

Learn Which Are These Four Apps

If you want to learn which these four apps are, please subscribe to the email list for creating apps:

Contact Me For a Quote

Want to get in touch directly? Click here to send me an email message through a web form.

Posted in Apps As a Business | Tagged , , , | Leave a comment

Updates And Changes to the Developer Program Policies for Android Apps on Google Play

Updates And Changes to the Developer Program Policies for Android Apps on Google Play

https://play.google.com/about/updates-resources/

10 tips to help you stay on the right side of Google Play policy

Posted in Android | Tagged , , , , | Leave a comment

How To Publish Four iOS Apps To The App Store

The task is to publish four iOS apps to the store. Previously, the apps were properly compiled and code rectified for iOS 11. It took five weeks to come to the situation that the only task remaining is publishing the apps to the App Store.

These apps are present in the Store since 2014 and were quite old by todays standards. The task was to innovate and bring them to life under iOS 11, otherwise Apple would have purged one or all of them from the store.

The Logistics Of Publishing Four Apps In A Batch

Out of the 8 gigs of memory that my computer has, I can allocate almost 6 to Macintosh software (the rest is used for housekeeping purposes). The more memory a Mac has, the happier we all are, but 6 gigs is not really much. The main problem is using simulators, which slow down the computer and if you try to have three or four of them active at the same time, the Mac will just stop responding. So, it is important to use one and only one active simulator at any time. In case of four apps in a row, we activate one app by one, take images on the simulator for each app and then kill the first simulator and then fire up the second emulator.

We then run the same four apps through the second simulator and gather the images to be published in the App Store listing. Mercifully enough, nowadays Apple will let you upload only one set of images for iPhone and only one set of images for iPad. (You still can create images for all other screen sizes and resolutions, but you do not have to.)

Choosing The Simulators To Work With

For iPhone, the only required screen size is 5.5″, while for the iPad, the size is 12.9″ (second generation). You can choose from one of the several models with size of 5.5″ and my choice is to use the simulator for iPhone 6 Plus. So fire it up in Xcode 9 and produce the app on computer screen.

Producing App Screen Shots From The Simulator

Normally, I take a shot of the entire screen and paste it into GIMP, which is my graphics processing software of choice. (If you can use PhotoShop, by all means do so. It is way better than GIMP, however GIMP is free, will runs on Windows, MacOS and Linux/Ubuntu and just does a good enough job for me.)

Once into GIMP, I’d cut out a rectangle of the simulator screen, past it again with Ctrl-Cmd-V into GIMP as a new image and save it in a file. Once saved, I’d press Cmd-E (or Ctrl-E) and save the image as PNG file, which is the ultimate goal. To upload the image to iTunesConnect however, the image must be of proper dimensions, must not contain alpha channel and must have no layers. To eliminate the latter two I use commands Image > Merge Visible Layers as well as Image > Flatten Image. To change the dimensions, use Image > Scale Image and enter the values for the simulator screen you are working with.

Screen Dimensions

In the past, Apple forced you to take screenshots of all these screens (up to five for each) and then also forced you to cut off the header for some of these formats (but not all). In 2017, you can still show what your app looks like in all possible screen sizes, but you do not have to. It is sufficient to supply the values for only two screen sizes, one for iPhones and one for iPads. For iPhones the screen size is 5.5″ and for iPads, it is 12.9″. You can then tell the iTunesConnect to use these supplied values for all other screen sizes, by clicking on link View All Sizes In Media Manager when preparing the new version of the app for submission.

To get screen size of 5.5″ choose iPhone 6 S, 6 Plus, 7 Plus or any other. To get screen size for iPads, use option iPad Pro (12.9 inch) (2nd generation).

App Screen Shots With Cmd-S

While in simulator, press Cmd-S and the PNG image of the screen will appear in the right upper corner of the desktop. Sometimes it will appear in the lower right corner, so you should make some room in the right side of the screen for these icons.

Now, when taking shots for size 5.5″, the PNG images will be of the right size, which is 1242 x 2208 pixels. Just drag the newly formed image to the folder of you choice (see below).

We are of not such luck in case of iPad simulator. The images that come out after Cmd-S are of half the needed size and you will have to use GIMP to change their size to proper 2048 x 2732 pixels.

In versions of Xcode before 9, there were several options to Scale the simulator window under Simulator View. Now you can scale the window by dragging its corners with a mouse and there is only one option to scale, which is Cmd-1, scale to physical size. The images taken with Cmd-S are always 100% so you do not have to worry about that any more.

Taking Screenshots On the Device

See here how to take a screenshot on your iPhone, iPad, and iPod Touch. You will find the images with the Photos app on the device and then you need to transfer them to the computer from which you are uploading the images to iTunesConnect.

All Files In One Place

I opened a new folder called screen_images and made four subfolders, one per app. Each of these subfolders has two further subfolders, called 5.5 and 12.9, denoting screen sizes in inches. When the iPhone 6 Plus simulator is active, the images go to subfolder 5.5, and when the iPad simulator is active, they go to the 12.9 subfolders.

Now as soon as you create a new shot of the screen and it appears on the desktop, drag it to the proper 5.5 or 12.9 folder, until you have five images in each subfolder.

Uploading The App Store Image Icon

In Xcode 9, you must package the image for the app store icon into the project itself. Drag the new image (which must be in size 1024 x 1024 pt) to the placeholder in Finder window for Assets.xcassets. The placeholder is called App Store iOS 1024pt.

If you do not do this in advance, most of the times you will wait for the app to get uploaded to the Store, only to find that you do not have proper icon in place.

If you are adding new files into the Assets.xcassets folder, be sure to import it again into Xcode. The new file must be called

App Store iOS 1024pt.png

Use GIMP to create the missing icon or you can use online services such as makeappicon.com.

Uploading the New Version Of the App To The App Store

While in My Apps portion of the iTunesConnect, click on plus sign near Version or Platform on the left side of the browser window. Choose iOS and enter a new version number of the app. Enter text for field What Is New In This Version? You may already have one such text if you are updating similar apps in a row (we are updating four similar apps here, so we may borrow from the first updated upp when we have one).

Enabling Push Notifications

If your app needs any of the available services, it has to be announced both in the provisioning profile on iTunesConnect as well as within the app itself. Case in point here is Push Notifications. To enable it in the app, go to project editor’s Capabilities pane and activate it. Alternatively, you can manually add the entitlement to your entitlements file.

In the account, go to Certificates, Identifiers & Profiles and go to iOS App IDs. Find the app that you working with and click on it. Click on Edit, scroll down and find the part on Push Notifications. Download both the Development SSL Certificate and the Production SSL Certificate and double click on the downloaded file. It will be inserted into the key chain.

Uploading New Version After Developer Rejected

Occasionaly you will have to delete the version of the app that you have just submitted, correct a thing or two and submit it again. First reject the app and the status will become Developer Rejected. You may do so even if the app is in review.

Erase the current build as described above and activate the new build, then submit for review again. You may need to wait for a couple of minutes till the latest build is processed, and becomes active.

Need Help With Submission Into The App Store?

I can help you if you have problems submitting the app to the App Store. Click here to send me an email!

Posted in iOS | Tagged , , , , | Leave a comment

Every Business Needs an Employee App

If your company has several employees or — even better — if it has dozens and hundreds of employees, you will need to have a special “employee” app. A typical employee app will have this as the main menu:

— policies and procedures,

— staff directory,

— benefits

— welness and safety,

— general manager news,

— team member news,

— calendar,

— schedules,

— alerts and notifications.

Employee Admin And the Back Door

The employee app is a member-only app, and the login details are defined by the management of the company. There must be a way to enter the login details for each employee manually and there also must be a way to enter a batch of login details together with the employee names. The management of the company should appoint one or more administrators which will act as admins. They will have their own login details and will be able to enter the data both through an app as well as through a web-based interface.

The employee app has its own server and a database behind it. The employee admin logs in into the web-based portal and can enter new records, delete the existing ones, view them, or perform batch operations on data. There may be several employee admins and each has his or her own set of data to work with.

If the company is large enough to have a special HR sector, one of the HR staff could easily be the employee admin for the app.

The admin can use the app both from the mobile device and from the desktop computer.

The Content For the Employee App

Most or all of the documents in the company concerning the employees should find their place in the app. For instance, your company should have most or all of these documents concerning the employees:

1. Harassment Policy
2. Vacation & Sick Pay Agreement
3. Military Leave Policy
4. Smoking Policy
5. Internet & E-mail Policy (Liberal)
6. Cellphone Policy
7. Your Drug-Free Workplace
8. Equal Employment Opportunity Policy
9. Employee Dress Code Policy- General
10. Workplace Safety Policy- for Employee
11. Employee Suggestion Policy

This may vary from US state to US state and from a country to a country, of course, but the essence is the same.

You may well have all these documents on your company site, in which case it is relatively easy to pull it in into the app. Or, you may have them as .DOC or PDF files, which is also a good option for including into the app.

You may also have a section about procedures, for instance, how to open a gym in the morning, how to close the shop in the night, what to do if a machine breaks down and so on.

Calendar, Schedules, Alerts, and Notifications

Whenever there is a new event in the company, the employee app proves itself useful. Each employee can see it in the calendar, adjust his or her schedules, receive alerts and notifications right on the their mobile device. With one or two taps they can acknowledge the receipt of the message or send their answer back.

An Employee App Simplifies Everything

Email, Viber, Facebook, Twitter, WhatsApp, text messages, push notifications… there is a plethora of communications options today. All employees will have an email account but from there, most will diverge. Instead of creating messages across many channels (email, Viber, WhatsApp…) create just one message and mandate that the employees look there first.

Conversely, when the employee leaves the company, the employee admin will not have to chase various sites and exclude them from this or that Viber group, ban from Facebook forum and so on. One click is all it takes so that the employee stops receiving messages through the app.

Larger companies will have stronger need to implement higher levels of security within the app. If you want that, it is available and you will be at least one step further from being spied upon by the likes of Facebook, Twitter, Google and other larger players in the Internet game.

Get Your Employee App Here And Now!

Click here to send me an email and start discussion of your own employee app.

Posted in Apps As a Business | Tagged , , , , | Leave a comment

Mysterious pngcrush caught libpng error:

From time to time, you may get a mysterious error in Xcode:

pngcrush caught libpng error:

Something like the image below:

pngcrush caught libpng error:

Misterious pngcrush caught libpng error:

The explanation Compress PNG Files Error will just confuse you. Xcode 9 will compile the code and run the app in spite of marking it red. It will even archive the app just before sending it to the App Store and it will still be passed through.

Further explanation will say image.png pngcrush caught libpng error. and also: copying emitted errors but did not return a nonzero exit code to indicate failure. The image seems to be OK but something is wrong anyhow… what could that be!? Turns out that your project will have the same image name listed twice in the Build Phases screen. Eliminate the redundant files from the list and make it look like this:

libpng

Eliminate libpng error in Xcode

The app will run without any red flags whatsoever.

Posted in iOS, Programming | Tagged , , , , , | Leave a comment

Three Hidden Costs You Will Pay To Upgrade Your Apps to iOS 11

Every year Apple releases a new version iOS and if you have apps in the App Store, you need to upgrade them. In several previous versions, the penalty for not upgrading the apps to the latest version of iOS was not severe. There used to be many apps published in, say, 2014, and still running happily on iPhones and iPad. However, this year, 2017, Apple will punish you if you do not upgrade your apps to the 64 version — your app will not be seen in the Store any more. The apps will continue to function for the existing users, but there will be no more fresh downloads… a death sentence for any app.

Death Sentence For Your App

Here is what one such letter looks like:

Remove app from the App Store

Letter from Apple — your app will be deleted from the App Store

(I received this letter because I was appointed as an admin within the account of the company that engaged me to upgrade the apps for them.)

There are three kinds of costs involved.

Upgrade the Existing Source Code To iOS 11

This may be a huge task in itself. Take local notifications as an example. Versions 8, 9, and 10 of iOS all had different ways of coding the notifications, all of these changes being dictated by Apple itself. Version 11 does not bring a new system for notifications, but if you skipped upgrading the app when iOS 10 was new, you will have to do it now anyways.

If you app is using video or audio player, you will have to start using the AVPlayer in iOS 11. And it will work much better, so not all change is bad for your app!

If you have missed upgrading the code in several areas for a couple of years, it will be all thrown into your face now. You or your developer will spend more hours in upgrading to iOS 11 than you would like to hear about. If you are in the business of publishing apps but are not a coder on your own, be prepared to pay larger than usual sums for upgrading the code.

Recreate the App Anew for iOS 11

The second source of hidden costs is to recreate each app anew, possibly using the enhanced capabilities of newer iPhone and iPads. For instance, you may want to include the Drag and Drop functionality into your app, with which you can transfer content from one app to another.

iPad compatibility may be another problem. iOS 11 for iPad is now (almost) a standalone operating system, different from the iOS 11 for iPhone. There is a new persistent Dock, a new App Switcher and so on.

If you want your app to be modern and use iOS 11 natively, you may well decide to support its new capabilities and — you guessed it — the costs of upgrading will just be higher and higher.

Publishing the App to the Store

The third kind of cost is to publish the apps in the App Store. The graphics may be new, the description text too and so on. Another kind of problem may be that Apple is now much faster and also much pickier about what they allow into the app store, so the price of submission to the store needs to be considered and even enlarged as to what it was before.

Apple seems now to want to crush the apps that have the same code base, i.e. the apps that are made with one base template. If you are app studio and have ten restaurants as ten separate customers but have used the same template for all the apps, Apple may crush you still — in spite of all the apps being different in content and targeting different markets.

For now it seems that changing the code base makes it harder for Apple to reject such apps. The price to pay is to have the developer change the code and that makes the publishing process slower and more expensive still.

Let Me Upgrade Your App To iOS 11

All three hurdles need to be overcome in order to have the apps again in the App Store, compatible with iOS 11. If you want help, click here to send me an email and get your upgraded app into the App Store again.

Also published Medium.com

Also published on LinkedIn.com

Posted in iOS | Tagged , , , , , , , | Leave a comment

How to Install a CocoaPod – Xcode 9 – Swift 4 – SendBirdSDK

To install a SendBird pod, go to here and download the pod. Copy it to the folder where you app is and then go to that folder:

cd "/Users/duskosavic/Documents/apps/Cole/iMedic Flash Cards/imedicflashcards_iOS_BTv4.0.3"

In my case, one od the intermedidate folders contains blanks, so I had to use quoation marks around the entire subfolder name.

We have to execute the following statements:

$ pod init
$ open -a Xcode Podfile
$ pod install

but what is Podfile? That is a file that I have previously downloaded from SendBird.com. You will get the contents of Podfile for every pod that want to install. Here is what it looks like:

platform :ios, '8.0'

target 'imedicflashcards' do
use_frameworks!

pod 'SendBirdSDK'
end

8.0 means that we will support versions of 8.0 and later. (The current version at the time of this writing is 11). Normally, you should support two versions from behind, so if the current version is 11, then you could have put 9.0 instead of 8.0 in the first line of the pod.

imedicflashcards is the project name and use_frameworks! is where the rubber meets the road. It is the main statement in the whole pod text. Finally, SendBirdSDK is the name of the pod we are installing. There may be other pods in that same Podfile file as well.

So after pod install, the following lines were shown:

Analyzing dependencies
Downloading dependencies
Installing SendBirdSDK (3.0.94)
Generating Pods project
Integrating client project


[!] Please close any current Xcode sessions and use `imedicflashcards.xcworkspace` for this project from now on.
Sending stats
Pod installation complete! There is 1 dependency from the Podfile and 1 total pod installed.

From now on, we want to click on file imedicflashcards.xcworkspace in order to start the project in Xcode.

If there are some errors, they will be shown as well. In my case, the error was that I have included flags from the manual installation of SendBirdSDK and the pod complained:
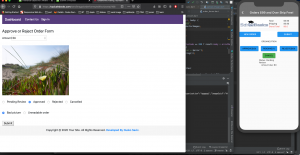

[!] The `imedicflashcards [Debug]` target overrides the `OTHER_LDFLAGS` build setting defined in `Pods/Target Support Files/Pods-imedicflashcards/Pods-imedicflashcards.debug.xcconfig'. This can lead to problems with the CocoaPods installation
- Use the `$(inherited)` flag, or
- Remove the build settings from the target.

[!] The `imedicflashcards [Release]` target overrides the `OTHER_LDFLAGS` build setting defined in `Pods/Target Support Files/Pods-imedicflashcards/Pods-imedicflashcards.release.xcconfig'. This can lead to problems with the CocoaPods installation
- Use the `$(inherited)` flag, or
- Remove the build settings from the target.
Duskos-Mac:imedicflashcards_iOS_BTv4.0.3 duskosavic$
[Restored Apr 21, 2018 at 5:52:39 PM]
Last login: Sat Apr 21 17:51:42 on console
Duskos-Mac:imedicflashcards_iOS_BTv4.0.3 duskosavic$

Once I got back to Build Settings in Xcode and erased the flags, everything ran as expected.

Posted in iOS | Tagged , , , , , | Leave a comment

How I Wrote “Object-Oriented Programming With Smalltalk/V”

The era of object-oriented programming began some time in mid 1980s. New languages started to appear and one them, Smalltalk, began to be available on the then ubiquitious PC. Smalltalk/V was the version for DOS. It offered a rich set of graphics, fonts, shapes and it was as close to the original Smalltalk as it was possible then. (The “v” in the title meant that it used the memory of the PC in a virtual way, so it seemed that the memory was limitless.)

I have programmed in many languages, starting with FORTRAN IV on IBM 360/44 at the university. GPSS, FORTH, BASIC, Hisoft Pascal, Turbo Pascal… whatever was available for the microcomputers, I tried it out. Smalltalk was a treat. Previously I have seen it on expensive desktop stations on computer trade shows, for about a five minutes a year. And to be able to really use — I was in the programmer’s heavens! And it had objects…

After the first fascination passed out, I realized it was quite a difficult a language to work with. I had to read the documentation and try out all those classes and methods, class methods and so on. The notion of the dispatcher became really important while I was writing this book! But it was worth it. To be able to produce such software on the PC, that was beyond imagination for people used to dBase II.

I wrote this book for almost two years and I almost missed the last deadline but yeah, it finally reached the stores. The first run was 1500 copies and some 300 were added in the second run. It was my first hard cover book, more expensive but it had its range of buyers.

It was printed in January 1991 and literally yesterday, on the 29th of August 2017 I learned that that book was translated into Japanese! More than a quater of a century later! The translator, Mr. Fuminori Kobayashi, found me after all this time and it was a great news for me.

The Japanese publisher is the Toppan company.

You can still find the English version of the book on amazon.com!

Posted in Dusko Savic Books | Tagged , , , , , | Leave a comment

How I Wrote “BASIC Interactive Graphics”

Since 1981 the world was swept away by the existence of cheap personal computers such as ZX Spectrum and Commodore 64. Millions of these devices were sold, creating a need for software and documentation — I have the hardware, what else can I do with it? A new class of magazines — computer magazines, appeared out of nowhere.

It was obvious that graphics would play a big role in the future of these little computers, so I started out my freelancing career as a writer of a book called “BASIC Interactive Graphics”. The publisher was a UK publishing company called Butterworths, which later became Butterworths – Heineman. I liked one of their books, I wrote a letter to the company, told them what I wanted to write and we had a contract. It was my first book and I wrote it in English, which is not my mother’s tongue at all.

It took me a year to write it, and it took them another 13 months to print it. The print run was 2500 copies and it sold out but the delay meant that there could be no more any print runs. You can still find that book on the amazon.com!


Posted in Dusko Savic Books | Tagged , , , | 1 Comment

How Many Ad Clicks Do You Need To Earn 2.500 Dollars From A Game?

Suppose you have invested 2.500 dollars into creation of your app, let’s say, it is a game. 2.500 dollars may be only for at total reskin of the app, or you might have billed yourself to that amount if you are a developer, or you might have had any kind of various costs while developing the app — games designer, graphics designer etc.

How To Know Whether Your App Will Recoup The Investment?

Did you do your math correctly? You have 2500 dollars for reskin and that is 2500 x 100 cents = 250000 cents. If you got 5 cents from a clicked upon ad, you would need 250000 / 5 = 50000 clicked ads. Suppose one user in 100 impressions clicks upon an ad, you would need 50000 x 100 = 5.000.000 impressions for the ads to pay out the reskin (not taking into account other costs you had).

Now suppose you app has exactly 100 screens to show ads. 5000000 / 100 = 50.000 impressions per screen. To achieve that you may have 50000 downloads (presuming each player visits all 100 screens in a row), another way to achieve that would be to have less installs but more stubborn players who dedicate themselves to the game, and so on.

You should best use a spreadsheet for this exercise.

Finally, all this math will not do you any good if you do not have downloads and players who want to play the game over and over again. But that is another topic altogether.

Posted in Apps As a Business | Tagged , , | Leave a comment

How To Create a Budget For My First App

The question in the forums was:

How much is the budget for the first app is reasonable for newbie (like me)?
Please don’t answer like “it depends”. I need numbers!

Here is my answer:

I’ll try to explain why it “depends”.

You really need to state your goal and work from there. If you just want to get your feet wet and go through the entire process in order to learn, buy a course from Carter Thomas go through it and learn to work with the templates. If you have in mind your very original app, first shop around to see what templates / pieces of code can be bought for cheap, find a developer and work from there to integrate it all into a publishable app.

Speaking of developers (and being one) — it also takes time and money to find and engage the proper developer. If you buy a Unity template, be sure to find a developer that has experience with Unity, for example.

The best way to approach a developer is with your own app project finished and detailed (“wireframed”), up to each and every screen. The worst way to approach a developer is to tell them “here’s what I want and I am paying you to make it happen”.

You will also have to spend money on the contents of the app: emojis if it is an emoji app, images and icons for navigational menus and so on.

There are also hidden costs for things that you do yourself: curating videos from YouTube, applying for the ad networks and putting ads into the app, integrating various SDKs for analytics and so on.

There is also the cost of time that you spend on communicating with the developer, testing the app, suggesting and implementing improvements, then publishing the app to the store, dealing with the eventual rejections (and yes, they happen to all of us, from time to time).

So open up a new spreadsheet page, put down all these costs and see where you are.

Posted in Apps As a Business | Tagged , , | Leave a comment

How A Developer Will Charge You For An App

Somebody asked in the forum how much an app should cost that contains

— ability to shoot an image and send it to the owner of the app

— let the owner send push notifications to remind users to buy something from him.

Here’s my answer:

I’m an active developer for both Android and iOS so here is how I go about charging my customers. One is to get paid monthly for a fixed sum and endure that until the app is published to the store. Another way is per screen and each screen has a certain value, say $100 or whatever we agree upon. Some screens are very easy to code, some take weeks so in the end it all levels out. Yet another way is per hour which works for small projects.

What you really pay is the amount of time I dedicate to your project including writing and answering your emails, being there for technical support and so on. Sometimes coding time is minimal and the time spent is mostly on communicating via email or Skype. A client of mine I worked for a year with, we exchanged almost 700 messages over several projects.

Camera for iOS I did that already and that is not a problem. Apple revamped notifications with iOS 10 so you’d need new code to alleviate that. Finally, you ask for a server based solution for sending notifications which is the hard part. You’d really have to know why are you investing in developing new software when you can send lots and lots of notifications through sites such as Mixpanel, Localytics, Leanplum, Urban Airship, Appboy, Herable, Outbound, Kahuna, Parse… and there are others.

Finally, are you ready to contact a developer? Do you have a wireframe of the product to be, or maybe a working app into which the new solution would have to integrate in, do you have a complete project with all the transactions detailed (“this button does that”) and so on. Unless I am working on my own app, I work best (and that may well be the case with many other developers) when given a blueprint to follow.

Posted in Apps As a Business | Tagged , , | Leave a comment

Why Your App Must Have Privacy Policy As Well As Other Policy Documents

Privacy policy is a must both for a web site and for an app. Go to any app or site that is similar to what you are doing, read a couple of their privacy policies and rewrite them for your own case. In many cases it will seem that you are not tracking what the user is doing or that you do not take any personal data from the user so, why bother with a privacy policy at all? It turns out that nowadays people know that they are being spied upon and expect to be tracked across the web and the apps. They are aware of the negative possibilities and want to know what are you doing with the data they produce using an app.

If in a game you are tracking what the users do “in order to improve game experience”, tell them what will you do with such data and tell them also whether you will be selling those data to third parties or not. If you are showing third party ads say from AdMob, be sure to incorporate a notice about that in your privacy policy. Ads agencies will usually provide you a paragraph or two that you should put into your privacy policy so it is not so difficult to create.

Most users will never read any of the “policy” documents that you should have in the app but you should nevertheless have them. In my apps, I have Privacy Policy, Copyright Policy, Terms of Service, Anti Spam, and Disclaimer Policy documents. Some are very long, some are one or two paragraphs long but important nonetheless. The good news is that once you create them for one app, you can transfer them almost unchanged to all other apps of yours so it is not such a great problem in the long run.

And of course, you may want to search for the privacy policy creating sites that will do it for free. For best effect, you may want to combine your original draft with the content that these sites give you.

Policy documents should protect both you and your customers / users. In the excitement of going to be published creating them looks like a trivial and unneeded chore to do, and yet if you are in this as a business, but they must be there.

Posted in Apps As a Business | Tagged , , | Leave a comment

Deprecated Constructor in PHP Class

Still converting old PHP code and upgrading to PHP 7.0, I receive a message like this:


Deprecated: Methods with the same name as their class will not be constructors in a future version of PHP; Validate_fields has a deprecated constructor in

Looking at the code I see this:


class Validate_fields {
var $fields = array();
var $messages = array();
var $check_4html = false;
var $language;
var $time_stamp;
var $month;
var $day;
var $year;

function Validate_fields() {
$this->language = "us";
$this->create_msg();
}

The message means that the class name Validate_fields and the constructor function Validate_fields() have the same name. The solution is to use a __constructor() instead of function Validate_fields().
Something like this:

class Validate_fields {
var $fields = array();
var $messages = array();
var $check_4html = false;
var $language;
var $time_stamp;
var $month;
var $day;
var $year;

function __constructor() {
$this->language = "us";
$this->create_msg();
}

The error is no more.

Posted in PHP | Tagged , , | Leave a comment

Use pre Tag to Format Your PHP Code in WordPress Posts

This entry is part 2 of 2 in the series PHP Programming

Taking advice from Writing Code in Your Posts, I am now using only the pre tag to fromat the PHP code in WordPress posts. It will look like this:

	if (isset($_POST['h_sys_submitted'])){	
	    $h_sys = safeEscapeString($_POST["h_sys_submitted"]);
	} else{
		$h_sys = '';
	}
	if (isset($_POST['asc_turned_to_submitted'])) {	
    	$asc_turned_to = safeEscapeString($_POST["asc_turned_to_submitted"]);
	} else{
		$asc_turned_to = '';
	}
Posted in PHP | Tagged | Leave a comment

Change real_escape_string to mysqli_real_escape_string for Function safeEscapeString in PHP 7.0

This entry is part 1 of 2 in the series PHP Programming

I often use function safeEscapeString from  in my PHP projects. It helps sustain the integrity of data coming to and from MySQL or similar database. However, if the code ran on PHP 5.4 or 5.6 at the highest, and I wanted it to run PHP 7.0, the latest and greatest version of PHP. When the error reporting is turned on, a fatal error in code will appear. The solution is to use the recommended function mysqli_real_escape_string, which takes two parameters, the link and the string to sanitize.

$temp2 = mysqli_real_escape_string($link, $temp2);

Since I had not had a special link to a database, I just added one to get the $link variable (as shown here):

$link = mysqli_connect("localhost", "my_user", "my_password", "my_db");

The complete function looks like this:

Function safeEscapeString($string)
{
$temp1 = str_replace("[br]", "", $temp2);
$temp2 = str_replace("[br /]", "", $temp1);

if (get_magic_quotes_gpc())
{
return $temp2;
}
else
{
$link = mysqli_connect("localhost", "my_user", "my_password", "my_db"); 
if (!$link) { 
if($local_print){ 
echo "Error: Unable to connect to MySQL." . PHP_EOL; 
echo "Debugging errno: " . mysqli_connect_errno() . PHP_EOL; 
echo "Debugging error: " . mysqli_connect_error() . PHP_EOL; 
exit; } 
} else { 
if($local_print){ 
echo "Success: A proper connection to MySQL was made! The my_db database is great." . PHP_EOL; 
echo "Host information: " . mysqli_get_host_info($link) . PHP_EOL; 
} 
} 
$temp2 = mysqli_real_escape_string($link, $temp2); 
mysqli_close($link); return $temp2; 
} 
}
 /////////////////////////////
Posted in PHP, Programming | Tagged , , , , | Leave a comment

How To Pack And Send Your Android Studio Project

If you are working as a developer for a client or if you are creating your own app in Android Studio and want to send it to a developer, here is what you do. In a nutshell,

— find the folder where the app resides in,

— turn it into a zip file,

— post it on some Internet server and send me the link

— so that I can download it and, of course, unzip it.

If you are using Android Studio on a Windows machine, that would look like this:

  1. Tap on the app row in the upper left most part of the Android Studio window.

    Click in app row to select the entire app in Android Studio

    Click on app row to select the entire app in Android Studio

  2. Right click on app row to get the menu
    send_as_project_02
  3. Left click on Show in Explorer and you will get to the folder for the app.

    You will get the app folder for the app, in the middle of the app, so to speak

    You will get the app folder for the app, in the middle of the app, so to speak


  4. Get the parent folder (one folder up in the hierarchy)

    One folder higher in the hierarchy you will get the entire app for zipping

    One folder higher in the hierarchy you will get the entire app for zipping

    Incidentally, you see here how I create backups of my app during the development.

  5. Right click on the folder for the app and zip it.

    Right click on the folder to zip it

    Right click on the folder to zip it

    The rest will depend on the upload service you use — box.com, dropbox.com, your own server etc. Then send me the link, I shall download it and that’s how you send your Android Project to a developer for further development!


Posted in Programming | Leave a comment

Toothache Help Android App

This entry is part 1 of 1 in the series Help Apps Android

Click here to download the Toothache Help Android App from the Google Play store.

Posted in Help Apps, Help Apps for Android | Tagged , , | Leave a comment

Gastritis Help App Available Both in Google Play and App Store

Try to relieve gastritis by using alternative medicine methods from this app.

Would you like to relieve stomach pain, gain confidence, relax, have control of your life again and achieve your work duties and social goals!


YouTube Direct

You can download an iOS Gastritis Help from App Store or an Android version from Google Play.

With this app, we have compiled ancient remedies for gastritis. We give you only the successful ones. Here is the table of contents:

–What is gastritis?
–Gastritis symptoms
–Herbal cures
–Chinese herbal cures
–Ayurveda
–Homeopathic remedies
–Bach Flower remedies
–Diet

How to use the Gastritis Help app?

There are three important buttons:

Your Therapy

Symptoms

Description of remedies

First tap on Symptoms and then tap on one or more icons that say Your Therapy. You will see a short message (“toast”) that the symptom is entered into the therapy.

You can select all symptoms that you want now or later, it does not matter. Once entered, you will be able to delete the chosen symptom with a click of a button.

Then tap on various groups of remedies. Typically, these will be Homeopathy, Bach Flower remedies, Ayurveda and others. Visit these therapies and tap on icon to select the remedy and enter it into the chosen therapy.

Finally, tap on Your Therapy. You will see a list of symptoms (in orange) mixed with a list of remedies (green) that you have selected. Taken together, the symptoms and the remedies form your therapy. Now all you have to do is obtain the remedies and start the process of eventual improvement of your health.

The whole process takes less than five minutes but will cut down the time to search for remedies. We have chosen only the proven remedies from various types of healing so let this be a firm base for further research of yours. In the meantime, you undertook the first step towards the change of your life.

If the symptoms change, you may repeat the entire process.

The app is free and is supported by (hopefully non intrusive) ads. This app belongs to a wider group of apps that may be able to help you improve your health. Please visit the option Other apps to see what else do we have.

You can download an iOS Gastritis Help from App Store or an Android version from Google Play.

Posted in Android, Dusko Savic Android Apps, Help Apps, Help Apps for Android, Help Apps for iOS, iOS | Tagged , , , , , | Leave a comment

iOS App Approved in Three Days

It took Apple 20 hours to reach the In Review status for a newly submitted app. The review phase lasted three hours — the app was rejected because of small fonts for iPad. After submitting new build and version it again waited for review, but only for an hour. The review phase now took only ten minutes and the app was approved.

This is not exactly a “1 day” process, more of a “3 day” process, but still very good.

The app, by the way, is called Gastritis Help. Choose your symptoms and choose remedies from various alternative healing methods such as Homeopathy, Ayurveda, home remedies etc. to decide upon your therapy. The link for the app store is:

https://itunes.apple.com/us/app/gastritis-help/id1101751987?ls=1&mt=8

The link for the Android version of the app is:

https://play.google.com/store/apps/details?id=com.gastritishelp

Posted in Programming | Leave a comment

List Of My Services and Prices

Here is a list of my services and prices, mainly for apps but a few related areas as well

Turn your Kindle ebook into an Android app

You have already published a Kindle ebook, it is live in the Amazon Kindle store and you have all the files you used to publish it there.  That is a start for me and we should decide what is the purpose of that app. Some ideas:

cross promotion with your other apps and sites,
promotion of your Kindle ebooks,
monetisation through ads in the app,
forming an email list etc.

The price for this kind of service starts at $300 for Android but the final price can be greate, depending on what else needs to be done to make the app useful.

Turn your Kindle ebook into an iOS app

Similar to previous, starts at $300 and up.

Turn your Kindle ebook into both an Android and iOS app

I can derive apps for both Android and iOS from one kernel so ordering both at the same time can be somewhat cheaper than just a double price for one platform.

Please note that this does not mean that for $600 you can have two finished apps. There are other costs to incur, maybe a new piece of software needs to be written to accommodate the requirements of your app, the app may need new graphic design, it also needs to be submitted to the stores, which costs extra and so on.

Create a showcase app for you and your company — turn your site into an app

Yeah, sites can be “mobile” but the only real thing is an app designed for that kind of device, in the native language of the device.  In this “site to app” service, I’d take most of the content from your site and make it available on the device. When you publish a new article on your blog, it should appear automatically in the app.

Prices for this kind of service start at $500.

Create a professional app for you

Like the previous, but enriched with live RSS feeds, direct posting to Twitter and Facebook from the app, YouTube videos, your blog, search within the app, live accounts within the app (register, forget password etc.) and so on. The price would start at $900.

Create a large, new, original, one of a kind app for you

You have a great new idea, a new angle on an old idea, whatever. You will probably also want everything in the “professional” app and more. Prices for this kind of originality start at $3000 per app per platform.

Create a back end plugin in PHP for the plugins for Android and iOS

If the plugin needs to access data on the server, add another $300 to the mix. So, for example, plugins for both Android and iOS accessing the same database through PHP, would cost $$300 + $200 + $300 = $800.

Publish your Android app to your account in the Google Play Store

Once the app is finished and you agree that it is all you wanted it to be (under the circumstances and for the money involved), the app needs to be published in the store. There are two store of general interest, Google Play for Android and App Store for iPhone / iPad. To get a finished app published in the requires a manual procedure that spans a couple of hours of work — running the app, testing it, catching graphics from the app, entering description and other details in the store, creating appropriate icons and uploading them to the store, creating a new version of the app and so on. It tends to be an invisible part of app creation, but sometimes can take a lot of time and the stores are getting tougher all the time.

Frequently, that includes the need to repeat parts of the process and if the app was rejected, figuring out why and how to mend it — and then go through all of the steps of uploading it to the store AGAIN. So it has to be paid as many hours can be spent in that, rather unproductive way.

The price per submission starts at $100.

Publish your iOS app to the App Store

More or less the same as above.

Publishing ebooks to Amazon Kindle store

Kindle ebooks are not apps but share many of the similar steps in the process of preparation and publishing. Prices for this start at $300.

Publishing paper books on CreateSpace (Amazon)

Ideally, you already have a Kindle ebook ready and you want to offer it in paper. The prices for this also start at $300.

Create a WordPress site for your apps business

Another time consuming set of tasks. Prices start at $300.

Create promotional videos for your app

This is optional in theory, but very much needed these days. Visitors of app stores are getting pickier than ever and want to see the video before downloading anything. For Androd, the video can be a couple of minutes long and the rules are not so strict. The video will reside on YouTube and may serve as a generator of traffic in itself.

For the App Store, the video resides on Apple servers and must be no longer than 30 seconds, and the rules are stricter than for a general YouTube video.

YouTube Marketing for your apps, sites, ebooks etc.

While Apple is somewhat strict about their apps promotional videos, there’s nothing to stop you from making a promotional video or two and put on YouTube. The price for this starts at $200.

Email marketing for your apps

The money is in the list, remains as true as always. While it is not much of a problem to put a form to gather the email address into the app, the real power of email marketing lies in email autoresponders, which will send your predefined selling messages to the owners of those email addresses. The only way to be efficient with autoresponders is to use a paid service and to set it up, takes time and that is what you would be paying under this service on this site. The prices start at $200.

Create AdMob ads in your app

One way to monetize your app is to use ads. To really make money with ads, you should have a very popular app, however, you will get some money in every case you implement ads. Technically, putting ads into the app is sometimes easy and sometimes not, depending on many things. If it’s bound to consume my time, it must be a paid service and the prices start at $200 (but what this really entails must be agreed upon on the spot, for each particular app.).


Hosting with an Internet provider

If you already have your own domain / site, that can do. The hosting service must support PHP, MySQL cPanel, HTML, Apache and so on, but most hosting services will do that already (if its not a Windows server). You will pay monthly to the hosting provider, depending on the type of account, you will pay from 10-odd buck up to $50 or $97 per month.


Posted in Android, Apps As a Business, Apps Marketing, Dusko Savic Android Apps, iOS, Kindle, Monetize Your App, Programming, RSS feeds | Leave a comment

Porting Kindle Ebooks To Google Play and App Stores, in English and Chinese

I have successfully ported my own Kindle books to apps and I have done that for other publishers. Here is an example of my work for another publisher, for Android:

https://play.google.com/store/apps/details…

End Time Series, Numerical Roots in Bible

Numerical Root Calculator App in the Google Play Store


and here is the same account in the App Store:

https://itunes.apple.com/…/numerical…/id1063163615…

Numbers and Roots of Numbers in the Bible

Numerical Root Calculator iOS App in the App Store


Here is the book that the apps were ported from, in the Kindle store:

https://www.amazon.com/Number…/dp/B00IDW25PA/ref=sr_1_1…

Numbers and Roots Of Numbers in Bible English Edition Kindle ebook

Numbers and Roots Of Numbers in Bible English Edition Kindle ebook


Problems in Porting Kindle Ebooks to Android and iPhone / iPad Apps

I have developed specialized software for porting Kindle software files to Android apps in a matter of minutes, back in 2013. So that part was under control and I was confident that I could port anything from HTML files to Android relatively fast. However, although the ebooks in the End Time Series were developed for Kindle, I was presented with MS Word files instead of pure HTML. Word is notorious for its bad handling of the HTML and this time it was no better. I had to manually divide the main book file into chapters, as that is what the Kindle to apps software of mine expects. Then there was the case of several special characters, which look very professional on paper, but just do not matter in HTML pages and apps which read those pages. Converting these characters had to be done from file to file, almost by hand, all of which took much more time than I expected.

Once the initial preparation was done, I still had to insert the codes for software to work with. You would expect that the chapter headers would be properly formatted in Word, but that was not the case either. One chapter was extremely long and that is not readable on most phones (and not even very well on tablets), so I had to divide it into several chapters, again.

Once that was done, and since the ebook was to be converted to both Android and iOS at the same time, I used the same core files for both. With the framework that I used, that is not only possible, but it is the preferred way: once you finish the app on your server, you should be able to publish it without changes on both platforms. Yeah right, when I finished everything, the display of HTML pages, the ones with text from the ebooks, was too small. That is, the fonts were so small that it was virtually unreadable. Once I realized the problem, the easiest way to solve the readability problem was to write a completely new plugin for display of the HTML pages — I called it HTMLBook. It does what Custom HTML, HTML Pro and other similar plugins do — read in the HTML page and do something with it, except that now you also have a new button at the bottom of the screen, which enables to dynamically change the size of font AND reformat the text properly. I shall describe the HTMLBook plugin in another post, but suffice it to say that this was another time sinking hole — just when I thought the app could be published, I had to develop an completely new plugin, for both platforms, with totally different solutions underneath.

Publishing Apps in English and Chinese

These ebooks originated in Chinese and were translated to English, so the publisher wanted to have both versions of the apps, published in both stores. As you can see from the above links, that makes for two English and two Chinese apps for Google Play and another two English and another two Chinese apps for the App Store. The publisher was kind enough to translate several hundred of simple apps messages to Chinese (Downloading, Something is wrong… etc) and of course, he provided the Chinese texts to turn in to apps. Images and text in icons had to be changed but, thankfully, the overall structure of the apps was always one and the same, which made everything not only easier but possible, too.

To translate the Android app, I used the facilities that the Android environment already offers to that purpose — various string constants in two languages, hidden so that the Android software still knows which are the right ones to choose, so that was not so bad. For iOS, the translation almost turned into a hack. Both the English and Chinese the sentences are in the very same plugin, and there is one switch in the control panel of the HTMLBook plugin that selects from English or Chinese version.

The end result, when everything was ready, was automagical. Select English, and you have a complete app in English, both for Android and iOS, and then you select Chinese, and once again, “with a press of a button”, you get the Chinese versions of apps, ready to be published in the stores.

Once these technical hurdles were under way, I had to make the best use of the new apps for the benefit of the publisher.

Should Apps Duplicate Ebooks Or Should They Be Original On Their Own?

In my opinion, apps can do more that ebooks, and to do that, they have to be interactive. The user is automatically interested in anything they type into the app and get the result back, so that’s what I did.

My idea was that you do not simply put the content from the book into the app, as that would not easily pass into the App Store. So I have developed a special plugin that does complex calculations that the Kindle book is based upon and try to interest the potential readers to get the original book in some way.

When someone visits the Kindle part of Amazon, they already have an intention of buying something. Alas, visitors of the app stores usually want things free and it would be really unusual for someone to spend 9 bucks to buy the app with the book content (while they will do that on Kindle). So these apps ended up as “loss leaders”, with three chapters from the books free, with a plugin to calculate free and with a possibility of getting the users email address to form a list.

Other approaches are possible: if the book creates its own universe, the app for the book could a game of some kind, or at least contain a quiz. But for me, forming an email list should be a priority for an app that converts from an ebook. Then you can lower the price for your ebook on Kindle and send the notification or email to your app list… boom!

Posted in Android, iOS, Kindle, Programming | Tagged , , , , , , , , , , , | Leave a comment

Maps Overlayed — User’s Manual for the New Plugin

Starting with Relocation Map, we come to the new Maps Overlayed plugin. It is a strict superset of the Relocations Map plugin. Section Map Overlay Behavior provides a switch:

Switch for map overlay behavior

Switch for map overlay behavior

Operate as normal map

If this is chosen, the entire plugin behaves as if it only were the Relocations Map plugin. The data you enter in the Map Locations section will mostly work. None of the sections and fields connected with overlays will work, at all.

Operate as overlayed map

All fields and sections for overlayed data will be avaible and working. This is the default for this plugin.

The next section is

Overlay Coordinates

Overaly coordinates define the rectangle that will be overlayed with active elements.

Overlay coordinates define the rectangle that will be overlayed with active elements.

The basic idea of the Maps Overlayed plugin is to define a rectangle on the map onto we want to concentrate the attention of the viewer. Not only that, we want to overlay — put a picture onto that rectangle — so that we both see elements of the picture and of the map beneath it. Furthermore, the overlay should zoom or relocate with the original map.

If we put a solid picture onto the basic rectangle, we will not achieve much. The goal is to put pins, images, circles… whatever have you as active elements that the user can further touch and see information beyond it. In case of standard pins, it is possible to touch the pin and a further callout shows, with the address of the pin and if we touch the calout, we can be transferred to the screen “beyond the mirror”. In that way, the entire map with pins can act as an elaborate menu, scattered across the screen.

A rectangle is defined as a set of four vertices. Each vertex is a point and here a point is an ordered pair of coordinates. The first number is called the latitude and has a value between 0 and 90 degrees. It usually is a decimal number. If positive, it denotes the Norther hemispere, if negative, it denotes the Souther hemisphere.

The second number is called the longitude and is a number between 9 and 180 degrees. If positive, it is denotes values Eastern of Greenwhich, if negative, it is to the West of Greenwhich.

For instance, 34.4248,-118.5971 is on Norther hemisphere, and to the “left” of the Greenwhich meridian. It is somewhere in North America, to be precise.

Instead of entering all the four vertices of the bounding overlay rectangle, it is customary to enter the middle point of the rectangle, and three vertices, namely. top left, top right and bottom left. The plugin will compute the remaining bottom right vertex, automatically.

If none of these coordinates is entered, the plugin will take the center of the map as a middle point, which will show itself as an empty place over the blue ocean on the map. You will have to pinch the screen many times to see some land, most likely in Africa.

There cannot be an overlay if there is no defining boundary so entering the data into this section is mandatory.

Overlay Image Section

The main purpose of this plugin is to overlay the image onto the map. However, you are not obliged to overlay it — maybe you do not have it yet, may be you have it are don’t find it sufficiently good for publishing yet, or simply, you have already overlayed other elements onto the map and you simply do not need the entire image yet. So, here is the switch:

You may not always want to include the image into overlays

You may not always want to include the image into overlays

If you choose the first option, to include the image, you should also enter the data into the rest of the fields of this section. They are the usual fields for images, so we shall not describe them here.

Overlay Boundary Section

The beauty of the Maps Overlayed plugin is that you can overlay various lines and polygons, not only an image. From the technical standpoint of view, all these shapes will boil down to a series of points, and the software will fill in the space from one point to the next in the series. We get a line, more or less irregular, but useful in many ways. In this section we define one such series of points to be a boundary of the territory that we want to explore with map elements.

It looks stunning and is very useful if you don’t know much about the amusement park, or a zoo, or a children’s playground that you want to visit. Where a standard map might show green for the trees, you may insert the boundary of the estate and make it very clear whether to go further in that direction or not, for example.

First, you can include  or not include the boundary into the overlay.

You do not have to include a boundary, even if you have it ready

You do not have to include a boundary, even if you have it ready

Then you can select the color of the boundary:

Change the color of the boundary at will

Change the color of the boundary at will

In the third field, Overlayed Boundary, we enter the series of points to represent the boudary polygon.

The textarea to define a series of points, which in turn definea boundary

The textarea to define a series of points, which in turn definea boundary

The order of points is important. It is customary for a real boundary to be closed. In order to “close it”, you should put the last point to be identical to the first point in the series.

Each point (a pair of coordinates) must be delineated by a semicolon, like this:

34.4313,-11859890; 34.4274,-11860246; 34.4268,-11860181;

Ideally, the semicolon should be the last character in the series. If it’s missing, the plugin is smart enough to add it before further processing so you are allowed to not enter that last semicolon.

In normal entry fields, you could enter each point in one row, press Enter on the keyboard, enter a new pair of coordinates, press Enter and so on. Unfortunately, the underlying software treats this entry field as a piece of JSON text. See the warning in the following image:

A JSON warning only because I pressed Enter after the second row

A JSON warning only because I pressed Enter after the second row

So, do not press Enter to denote a new row of data, or to separate the points!

The best way to prepare a series of points to serve as a boundary is to use an editor which can show invisible characters. Here is what the text input would look like in program Notepad++ fow Windows, after turning on the option View, Show Symbol, Show All Characters.

In Notepad++ you can clearly see where the problem end of line character lies.

In Notepad++ you can clearly see where the problem end of line character lies.

Deleting these non-printing characters gives us the final string to copy to the the entry field for the boundary:

Cleare the strange characters and get string to enter into the boundary field

Cleare the strange characters and get string to enter into the boundary field

Once you click on the save button, and the green message Saved! appears, the system will have entered the boundary points. You may also want to go to the very last part of the control panel screen and click on the save button for the section JSON Configuration Data (Editable).

Let me repeat that it is of overall importance to see a green message Saved!. If the message is not green but red, the data will not be saved. This is a known bug in the control panel software. In that case, go to the first section at the top of the document, Screen Nickname, and change the nickname a bit. For example, add a digit or two and don’t worry, that will be the only place to make such a change.

 Overlay Route Section

Section for routes is identical to the section for boundaries

Section for routes is identical to the section for boundaries

This is totally the same as the overlay boundary except that instead of a boundary, you take coordinates of any path in between two points in the map. The idea is to show a kind of “driving directions” between two attractions in, say, a zoo. There could be more such routes of interest so a possible expansion for this app would be to take into account several routes instead of just one.

 Overlay Characters — Colored Circles Section

This section will show colored circles on coordinates you decide upon. You enter a color in classical #FFFFFF format, followed by a point. So, it is color, latitude, longitude, followed by a semicolon, and so forth, for as many points that you want.

Points to draw colored circles

Points to draw colored circles

Posted in Programming | Leave a comment

Tutorial For A New Version of the Location Map Plugin for iOS

Here is how to use the current version of the Location Map plugin.

As it stands, this combination works. You will be able to enter new points, connect already existing screens to them, zoom at will, tap to go to the screen from a related pin, and so on. There is only one catch: you have to enter the screen name through the Load Screen With Nickname field after clicking on the name of the element in the Location Title column.

You will notice that the Item Properties screen now contains fields Callout Window Tap Action and Load Screen With Nickname. These are new and I have added them although you did not require it. You will have to enter the name of the screen once again using the Load Screen With Nickname in the Item Properties window, click Save, then Close the window. This will return you to the starting Location Map screen and you will now have to refresh it in the browser in order for the changes to actually take place.

As a bonus, zooming now works perfectly.

This is a workaround, I admit, but it works, albeit the additional several clicks per item in the map.

Here are the screenshots that will make it clearer.

This is the starting point for the plugin. There are three locations already entered and they will appear on the iOS device without problems.

Location Map With Several Pins Already Entered

Location Map With Several Pins Already Entered

Let us enter a new location:

Location Map plugin -- entering the data for a new location

Location Map plugin — entering the data for a new location

Clicking on add will give us the following screen:

Location Map -- a new location has been entered

Location Map — a new location has been entered

Unfortunately, at the current version, this will not be sufficient. Clicking on

Loads Custom HTML Text 7 Reiki

will lead to the following screen:

Location Map plugin -- the data that we entered will not work, the address of the BT item is not right

Location Map plugin — the data that we entered will not work, the address of the BT item is not right

Fortunately, we can enter the correct file address by clicking on the name of the location in the Location Name column:

Location Map plugin -- now we enter the data through the specific screen for the element

Location Map plugin — now we enter the data through the specific screen for the element

We get the following screen:

Location Map -- specific data for onw location

Location Map — specific data for onw location

Everything seems normal, however, we now have the opportunity to properly set the address of the screen to go to. Click on Select:

Location Map -- entering the screen nickname for the second time, to get it remembered

Location Map — entering the screen nickname for the second time, to get it remembered

Now we choose from a list of existing screens:

Location Map plugin for Buzztouch -- choose the same name as already entered in the field

Location Map plugin– choose the same name as already entered in the field

We get back to the screen that we started from, seemingly nothing has changed:

Location Map -- another step in the process of entering the screen nickname

Location Map — another step in the process of entering the screen nickname

Clicking on save and then on close in the upper right corner gets us back to the starting screen of the plugin:

Location Map -- the screen looks normal, but we still have to refresh it

Location Map — the screen looks normal, but we still have to refresh it

To see the effect of the changes, we now have to refresh the screen in the browser. Once you to that, you will see the same screen as in the image above, however, now clicking on the link will lead to the proper screen.

Location Map -- clicking now the link will lead to a proper screen

Location Map — clicking now the link will lead to a proper screen

Here is what we get after clicking on the link:

Location Map -- now properly leading to the screen it was supposed to lead to

Location Map — now properly leading to the screen it was supposed to lead to


Posted in iOS, Programming | Tagged , , | Leave a comment

Low Carb Recipes And Videos (Android App) — Create Low Carb Menus On the Fly

Low Carb Recipes And Videos (Low Carb Recipes And Videos, Android app) will help you select low carb recipes to form a menu from a list out of 76 recipes preinstalled in this app. The recipes are broken into the following categories:

appetizers, breads, deserts, meat, salads, soups, beverages, condiments, eggs and cheese, poultry, seafood, and veggies.

The first option in the linear menu, however, is Selected Favourites List and you fill it by reading a description of the recipes and choosing a button Put Into Favourites.

Here is what the main menu looks like:

Easy Low Carb Recipes Android app, the main menu

Easy Low Carb Recipes Android app, the main men

Let us demonstrate the selection process, by pressing, for instance, Soups. We get the following screen, with five

Choice of low carb soups

Choice of low carb soups

Once again, let us select Cream of Broccoli Soup and see the text of the recipe:

See the contents of the recipe and eventually select it to the Favourites list.

See the contents of the recipe and eventually select it to the Favourites list.

Tapping the button Put Into Favourites leads to a pop up screen, to confirm or cancel the selection:

To put into the Favourites list or not?

To put into the Favourites list or not?

Pressing Back key leads to the main screen and from the, tapping on Selected Favourites List, we see that now the favourites list contains the latest edition, Cream of Broccoli Soup.

List of Favourite Dishes is now updated to contant the Cream of Broccoli Soup

List of Favourite Dishes is now updated to contant the Cream of Broccoli Soup

Tapping Delete in a line will erase the corresponding dish from the Favourites list, but it will ask you first:

Asks for permission to delete a dish from the Favourites List

Asks for permission to delete a dish from the Favourites List

The result is the list without the item:

The Favourites List is update and has one article less than before

The Favourites List is update and has one article less than before

You will have to manually delete all the dishes in order to start planning a new low carb menu.

Possible Improvements For the Low Carb Recipes And Videos App

Sometimes it lags, does not respond to taps, should be made very responsive in all situations.

To be able to save the chosen menu, name it, select from a list of saved menus.

Combine it with a  calendar, delegate a menu across different dates and meal times.

Have a database of ingredients, compare it to what you have in house and design meals and menus accordingly.

A search feature across all recipes.

Enter weight if you are interested in low carb diet with the goal of losing weight.

It should be made visually much more attractive, by adding images, photos of the meals the users made and so on.

Posted in Programming | Tagged | Leave a comment

Ambient Music New — A New App, With A New Video Plugin

I have a new app, called Ambient Music New:

https://play.google.com/store/apps/details?id=com.ambientmusicnew

If you want to listen to non-intrusive music while you do something else, this Android app is for you. (See the description below.)

From the programmer’s point of view, there are two enhancements to brag about. My plugin called DS_awlProOperaMusic is based on CM_awlPro from the plugin market, however, it adds the

— ability to listen to the entire playlist with one tap of a button, and it introduces

— several commands besides the video playing. You can stop and and pause the video, direct it to an absolute count of seconds within the video, you see the name of the video playing, and you can choose another video to play without stopping the current video.

Here is what the first screen looks like:

The first, the playlist screen of Ambient Musid New app

The first, the playlist screen of Ambient Musid New app

There are separate screens for vertical and horizontal layout. Let us now show the horizontal layout first.

When you tap on a music row in that screen, the video starts playing:


The video starts playing. You see both the video and the surrounding commands.

The video starts playing. You see both the video and the surrounding commands.

When you tap the thin line to the right, you get the list of all other videos to play, so you can select the next video right there, without going to the main menu at all.

The plugin supports three different styles of the player. The first is the default style:

The default style of the video player offers the possibility to play the video full screen.

The default style of the video player offers the possibility to play the video full screen.

This is the minimal player style:

The minimal style player.

The minimal style player.

And finally, there’s the chromeless style:

The chromeless style of video player.

The chromeless style of video player.

The Options button shows the main options from the main menu screen:

Additional options from the Options button on the main menu screen.

Additional options from the Options button on the main menu screen.

Pressing App Policies option will get you a screen like this:

A relatively "normal" menu screen for app policies, leading to screen documents.

A relatively “normal” menu screen for app policies, leading to screen documents.

Of course, there the vertical shots too:

Vertical view of the main playlist screen.

Vertical view of the main playlist screen.

I shall not repeat all of them, but here is another shot, to choose the next video to watch, vertically:

Vertical view of selecting the next video to play.

Vertical view of selecting the next video to play.

Re-skinning This App

This is the simplest possible YouTube displaying app.

This app lends itself well to skinning and re-skinning, and of course, the hallmark of all my Android apps — AdMob banners everywhere, with some (rare) interstitials.

This one app will not make me rich, however, a multitude of these apps will add up, little by little. If you know what people want on YouTube, and if you are careful enough to choose only videos with the standard YT licence, you can get the source code for an app like this from me, for $97, including support. I now accept PayPal.

Meanwhile, download the app, it really is peaceful and relaxing!

If you want to critique the app, let me know through email:

http://duskosavic.com/blog/contact-dusko-savic/

Here is the

Formal Description of the Ambient Music New

Relaxing music on your phone or tablet, new from 14 May 2015.
With this app, you will calm down yourself, study better, de-stress yourself, and get more sleep.

The main screen is Ambient Music. You will have the following tracks:

Three Hours of Ambient Music
RELAX TV 3 Hours of Relaxing Music, Nature Sounds, Ambient Sleep
Channel LoungeVstudio, 180 minutes

Relax Daily Project
Slow Background Music Instrumentals – soothing, calming, positive
Channel relaxdaily, 56 minutes

Guitar Music for Relaxation
Instrumental Guitar Music ? Meditation, Relaxation, Yoga, Work, Workout
Channel Jack Francis, 68 minutes

Relaxing Sounds – Zen –
Chinese Bamboo Flute with Nature Sounds

Piano Ambient Music
Bruno Sanfilippo & Mathias Grassow – Ambient music
Channel Bruno Sanfilippo, 57 minutes

Guitar — Still Waters
RELAX: Relaxing Music, Meditation Music, Sleep Music (Still Waters)
Channel Alex Bett, 57 minutes

Relaxation Piano Music
Relaxation Piano Music II – Grieg, Beethoven, Chopin & Others
Channel Kamibambiraptor, 82 minutes

=======================

Download Our Other Apps
We have other similar apps, with opera music, relaxing sounds of nature, Canzoni Italiane, Napolitan Songs, medical apps and many others.

App Policies
We do not hold copyright to the works that we have chosen for this selection of videos from YouTube.

If you want quality ambient music, this app will save you time. These are all videos from YouTube, however, personally picked and problem free. Although there is a good deal of high level Java programming going on behind the scene, you won’t notice it. To enjoy the music, just select the track you want, or, with the Play All button, play all the tracks in a row. Excellent if you study!

Download this app only if you want to relax and do something else while the ambient music is calming everything around you.

This is our choice of ambient music from YouTube. You can go to YouTube directly, that is true, but having it all in an app, within two or three taps is very convenient and beats entering naked YouTube links hands down. This app is for true ambient music lovers, not for technical buffs!

Added banner ads as well as (rare) interstitial ads.

Posted in Android, Apps As a Business, Dusko Savic Android Apps, Monetize Your App, Programming, YouTube Player API for Android | Tagged , , , , , , | Leave a comment

How To Convert an Existing App From iOS to Android

Would it be difficult to convert and existing BT app from iOS to Android?

Both yes and no. If you have been using only plugins that are available for both platforms, chances are that you will not have many problems in converting. If you have been using plugins that exist only for iOS, then

oh well, yeah, of course, right… … …

you will have MANY problems in converting from iOS to Android. Some things that are so easy on iOS are not currently available on Android. You shall either have to skip on the feature or wait for someone to develop the Android plugin or commission creation of a plugin specifically for you purposes.

First Case — The Plugin You Used in iOS Exists under Android

Within the last year I have been privately writing plugins for both sides of the coins, both for iOS and for Android, for clients. In one case, I had to convert the entire app of some 300 screens from iOS to Android. What should have been an easy port turned into three weeks of hard manual labor. For iOS they used the HTML plugin to show pages on their sites and what would be more natural than to use the same HTML plugin on the Android side? It turns out that in version 2.0 of BT that plugin worked normally for both platforms, but in version 3.0 David Book changed things on his own and made the Android plugin virtually unusable. It cannot read images from HTML pages, for instance, and will force you to download the page each time instead of showing it outright.

The problem is so severe that Smug created his own version of BT HTML plugin and (fortunately) made it available to everyone for a small amount of money. It works just as it should and so I manually re-coded some 200 pages of that app and now it is OK.

Did I have to do that manually? No, I could have dived into the server code in PHP and converted the HTML plugin into Smug HTML on the fly, only that I didn’t as that was a one time job.

How To Convert When There is No Such Plugin on the Android?

You will also have problems with any other plugin that exists for iOS and has no counterpart in Android. If you have used Aussiedra’s iOS plugin to show videos on iPhone, you will have to use CMCOFFEE’s plugin for the same thing on Android. They won’t even have identical control panels, so more problems are on the way. As I said, either do it manually, or write / commission a piece of software to port parameters from one control panel to another control panel.

No Such Plugin For Android, Sorry!

Finally, there will be a case where no Android counterpart of a plugin exists. For instance, there are no Twitter and Facebook plugins on the Android side, so when one of my clients needed it, he had to pay to develop these two plugins from scratch. He could have afforded that because his client had budget sufficient to bear the brunt of such cost, and you may not be in that situation.

Or, if you are converting a larger number of apps that use mostly the same plugins, you may want to finance that cost in view of future profits that a multitude of apps is going to bring you (one day).

In an ideal world, each and every plugin in the BT market should have both Android and iOS parts ready when being published. Then you would not even have to pose your question, you would just publish two versions of the apps all day long.

Alas, that is not the case. Most developers do not learn both Java and Objective-C for the fun of it, they want to be paid for development, so usually it is an either-or situation. There are very few plugin developers that routinely publish plugins for both platforms. Chris1 and Susane come to mind, CMCOFFE and Smug could do that if they wanted to and I could do that too except that I prefer to develop for clients directly. (I am sure there are others and I apologize for not mentioning them, but that is not the point.)

The Solution — Transcode The Existing Plugin From iOS to the Similar and Existing Plugin for Android

The long term solution would be to change the code on the server and instead of this

SAMPLE JSON Data
————————
{“itemId”:”343434″, “itemType”:”Das_video_playlist”,
“itemNickname”:”Video”, “navBarTitleText”:”Video”,
“DasVideoURL”:”http://gdata.youtube.com/feeds/api/playlists/6F688A114397EEAE”,
“DasVideolistTitleFontColor”: “#000000”}

insert this

JSON Data
————————
{
“itemId”: “948A6C3DB67AA468853926F”,
“itemType”: “CM_awlPro”,
“itemNickname”: “apro”,
“navBarTitleText”: “apro”,
“youtubeKey”: “your_youtube-key”,
“ytplaylist”: “HPcpp4e3JVpXbtgyD-k-nCmwpbbMIHOh”,
“isGrid”: “false”,
“numOfColumns”: “3”,
“changeThumbSize”: “false”,
“thumbHeight”: “20”,
“thumbWidth”: “20”
}

But that is for David Book to decide and implement, not for us, users of the system.

Posted in Android, Programming | Tagged , , | Leave a comment

How To Hire A Programmer For a New Plugin

There does not seem to be any part of these forums specially devoted to hiring a programmer, you just publish it and it appears on the top of all threads. That should be sufficient for the possibly interested programmer to contact you.

If you want to spend money for an app, I’d suggest first becoming a member here. That would give you more weight, so to speak, showing your commitment, and would also enable you to have an apps server. Without it, you are making the task of a would be programmer more difficult.

Try the Existing Plugins First

I second the idea of looking at the existing plugins and buying one or more of them before doing anything else. Once you have tried them, you will be in a better position to explain to the programmer what you want and what you do not want in your version of the plugin. And it may also happen that the existing plugins are quite sufficient in the first place, you won’t know until you tried them.

The programmer will also have that plugin and its source code, so you would be on the same page with the programmer. That is very important, as there can be no successful plugin making without a project and a goal first. You should write as detailed a project as you can, and you must state the goal, so the programmer knows when the job is finished.

Be Precise in Your Project

Sometimes a single word means a lot. Once I was hired to create a plugin that downloads an MP3 file and plays it. When I finished it, the client said: “Oh, I want it to play non stop, even when you leave the app.” So I scratched everything I wrote up to that point and had another round of coding, for the same amount of money, so to speak. (For the technically minded, the first version was written as a fragment, the second version was written as a service in Android.)

In case of an RSS plugin, the difficulties might arise if you wanted to commission a general RSS plugin, one that could read each and every RSS feed out there. For best results, you should specify the exact feeds that you want your plugin to be able to read and enter them as a part of the plugin initial specification.

How Much To Pay For the Plugin?

As for the money involved, that will differ wildly. I see people here being paid 100 dollars per plugin, then some are paid $300, some are requiring $500 and getting the deal, and if you want someone to write you an entire app with 5-10 separate and original plugins, that may well end up in lower four figures. You will never know until you start negotiating.

Unless it is someone that I have already been working before, I insist on down payment — the entire amount in advance. Again, there are no rules. In any case, be prepared to spend a lot of time working with the programmer. Usually, it is through email and Skype, but there are other channels as well. You must have your own vision of the finished plugin and may want to impress that on the programmer, however, you must also respect what the programmer has to say. Some things are not (easily) possible on Android although they may be readily available on iOS, and vice versa.
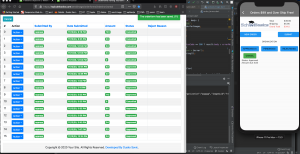
Allocate at least several weeks for the plugin to be ready for production. 3-5 days for the initial effort, 3-5 days for the coding and testing, 3-5 days for writing documentation, something like that. If there are nasty surprises along the way, it may take much longer.

What Else Can You Do To Increase the Chances of Success When Commissioning a Plugin?

You should already be proficient with various aspects of the app development cycle. I suggest you have at least one Android app published before commissioning anything, so that you and the developer are on the same page right from the start. After all, you are commissioning one plugin only and that will have to fit with the rest of the app. Programmers are often not that great at design, or do not want to get involved with it, so you will have to supply your own design for the app — the color scheme, icons, menus and options etc. The programmer has to be given an icon, they will not develop it for you just because they can.

Commissioning a Plugin Is a Part of a Business, No More, No Less

In the end, commissioning a plugin is a business decision. It must fit into your business plan for the app, and if it cannot, don’t commission anything until you can prove to yourself that the existence of the new plugin will turn tables into your favor in the app stores.

Posted in Programming | Tagged , , | Leave a comment

Button Ads — Run Your Own House Ads Without Google

There will be times when all you want is to show your own ads, no Google, no AdMob, no nothing. One solution is to run “button ads” — I called them so because, technically, they run as buttons. Yyou get to set up your own ad text and link for the destination web page. Here is an example of the button ad running in my app Musica Italiana Napoletana. (You may want to click here and see for yourself.)

Here is a screen shot in which a button ad appears, with the corresponding control panel:

 ronnie_1_device-2015-03-11-085403  ronnie_4_changed_name_house_ad
 ronnie_1_device-2015-03-11-085403  ronnie_3_button_ads_options

You may notice that the placement of the button ad is not standard in this example.

Make Money With House Ads — Button Ads

There are several ways to make money with house ads.

1) Promote your own apps or merchandise

Here, I am promoting two apps of mine, Opera Music and Canzoni Italiane. They both make money through AdMob ads, and the more people download the apps, the more they will be able to earn.

It is also important to note that these apps are related in theme, which is “Italian music” from various angles. It does not make sense to run house ads for dog food from Opera Music.

2) Run affiliate marketing campaigns

This is a huge topic in itself. For these three apps, you can try to link to Amazon.com, iTunes.com and similar shopping centered sites.

You may also use links from your affiliate network and try to sell something from the affiliate sites. If that is the case, make sure that their sites have corresponding mobilized pages, so that users of your app can order and pay directly from your app.

3) Run similar ads

You may observe what kind of ads Google is serving through AdMob campaigns and run similar ads, either directly from the vendor or through an affiliate network.

4) Place button ad wherever you want to

You can place buttons ads anywhere on the screen that you want, you are not limited to the standard sizes of AdMob house ads. You can have an entire menu of button ads, it is up to you.

One added benefit is that Google will not automatically see what kind of house ads are you serving. And of course, you can always run house ads through AdMob. My DS_menuIconsAdMob plugin is especially written to that purpose so if you want to monetize your apps’ screens through AdMob, let me know.

Posted in Android, Apps Marketing, Monetize Your App | Tagged , , , , , , , | Leave a comment

How To Get Twitter Credentials For Your Mobile App

To use Twitter to the max in your app, the first step to “create” an app within Twitter’s developer section. The address you need will be

https://dev.twitter.com/twitter-kit/android/configure

which leads to this screen:

Developers Fabric Twitter Android

Configure your Twitter app for Android

Read that page to learn what you need to specify in order to create an app with Twitter.

Clicking on the link leads to this screen

Screen to add a new app to Twitter or work with the existing ones

Screen to add a new app to Twitter or work with the existing ones

My was called Share To Twitter, so clicking on that, I get access to my app’s details on Twitter. You will have to visit all four menu options, Details, Settings, Keys and Access Tokens, and Permissions and dully generate and enter all the information required. On the following image we see only the last option — it is important to enable the third option Read, Write and Access direct messages.

app, Twitter, access rights

Set up wide access rights for your app on Twitter

How To Use These Parameters?

To publish to Twitter (or, publish using Twitter), you may use my Share to Twitter plugin, described here. This is only for Android users. This approach uses Android intents and needs not keys, access rights and so  on. Ideal if you already are a mobile Twitter user and have their “original” app already installed.

If you use another of my plugins, called Menu Share, you can also post to Twitter and eleven other social sites, without the need for keys etc. provided you once enter the login and the password.

You will need the keys from the above screens if you want to use an external library such as Twitter4J.  Finally, in the last quarter of 2014 Twitter rolled out their integrated approach to mobile apps building, called Fabric. Now (February 2015) their entire developer site is made into “fabric” and there is no escaping using it. Most examples are also for Android Studio, so if you are still using Eclipse, you may feel like out of luck.

android, fabric, twitter, gradle

Fabric for Twitter is mainly orientated towards, Android Studio, using gradle etc.

For Fabric, which is now a formal library for building Twitter apps, as well as for Twitter4J, you will need the keys and access rights described in the above image.

Posted in Twitter apps | Tagged , , | Leave a comment

Share To Twitter — Android Plugin To Post To Twitter

Almost all apps nowadays post to Twitter, Facebook and other social sites. The reason is that in iOS, it is relatively easy to post to social sites, and so was moderately difficult to write plugins to that end. On the Android side, there is no such support so here is for the first time an Android plugin that posts to Twitter. A similar plugin for Android only is also available for Facebook, and there is a third plugin, called Share Menu, that can post to twelve different social sites, provided you first enter the password for each site that you want to post to.

Most people that want to post to Twitter and Facebook will already have their respective “native” apps installed, so the user only has to tap an icon and post to these sites almost automatically or with a minimum of fuss. In this post we concentrate only on posting to Twitter, as posting to Facebook has its own quirks.

How To Post Predefined Text, Image and Link to Twitter

Normal usage for this plugin is to be called from an icon on an action bar. Let us say that you have a plugin such as HTML Pro or HTML Pro AdMob, which is HTML Pro modified to show Ad Mob banners and interstitial ads.The HTML Pro screen may contain information about a location that you may want to visit, a shop to buy shoes from, a cinema to watch movies, and so on. You want to help your user to post the shoes shop to Twitter, so you command that the action bar of the HTML Pro screen contains an icon to post to Twitter. In control panel of the HTML Pro screen there is a field that looks like this:

show_twitter_full_menuIf the first option is activated, the Twitter icon will be shown in the action bar, as in this image:

Twitter, Twitter icon, post to Twitter, HTML Pro

Selecting Yes in the field will make the Twitter icon show in the action bar of the HTML Pro screen

Now, tapping or clicking on that icon will activate the Twitter app and the following screen will show:

download image for Twitter post

The image is being downloaded to post to Twitter, if there is one in the control panel

If in the field Twitter Image Url there is an entry, the image will be first downloaded and then the “post to Twitter” screen will show:

Twitter app

The Twitter app is acitvated, the text is predefined as is the image, but you can change it all on the fly

Tapping on the blue button Tweet, will send the contents of the screen to the Twitter.com and there will appear the message with the image:

Twitter, post to Twitter

The contents of the Android screen were posted on Twitter, image too

How To Define the Text, Link and the Image to Post to Twitter From Your Android App Control Panel

The control panel for the HTML Pro screen also contains the fields for the elements of the

Twitter, action bar, Android, icon

Fields to populate the Twitter post

Here is what these fields might look line in practice:

Twitter post

Fields to define the link, the text, the image and “return to” screen within the app

If these fields remain unpopulated, you will get a chance to write text into the app and then, by pressing the Tweet blue button, send it to Twitter. Any combination is possible, no link, no text, no URL address, but the field Twitter Next Screen Item Id should always be populated by an item id of the screen that the app will continue with after the “underlying” Twitter app goes back to sleep.

In this case, the contents of that field points to the “Main Menu” screen, the one that the app starts with. It can be any other screen, really, in some cases, that might be the “upper” menu from which the HTML Pro screen was called.

If this field is left empty, the app tends to be unusable, because  the Tweet screen and the screen before it create a vicious circle, which can be broken by using, say, the menu of the app to go to the home screen.

There Can Be Only One Share To Twitter Screen

There needs to be exactly one and only one instance of the Share To Screen plugin in the app. The HTML Pro plugin, the HTML Pro AdMob plugin and others just transfer the parameters to the Share To Twitter screen, which then interprets them and posts to Twitter. Also, note the item id of that unique Share To Twitter screen and enter that value into the auxiliary plugin called DS_auxiliary.java.

Here is what its relevant part looks like:

plugin, global values, singleton Java

DS_auxiliary plugin acts as a singleton, making certain values global for the ap


Posted in Programming, Twitter apps | Tagged , , , | Leave a comment

How To Change the Color of the Background in Action Bar For Android

There is an excellent online resource for creating a simple, attractive and seamless custom action bar style for your Android application:

http://jgilfelt.github.io/android-actionbarstylegenerator/

Here is the code on GitHub:

https://github.com/jgilfelt/android-actionbarstylegenerator


Posted in Android | Tagged , , , | Leave a comment

How to Change the Color of Text in Action Bar for Android

Up to now, the color of the navbar text was always the same in all Buzztouch apps for Android. In this document, you will see how to change the text to one or more colors.

This will be the result of our coding:

navbar text

From black navbar text, to red, to multiple color text

The version used here is Buzztouch Android 3.0, with fragments.

To change the color of text in action bar for Android, find the following line in file BT_activity_host.java:

if (actionBar != null) {

In my version of BT_activity_host.java it was around line 1256, however, various versions of this file exist and the line numbers given here may vary. The line you are looking for is in function

public void configureNavBarAndBackgroundForScreen(BT_item theScreenData) {

which for me was in line 1226.

Now let us change the color of the navigation bar text. First we shall find the following text, right below, around line 1259:

// set title...
actionBar.setTitle(navBarTitleText);

The text we want to color is in variable navBarTitleText. There are two ways of entering color:

1) Using an HTML class

The text will be transformed from pure text into HTML text, and we can enter the colors there:

actionBar.setTitle(Html.fromHtml("<font color=\"red\">" + navBarTitleText + "</font>"));

The text will be red when you run the app next. If needed, you can use hex values for color, like this:

actionBar.setTitle(Html.fromHtml("<font color=\'#0000CC\'>" + navBarTitleText + "</font>"));

The text will again be red. Please note that these two lines of Html are not identical character by character, be careful when you paste one or the other into your class.

This approach is idea of forum user CMCOFFEE.

It may well happen that this is the first time your project needs the Html class from Android Java. If there is a red mark on the left of the line Eclipse, you need to import that class into the project. There are several ways of doing it:

a) Enter the following line into the import section of your class:

import android.text.Html;

b) Or, in Windows, press Ctrl-Shift-O to import it automatically.

c) Or, hover over the red mark with the cursor of the mouse and import the needed class from there.

java, red mark, eclipse

Red mark here shows us to import the Html class from Java libraries

That’s all there is to change the color of the navbar!

2) Using spanned arrays

This is a technical name for using a bit of code in Java. The procedure boils down to two consecutive Copy and Paste routines. Once again we need the line

actionBar.setTitle(navBarTitleText);

and find it around line 1256. Comment it out and put beneath it the following lines:

String taraba = "##";
int color = Color.CYAN;
// color = BT_color.getColorFromHexString("#d3d3d3");
CharSequence s = setSpanBetweenTokens(taraba + navBarTitleText + taraba, taraba, new ForegroundColorSpan(color));
actionBar.setTitle(s);

Then, press Ctrl-Shift-arrow down on Windows and go to the end of the current method, which should be

configureNavBarAndBackgroundForScreen

After that function add the following code, taken from here:

http://www.androidengineer.com/2010/08/easy-method-for-formatting-android.html

//==================================
public static CharSequence setSpanBetweenTokens(CharSequence text, String token, CharacterStyle... cs) {
// Start and end refer to the points where the span will apply
int tokenLen = token.length();
int start = text.toString().indexOf(token) + tokenLen;
int end = text.toString().indexOf(token, start);
if (start > -1 && end > -1) {
// Copy the spannable string to a mutable spannable string
SpannableStringBuilder ssb = new SpannableStringBuilder(text);
for (CharacterStyle c : cs)
ssb.setSpan(c, start, end, 0);
// Delete the tokens before and after the span
ssb.delete(end, end + tokenLen);
ssb.delete(start - tokenLen, start);
text = ssb;
}
return text;
}
//==================================

(The above function may go anywhere in the class, but it is just convenient to place it below the place it is used in.)

The function will hunt for the delimiter set in variable taraba and will insert the color codes into the string.

That’s it. Then next time your run your app, its action bar text will be in CYAN. Change the line

int color = Color.CYAN;

to whichever the color you want, including hex codes. You can use the function </>

getColorFromHexString(String hexString)

from BT_color.java, using it like this:

int color = BT_color.getColorFromHexString("#d3d3d3");

and so on.

Pros and Cons

This file, BT_activity_host.java, is one of the fundamental classes for Buzztouch app development system for Android. Change it at your own risk. If you only apply changes described here, everything will be OK, however, bear in mind that if you apply this hack in one app, it will not be transferred to the next app you are making. Make a list of such changes so that you know which files to visit routinely when you start a new app for Android.

This hack will change the color of the navbar text globally for the entire app. This is what you usually want, however, if you wanted different colors in different plugins, this solution will not fit the bill. Ideally, the Buzztouch core system should be changed so that in each plugin you have (or may be able to install) particular color of the navbar text. This may happen in the future, but currently, this hack should be sufficient.

How to Complicate Your Life Further — Using Variables

You may want to create a special variable that will hold the value of color. Later it would be easier to change it, document it and maintain it.

Here is how you could do it even if you do not know or like Java.

String colorString = "red";
String originalString = "<font color=\"red\">" + navBarTitleText + "</font>";
actionBar.setTitle(Html.fromHtml(originalString));
String s1 = "<font color=\"";
String s3 = "\">" + navBarTitleText + "</font>";
actionBar.setTitle(Html.fromHtml(s1 + colorString + s3));

The first line introduces a new local variable colorString. The next two lines introduce another string, called originalString. These two lines do nothing on the outside, I include them here only to show the genesis of code. The last three lines tear originalString into three pieces, variables s1 and s3 are constant, and variable colorString is in the middle. In this way, changing the value of colorString will also change the color of the navbar.

Several Colors in the NavBar

If navBarTitleText contained several words, it would be possible to give each of them their own colors. Here is the code:
String colorString1 = "red";
String colorString2 = "blue";
String s4 = "<font color=\"";
String s5 = "\">" + "Main " + "</font>";
String s6 = "<font color=\"";
String s7 = "\">" + "Menu " + "</font>";
String temp2 = s4 + colorString1 + s5;
String temp3 = s6 + colorString2 + s7;
String tempAll = temp2 + temp3;
actionBar.setTitle(Html.fromHtml(tempAll));

Example:

This is a navbar without color modification:

default theme, buzztouch apps, navbar color text

This is the default color of the theme in Buzztouch apps

This is the red variation:

red, navbar text

Navigation bar text now is colored in the red, as per the code shown in this text

And this is an example with two colors:

navbar text, text color, html

Text in the navbar can be in different colors, through HTML and variables for color

The sky is the limit here!

How to Contact Dusko Savic

Dusko Savic (DuskoSavic.com) has authored 25 books about programming and software. One of his sites was visited more than 600000 times since 2005. With Buzztouch.com since 2011, Dusko is equally at home with Java for Android and Objective-C for iOS. In 2014, he has created about a two dozen new plugins which he uses in his own apps and/or writes directly for clients.

You can see his Android apps here. His flagship app is Opera Music, download it and enjoy the best opera arias from the best performers in history. See his AdMob plugin in action there, an elegant way of making passive money with Android apps.

If you want your apps to make money, let me know. If you want me to

— code a plugin or an

— entire app for you, either for Android or iOS,

click here to send me an email.

Link to the blog: http://duskosavic.com

Link to the contact page: http://duskosavic.com/blog/contact-dusko-savic/

Link to the Play Store: https://play.google.com/store/search?q=dusko%20savic

Posted in Android, Contact Us, Dusko Savic Android Apps, Programming | Tagged , , | Leave a comment

Make Money By Integrating AdMob Ads Into Your Android App

If you are like me, you love making apps… the excitement of choosing the right title, gathering material to publish, creating a new and fun user experience… And once you are done, your thoughts meander… ok, great, now how do I make money with all this!?

Why Did I Choose AdMob?

Because Google owns it, because Google owns Android and because Google owns YouTube. A few years ago I had a very good experience with AdSense and some of my sites (Google owns traffic and Google owns AdSense too), until Google stopped sending traffic to my site because one of its infamous “slaps”. So why go with AdMob, which is for apps what AdSense used to be for sites!?

Now there are competitors, that’s why. The biggest competitor is Apple with its App Store, meaning, if Google stops loving my apps, I have elsewhere to go. Also, there are about 40 large and up to 150 not so large sites for distribution of Android apps which are independent from the Google’s Play Store.

I can distribute my apps from my own site if I wanted to, and then the apps can “sell” my other apps on their own, which sites just cannot do.

Finally, AdMob is the largest ads network for apps, they pay always on time, have large inventory of ads and so I feel I’m safe. If they do not like my apps any more, I should be able to switch to another ad network with a turn of a switch, as they say.

Integrating AdMob Code

The basic Java code for AdMob ads took me about three months to write and make perfect. I started that mid 2014, just when Google switched from an older version of AdMob to a new version. About 95% of articles on sites were about the old version, so it really took me weeks and months in the end to get it right.

To complicate things further, the relatively new version of Buzztouch, which is still of interest today, 3.0, works with fragments only. If you must have an activity in your app, you can, but the spirit of BT 3.0 is – fragments. Ok, but it meant additional agony for coding. For instance, if you have an activity, in most places you will use a variable called this, which is an object-oriented way of saying “all the variable in this class”. With fragments, it must be a context, i.e. a variable of type Context, and that usually is

Context context = getActivity().getApplicationContext();

— however, in some cases, it is only the first part, getActivity().

Things like that slowed me down for weeks, until I started getting them right the first time.

Buzztouch Control Panel Concept Applied to AdMob

The beauty of Buzztouch is not in the eye of the beholder but is in its control panel. Each Java class has its control panel and the class and the interactive panel together create a plugin. So, if your app is published in Play Store and you want to expel one ad agency and switch to another, how can you do that? For other apps, that means republishing the app, which can be a tricky process in itself. With Buzztouch control panel, you just set a parameter, save its new value, the app automatically refreshes itself and voila! new ads are now appearing.

Within AdMob plugins, you have two kinds of ads, banners and interstitial ads. They are completely different, both from the inside, technically, as well as from the outside, how they feel to the user. They are two different ways of programming, however, I put them together into the same plugin and then give the user parameters in the control panel to play with.

Here is what the control panel looks like:

AdMob, ads, advertising in apps

Parameters in control panel for AdMob ads

Banner Ads for Admob and the Control Panel

The three upper most parameters are about banner ads. Here is what they mean:

Activate Banner Ads

Decide whether you want the banner ads in the app to be active or not. Acts as a general switch. If no, none of the ads can be shown. If yes, show type of ads that you want to, exactly one at any time. Deciding which type of ad to show is in another field, whichAdToShow. You can choose banner ads to appear either at the top or at the bottom of the screen.

Admob, advertising in apps, banner ad

How to activate banner ads in the app

Top Banner AdMob Code

Enter the code for banner AdMob ads that you have gotten from AdMob.com for your app and/or specifically for this screen.

This will be the code for the upper banner ad, provided the “underlying” plugin supports such a placement. For instance, Menu with Image does support such a placement.

Here is what it looks like on the main menu:

admob, ads

Banner ads top of the main menu

Bottom Banner AdMob Code

Enter the code for bottom banner AdMob ads that you have gotten from AdMob.com for your app and/or specifically for this screen.

So you will have two different banner ad codes, if you want to show both.

Interstitial Ads for Admob and the Control Panel

Here are the parameters for interstitial ads:

Interstitial Ads Frequency

If 0 is chosen as the interstitial ads frequency, no ad is shown at all. In other words, if you do not want interstitial ads to appear at all, put 0 here.
Choose 1 to show an interstitial ad each time the plugin is executed.
Choose 2 to show an interstitial ad every second time the plugin is executed.
And so on. You may want to put an even higher number here in order not to alienate the visitors of your mobile app.

admob, interstitial ads

Interstitial Ads Frequency — whether to run them at all, and at which frequency

Interstitial AdMob Timing (in seconds)

After how many seconds will the next interstitial ad appear in the app?
Put 1 for 1 second, 60 for one minute, 180 for three minutes and so on.
If you do not put anything here, the default is 180 which will show a new interstitial ad every three minutes.

admob, interstitial ads, app

Interstitial Admob timing in seconds

Interstitial AdMob Code

Enter the code for interstitial AdMob ads that you have gotten from AdMob.com for your app.

Once again, this will be another code for another type of ad from AdMob site.

General Parameters For Showing AdMob Ads in the App

Which Ads To Show

Choose one SDK and one company that you want to work with in the app.
You can change it later, dynamically.
In this way you can change ad agencies on the fly, without recompiling and resubmitting the app again.
This presupposes that your app was shipped with the all needed SDKs in the first place.
If field Activate Ads was set to NO, none of the ads will show up, regardless of what you select from the list below.

admob, ads, advertisin in apps

Which Ads To Show in the app

These options are taken from the Buzztouch site, when one wants to download the source code for the app. Some of these may not be with us in the future, for example, here Scringo is still shown in spite of its demise in the last weeks of 2014.

Truth to be told, only AdMob is working now. That may change in the future!

Test Ads On or Off

Set to Yes if you want to show test ads only.
This is secure and should be done while you test that app and the ads.
At least in Google AdMob, clicking on your own ads can cost you the loss of account.
Set to No to make money, i.e. to show real ads.

admob, ads

Test Ads On or Off
Set to Yes if you want to show test ads only.

Here is what a test AdMob ad looks like:

admob, ads, advertising in apps

Test banner ads in app Opera Music

This setup of the ads enables one to have maximal flexibility. You can show no ads at all, only at the top, only at the bottom or both; interstitial ads are also on or off. You can show them, say, every fifth time the user enters one type of screen, or every 9 seconds or in combination.

How To Make Money With AdMob Ads In Your App?

After you install them and take a new AdMob ad code for each place in every screen that you show ads at, start counting. Soon you will know how many ad views your app has, how much money each ad has brought. You will see all that in the AdMob.com interface, or, you can also watch it at the AdSense site, if you happen to show AdSense ads as well.

In my experience, interstitial ads bring no money at all, probably I am too agressive. They say good results with interstitial ads can be achieved if you show them at natural breaks in the app, or, say, only once per app, when the user is leaving the app.

The best money maker is at the very first screen that the user sees. In my apps, that is the main menu. You should make more money if you managed to show more ads, which was the reason I added the option to show bottom banner ads, and then to show both the top and bottom ads at the same time.

Google is my friend in all this. I started showing ads in a new version of Opera Music app on the 10th of September 2014. At first the ads were off target, but in December, the ads were much more targeted per country, so Google both has large inventory of ads and optimizes their placement and timing as well.

How to Contact Dusko Savic

Dusko Savic (DuskoSavic.com) has authored 25 books about programming and software. One of his sites was visited more than 600000 times since 2005. With Buzztouch.com since 2011, Dusko is equally at home with Java for Android and Objective-C for iOS. In 2014, he has created about a two dozen new plugins which he uses in his own apps and/or writes directly for clients.

You can see his Android apps here. His flagship app is Opera Music, download it and enjoy the best opera arias from the best performers in history. See his AdMob plugin in action there, an elegant way of making passive money with Android apps.

If you want your apps to make money, let me know. If you want me to

— code a plugin or an

— entire app for you, either for Android or iOS,

click here to send me an email.

Link to the blog: http://duskosavic.com

Link to the contact page: http://duskosavic.com/blog/contact-dusko-savic/


Posted in Programming | Leave a comment

How To Share a Link from My Android App to Facebook

The most important link to learn how to share links from your Android apps to Facebook is this.

Here is the Getting Started Guide for Facebook. Since I had previously already had created a Facebook app, imaginatively called “Test On Android”, I just had to download the SDK. Unzip, and take it from D:\Downloads\facebook-android-sdk-3.21.1(1) on my local disk. From Eclipse, File Import, but without copying the SDK physically into the workspace, as per Facebook instructions.

Not much luck, Facebook files came setup to Android 9, which Google does not seem to offer any more. However, FacebookSDK was installed safely, asking for version 10 or 2.3.3, which is totally OK. Now I go to my current app, called ShareMenuDemo and import the jar file for Facebook:

add_facebooksdkClick Apply to confirm and that’s it, no red marks in Eclipse, everything normal. Now put the app identifier into the strings.xml and androidManifest.xml files, like this:

The placement of Facebook app identifier in the Android Manifest file

The placement of Facebook app identifier in the Android Manifest file

 Link to read more about Facebook Dialogue.

Facebook SDK for Android Reference


Posted in Programming | Leave a comment

How To Integrate Twitter Into Your Own Android Apps

I searched for the key phrase “develop twitter app android emulator” and decided to use the following page to start:

http://www.tutorialspoint.com/android/android_twitter_integration.htm

Additional pages that were needed are:

Create a new twitter application at https://apps.twitter.com/app/new

http://twitter4j.org/en/code-examples.html

http://twitter4j.org/en/configuration.html

Continued on the 11th of December 2014

Interesting link, because I need to send both text and an image to be posted on Twitter.

That leads to this piece of source code on GitHub.

Continued on the 14th of December 2014

Having just finished the Share To Facebook plugin for Android, I installed the Twitter app into the emulator.

Here is a good link how to download anything from the Play Store. In the end, it boiled down to this site:

http://apps.evozi.com/apk-downloader/?id=com.twitter.android

The Twitter app downloaded without real problems; it gave warnings but I was able to just use the downloaded file from the \temp\ folder. Finally, the line

adb install com.twitter.android

did the job. Twitter works on the emulator and I can test my new Share To Twitter plugin.

Posted in Twitter apps | Tagged , , | Leave a comment

How To Install Facebook App On an Adroid Emulator

I want to install Facebook app on Android emulator / simulator to be able to test new plugins that I write. Searching for phrase “install facebook app android emulator” I decided to listen to this source of knowledge:

http://stackoverflow.com/questions/15760402/how-to-install-facebook-api-on-emulator-in-windows-7

After clicking on this link, I agreed to become a Facebook developer. Then I gave a name to the app that I will be making, it gave a Facebook app ID, and then I downloaded the Facebook SDK. The file was called facebook-android-sdk-3.21.1,

Facebook installed on Android emulator

Install Facebook application into a running android emulator, from a Terminal (CMD) screen

then I also downloaded the version for the emulator. It is called Facebook-11.zip and will actually contain only one file, Facebook-11.apk. And voila!, I have Facebook app on my emulator!

Android emulator can run Facebook app

Facebook App Starting

I’ve got Facebook app running on my emulator. It is not running very smoothly, or not running at all sometimes, but still, this is what I wanted and this is what I’ve got.

Posted in Android, Facebook apps | Tagged , | Leave a comment

From Kindle Ebooks to Android Apps — Case Study of Six Ebooks of Mine

Currently I have 17 apps published in Dusko Savic Google Play account. Six out of these 17 titles already live their electronic lives in Kindle store. Just as a point of reference here are the links so the you can compare the app versions against the Kindle versions:

Kindle account Play store
1) Homepathic Remedies for Teething in Kindle store Teething
2) Cure Acute Otitis Media and Glue Ear Without Antibiotics and Save Your Child From Adenoidectomy Cure Otitis Media
3) Eczema in Children: Short Guide To Efficient Treatment Eczema In Children
4) Perfect Food For Your Child Perfect Food
5) Perfect Diet: Turn Your Obese Child into an Agile, Joyful, Well Balanced, and Calm Minded Kid Perfect Diet
6) Homeopathic Remedies for Baby Colics Baby Colics

I described here how I developed software to turn Kindle HTML files into apps, literally under one minute per conversion. In total, it takes under one hour from receiving a HTML file to have it published in the Play store, provided everything else is in place.

If you are interested in this kind of conversion, contact me here.

Posted in Apps As a Business | Tagged , , , , , , | Leave a comment

Best CMS To Have Members, Forum and Chat

What would be the best software to build a site with members, forums and chat?

Here is my answer.
You have many options and here I will outline just a few.

1) Use WordPress

It is the most popular CMS (Content Management System) in the world, with some 15% of all sites built on it. It is easy to install, easy to setup (it gets a little technical but you will have dozens of sites to help you out immediately), and you can all do it on your own.

Basic WordPress will not do what you want now, but you will be able to install plugins and themes, which is another name for pieces of software that fit into WordPress and enhance its capabilities. There is also something called BuddyPress, which will enhance basic WordPress to the level of a full social media site.

bbPress would be the name of the forum for WordPress but there are many others.

With WordPress, possibilites are endless but you will have to experiment. Out of the box, WordPress will fall short for you want.

2) Joomla

Joomla would be the best choice for what you want: it has membership functions right in, and you can add additional software to it via so called extensions. Most extensions are free and there are paid ones, which usually are complete software solutions on their own. In Joomla, you will be able to have many levels of users, user groups and you will be able to control who has access to what. I have one membership site like that, where I sell courses in astrology and energy healing and it functions just right.

There will be some steep learning path with Joomla, especially if you have never seen it in action. But it is free, it adapts to various screen factors automatically (meaning the site will show well on mobile devices) and so on.

You will be able to add forums (the best is called Kunena), chats and so on for free, just roam through the extensions site on joomla.org.

3) Make it on your own.

That what I currently with do PHP, a framework called CakePHP and a plugin called User Management. PHP and CakePHP are free, the plugin costs $50 but gives me exactly what you want: ability to create new user accounts, manage them in the background and create any style of site that I want. It is also much less prone to hacks and attacks than WordPress and Joomla, because hackers all over the world attack those two easily and joyfully.

For forum, chat etc. you would have to find already existing plugins for CakePHP or write your own.

There is a steep, steeep learning curve for CakePHP but once you get it, you will be able to produce unusual but optimized sites at will.

The verdict? In your case, Joomla.

P.S. If you want to compare various CMS systems, try the following link:

http://www.cmsmatrix.org/

Posted in Programming | Tagged , , , , , , , | Leave a comment

Improving Click-through Rate for Banners in Your App

There were 12,000+ banner requests at one app but nobody clicked on a banner. How to improve this situation?

Here is my answer.

It must be improved, or you are out of the business.

1) Are the ads that are currently showing relevant ?

I’d try to see which ads are actually showing for all those requests. Probably, these requests come from banner ads that appear on every page of the site and are, thus, untargeted. It is better not to serve untargeted ads at all.

2) Steer your visitor towards offers that will convert better

You want money from your app and it is up to you to think, imagine and concoct what your users want BEYOND your app and its content. Think of your app as of a magnet to get the visitor into your app, but once there, what else can you offer your visitor? Much will depend on the availability of digital rewards, so to call them. If you have a music app, showing ads to buy a CD would not really work in this day and age. Instead, go to amazon.com, key in keywords for you app name and see what amazon has to offer. I’m not saying here that you should become an affiliate of Amazon, although it is possible, just to see what you demographics want.

3) Use eBay to get ideas what else to offer / sell

You can also go to ebay and see what your demographics buys there. See what you can offer them while in your app!?

4) Take offers from large affiliate networks

Go to any large affiliate network, say Commision Junction and ShareaSale, and see what can you offer your visitor from these sites. Again, digital content will work the best, but coupons or vouchers are also a game.

5) Gain intelligence on web sites in your niche

Go to web sites for your keywords and see how they monetize the traffic. Can you take one offer from these sites and turn it into a money maker?

The Golden Rule of Internet Marketing: give your visitor what they want. If you have an app about thyroid diet, sell them the pills for that diet that they will buy month after month. They buy the pills, you get the affiliate commission, month after month.

Treat your app as you would a site — just a meeting place, where the visitor is being transferred from one reality to another, and you get the commission in the process (sometimes).

6) Run your own ads!?

You may also want to run your own ads. (The easiest way would be to use splash screen as an advertisement.) Then change the offers and track. Running this kind of ads would be similar to running an AdWords campaign. First you have to lure them into clicking your front ad, then tell them the benefits, then the actual sale etc.

7) Whatever you do, implement a tracking scheme.

This may be your own code, or Google Analytics or any other kind of tracking specifically made for apps. But you must have one, otherwise you will be lost; people will come to your app you will not make any money, as is the situation right now.

Posted in Marketing, Monetize Your App, Programming | Leave a comment

What Your Site Can Do To Promote Your Apps Business

This is a short guide and reminder on how to use a site to promote your apps business.

1) Just a bit more general remark here. Whatever you do, do with from the security stand point of view. Always have the latest versions of the software you use.

2) The home page of the site should be reserved, well, for the site itself. You should put WordPress or Joomla there and explain people what you do. If it is a .biz or a .com site,  people will think you mean business or have something commercially to offer. Even if you have only published one app so far, it still pay handsomely to treat this venture as a real business from the very start.

3) Related to 2). Let your site be a showcase of your apps, your willingness to work with others on their own apps, for the services that you are going to provide and so on.

4) You should also have a contact page, Twitter and YouTube accounts and a fan page on Facebook. Publish their links prominently on each page of the site. Each app of yours can also have its own fan page on the Facebook.

5) The more videos you have on YouTube, the better. Also publish the videos in your blog posts so that the visitors can see in advance what kind of business they can do with you. Each video should have link towards the app in the app store, so that they download the app right away.

6) You have a site now, treat it as a magnet for visitors that should be interested in what you do. At the very least, whenever you publish an app, make a post on the blog of the site, with links, videos and all. Make the ultimate benefit of the app reflect in the title of the post about the app.

7) Each app should have a link to your contact page so that people can send you messages, offer you a job or whatever.

8) Create a mobile version of the site. On WordPress or Joomla that should be as easy as picking a good plugin or extension.

9) Create a QR code for everything, the site, the apps, everything. Let people find you in that way too. Not many will use the QR codes, but still, someone will. Then put the codes on your Facebook fan page.

10) You are in the apps business so create an app that mirrors the site and showcases what you do. Use the material that you have from the site and other apps that you have published and put it in one app. Treat that app as an ongoing salesman. When someone becomes interested in what you do, point them to your app, not to your site. But in the app, teach them what your services can do for them, do not just put links for apps and downloads.

11) Put up an entry form and gather email addresses from the visitors so that you can use email marketing later. This will be the most important function of your site, to remain in contact with the visitors that visited the site only once. Offer them some kind of goodies to download in exchange for the email address and let them unsubscribe easily if they want to.

Some people will only be interested in a new app that you are about to produce, so create a special email list for just that purpose in mind. When you publish the app, send them the email and the downloads will start right away.

12) Create page on the site with only the links to the already published apps of yours. Call it Our Apps At a Glance, a Catalogue of Our Apps or something similar and update it when a new app is published.

13) Put a list of all your apps into each eapp that you are producing, as well as the link to the site. Since you are already having a mobile version of the site, it will show well on mobile devices.

14) When you publish a new app, make it so that it is automatically shown in the list of apps in all of your apps. Apps have a unique ability to advertise themselves. The more apps you have, the bigger you own little inhouse advertising capability is.

15) When you publish a new app, let it appear as the first screen in all of your apps for a day or so. The downloads of the new app will just soar right from the start.

This so good advice that I will now turn it into a to do list and start implementing the missing pieces right away, for this site, DuskoSavic.com!

Posted in Dusko Savic Android Apps, Marketing | Leave a comment

27 Alternative App Stores for Android Apps

This entry is part 2 of 2 in the series Apps Marketing


Amazon App Store

AndAppOnline

AndroidPit App Center

Appland

Appslib

Soc.io Mall

Getjar

SnappCloud

F-Droid

Mobango

Mobile9

Moborobo

Opera Mobile Store

AppTown

Pdassi

Apptoide

SlideME

Anzhi

Appchina

D.cn Games Center

gFan

HiAPK

N-Duo Market

PandaApp

Taobao App Market

Tencent App Gem

Yandex

Posted in Android | Tagged , , , , , | Leave a comment

YouTube Video Marketing For Your New Android App

This entry is part 1 of 2 in the series Apps Marketing

If you want a free channel of marketing for your new app, you should publish a video about the app. It is easy to make one such video, perhaps by combining the screenshots from your app, by paying someone on Fiverr to do it and so on.

Once the video is published, you should add a link to the description of the video, pointing to the app in the store so that people who see the video can easily download it.

Here is a link to a simple video I did for my Android app, called Rihanna Lyrics Complete:

https://www.youtube.com/watch?v=c-9WncJJZy8

In the following image, the red arrow shows the link.

Show the position of the link towards the app in the app store

The red arrow shows where the link is, in the description of the video.

SEO Optimizaton of the YouTube Video For Rihanna Lyrics Complete

There is some SEO optimization going on — I put the words “Android app” into the title so that someone who searches for an Android app for Rihanna can find it a bit easier. There are a lot of keywords about Rihanna underlying the video, but of course, the visitor cannot see them when watching the video.

In the following image, the red arrow shows where the link to the app store goes when editing the video in video manager of your channel. The blue circle shows the keywords used for SEO optimization of the video.


SEO optimization of the YouTube video, by adding the link to the app store and the SO keywords.

The red arrow shows where to put the link to the app store, while editing the video in video manager of your YouTube channel. The blue circle contains the keywords for SEO optimization of the video.

Show the Video in the Google Play Listing

I also put the address of the video into the Google Play store listing, so people can see in advance what the app looks and feels like, before the downloading. They may not like what they see so they do not download it and that is fine — it cuts down the number of negative reviews.

Play store listing takes the video from the YouTube and makes it watchable directly on the site.

How the video from YouTube shows in the Google Play store listing.

Once you click on the image of the video, it gets shows directly on over the store listing, as this picture shows.

YouTube video running in the Play store

A video from YouTube running directly over the Play store listing, so that the visitor can immediately see whether the app is for them or not.

The very name of the video is also chosen in accordance to the more popular keywords about Rihanna. If you see people searching for something at Google and do not find an app for that in the store, you are more than welcome to create one. If you have an app in the store and the keywords used all over are right, Google will easily show you in the SERPs (search engine results pages), increasing the number of downloads of an app.

So, does this work?

It seems it does. Here is the screen shot of Google listing for keyword “rihanna lyrics app”:

The video for an app is ranked No. 6.

All the entries in the listing are from the Google Play store, pointing directly to the apps there. No. 6 is my video, from YouTube. Of course, I’d prefer that the entry directly to my app in the store is shown, but this course is about marketing a new app, so for now, I’d be quite content to have any kind of link to my stuff, videos or not.

Where Did the Keywords Come From?

I use two pieces of software for keyword analysis, Micro Niche Finder as well as Market Samurai. Both are excellent, always fresh and accomodating to their main source of information, Google. Here is what Market Samurai had to say about “Rihanna lyrics”:

More than 450 searche of Rihanna lyrics per day is a lot of searches.

Rihanna lyrics gets 457 searches PER DAY.

We also see that Market Samurai has selected 27 additional keywords according to its Golden Rules, which might make a good page on the site or in an app — OR — might make a good title for a new video which would link to your app.

If you want to make an app and are not quite sure whether there is demand for it, you may ask me to do the preliminary SEO research for you.

Posted in Apps Marketing | Tagged , , , , , | Leave a comment

Rihanna Lyrics Complete Free Android App

https://play.google.com/store/apps/details?id=com.rihannalyricscomplete
Download the  Rihanna Lyrics Complete Android app from the link above.

Lyrics for all Rihanna songs from Music of the Sun in 2005 to Unpologetic in 2012, plus 35-odd singles.
In addition, you will be able to download ringtones of Rihanna’s, should you want to.

This is a free app, so it is supported by occasional ads.

The purpose of this app is to gather all Rihanna lyrics and it contains no pictures of Rihanna, sites, forums etc.

Here are the albums with the songs:

Music of the Sun (2005)

Pon De Replay; Here I Go Again; If It’s Lovin’ That You Want; You Don’t Love Me (No, No, No); That La, La, La; The Last Time; Willing To Wait; Music Of The Sun; Let Me; Rush; There’s A Thug In My Life; Now I Know; Pon De Replay (Remix)

A Girl Like Me (2006)

S.O.S. (Rescue Me); Kisses Don’t Lie; Unfaithful; We Ride; Dem Haters; Final Goodbye; Break It Off; Crazy Little Thing Called Love; Selfish Girl; P.S. (I’m Still Not Over You); A Girl Like Me; A Million Miles Away;      If It’s Lovin’ That You Want Pt. 2; Who Ya Gonna Run To?; Coulda Been The One; Should I?; Hypnotized

Good Girl Gone Bad (2007)

Umbrella; Push Up On Me; Don’t Stop The Music; Breakin’ Dishes; Shut Up And Drive; Hate That I Love You; Say It; Sell Me Candy; Lemme Get That; Rehab; Question Existing; Good Girl Gone Badl Cry; Haunted; Disturbia; Take A Bow; If I Never See Your Face Again

Rated R (2009)

Mad House; Wait Your Turn; Hard; Stupid In Love; Rockstar 101; Russian Roulette; Fire Bomb; Rude Boy’; Photographs; G4L; Te Amo; Cold Case Love; The Last Song; Hole In My Head

Loud (2010)

S&M; What’s My Name?; Cheers (Drink To That); Fading; Only Girl (In The World); California King Bed; Man Down; Raining Men; Complicated; Skin; Love The Way You Lie Part II

Talk That Talk (2011)

You Da One; Where Have You Been; We Found Love; Talk That Talk; Cockiness (Love It); Birthday Cake; We All Want Love; Drunk On Love; Roc Me Out; Watch N’ Learn; Farewell; Red Lipstick; Do Ya Thang; Do Ya Thang, Fool In Love; We Found Love (Extended Mix)

Unapologetic (2012)

Phresh Out The Runway; Pour It Up; Numb; Loveeeeeee Song; Jump, Right Now, What Now, Stay, Nobody’s Business; Love Without Tragedy / Mother Mary; No Love Allowed; Lost In Paradise, Half Of Me

Other songs – singles

Birthday Cake Single; Birthday Cake (Remix); Bubble Pop; Cockiness (Love It) (Remix); Diamonds (Remix); Emergency Room; Goodbye; Happy; Hatin’ On The Club; It Just Don’t Feel Like Xmas (Without You); Masquerade; Pour It Up (Remix); Redemption Song; Rude Boy (J4R Remix); S&M (Britney Spears Remix); S&M (J. Cole Remix); Sexuality; Slower To Heal; Stranded (Haiti Mon Amour); alk That Talk (Remix); Tip Pon Toe; Umbrella (Cinderella Remix); Whipping My Hair; Who’s That Chick; Winning Women

https://play.google.com/store/apps/details?id=com.rihannalyricscomplete
Download the Rihanna Lyrics Complete Android app from the link above.

Posted in Android, Dusko Savic Android Apps | Tagged , , , , , , , , , , , , , , , , , , , , , , , , , , | Leave a comment

Change In Google Play Policy from 23rd of August 2013 — Third Party Ads Through Push Notifications Are Now Forbidden

This change in Google Play Policy from 23rd Aug 2013 means that push notification from the outside sources are not allowed any more, only from within the app. You may send your users notifications on your own, it is only that third party ads through push are forbidden. That is why tapcontext say that you should show the interstitial ads first when the app loads and that you should also send notifications of type “here is a new feature, please take a look” or “you probably did not know that my app can do this too”. The goal is to motivate the user in an ethical way to run your app, which will then show your ad as soon as the app opens up.

Which means that we shall have to make our own push notification queues for each app, turning our apps into an aweber of a sorts. So, if you want money from free apps on Android, the production of an app does not stop with creating the internal content of the app, you will have to write the auto responder notification sequences too.

Currently, you will have to send the push notifications manually, although with some PHP code it should be possible to create the sequence in advance.

This also shows the difference between a site and an app. In a site, you have to lure the user to leave his or her email address, with an app, you automatically have the ability to send push notifications, no bait needed once they download the app.

If you can lure the app user into giving you their email addresses, so much the better. This may seem easier than it is. You may show them the Email Us plugin first but it is a bit more complex than that. The user should be able to bypass giving you the email, and once the user enters the email address, you should not show the prompt any more.

Posted in Android | Tagged , , , , | Leave a comment

How To Run Your Android App On Your Hardware Device from Eclipse and DDMS

For Android and for your particular hardware device, you may have to download and install some kind of a driver. I know my HTC Wildfire S was virtually ignored by the computer (Windows XP) until I installed the corresponding driver.

You may not have this problem if you are using devices that fit more naturaly, such as using Google devices to develop for.

Once you connect your device to Eclipse, pay attention to the DDMS perspective. It is very important to use that view, because it is from that perspective that you are able to take screenshots of your device directly to the clipboard.

Once that the device is connected, you may run the app directly on the device if you set it up in that way. Right click on the name of the app, then Run As > Run Configurations > Target tab, then click on Launch on all compatible devices, and finally Run.

That will run the app on the device. Sometimes you will not be able to run it directly, then just uninstall the old app on the device and run it again from Eclipse.

The other way to run your app is to treat the device as a USB external drive and copy the apk file directly to it. You will find the apk file in the bin folder of the app. I then run Astro manager (a free download from the Play store), then execute the apk file, which has the effect of installing the app. Then you run the app from the icon on the device and usually it all goes smoothly. It is best to set Install location to internalOnly in the AndroidManifest.xml file while you are testing, and then, for the final deployment, change that parameter to preferExternal, because lots of people will just uninstall the app if they see that it runs in the internal memory only.

Posted in Android | Tagged , , , , , | Leave a comment

The Right Way of Monetizing Your App: Content First, Interactivity Second, Personalizing Third, and Only Then Monetization

Someone’s app was rejected from Apple on the grounds of 2.12 and 10.6. To Apple, the app was not very useful because it was taking its content from the web server, and it also used buttons that were not Apple-like, so to speak. Not using the “native iOS look and feel” might be another way of decribing it.

Here is my reply in the forum post. The app and the video here just served as a stepping stone for my reminiscences of what makes a great app for both the user and the originator. Here goes my forum post:

I have watched the video and I think that, on this occasion, Apple got it right. Your content is awesome, but it does look like visiting a site, it has no reckognizable Apple user identity and – the main question – so what?

With your app, the user visits, watches and then – does what? Scribbles on a piece of paper which elements to buy? Goes to a computer keyboard and writes a note to himself what to buy? Picks up a phone to tell someone what was decided?

Let the user keep some data on the device, only then it is his/her own project. At the very least, let them keep a list of the elements that they have surveyed, chosen or have looked at. Let them then email that list to someone else, or share the data with the architect, contractor or spouse. The apps are at their best when they mirror the personality and choices of their user. Otherwise, it is just surfing the web.

To be honest, my apps are also guilty of being non-personalized, but I publish them on Android, where there is no Apple police. Still, it is wise not only to strive for the best user experience, but to strive to be useful as well. Let the user invest some time into the app and then they will come back to use it on their own. That will automatically increase the number of page views and then it is not so difficult to start monetizing.

Content or usefulness first, interactivity second, personalizing third, and only then monetization. Otherwise, there is no one to monetize from.

Posted in Monetize Your App | Leave a comment

RevMob Review – How Carter Thomas is Pulling In $125 eCPM With RevMob

Mobile App Monetization – How I’m Pulling In $125 eCPM

by Carter Thomas

“It’s money that matters.” – Randy Newman

The secret’s out – it’s not easy to make money with apps.

Everyone who’s on this blog at some point has watched, read or purchased content from someone talking about how you can make millions of dollars with apps. They talk about how every download you can get is going to make you AT LEAST $1…all you need to do is get apps in the store.

I hate to break it to you, but that’s bullshit.

If you think that you’re just going to sit back, relax, and watch the money pour in, you’re in for a rude awakening. App monetization is not about being in the game, it’s about winning. It’s not about downloads, it’s about dollars.

In fact, if it wasn’t for a few key app monetization networks, I’d be in a lot of trouble. Up until now, making money on apps required a LOT of downloads, much the same way websites require a lot of traffic. Strategies like in-app purchases, Lite -> Paid up-sells, and CPM advertisting (Admob/iAds) are DYING, yo. Straight up. I know this from first hand experience.

Fun fact – last week the in-app purchases from 3 of my apps made me about $70. The new monetization I’m doing made me $800.

In-app purchases took me 2 days to program in and $300 in development work. The new services take 10 mins and involve 2 lines of code.

Some people have different results, no question. This can vary from category to category and depend on download volume. I will say, however, that every single person I’ve talked to has absolutely buried their previous best revenue days with these new networks. The world is changing.

The Glory of Inequality – Why It Pays To Love Rich People

Yeah, you heard me. When it comes to making money with apps, the best thing you can do (at least for a while) is to make rich developers even richer. Instead of trying to sell your own apps, sell theirs. Here’s why.

Now – please understand that I’m all about following your dreams and staying the course. To create a brand that’s as strong as iron and as cool as Triumph Motorcycles is the ultimate dream for anyone getting into apps. But this article isn’t for you – this is for the thousands of you out there that just want to make money. You want to build an app and have it spit out $80/day and then repeat that process.

So here’s a quick and dirty breakdown about the app market that maybe you don’t know (if you haven’t opted in to my email list and read the $0.51 article, I highly recommend you do so before reading this):

Take a look at the apps on the Top Grossing lists, specifically the top 25. You’ll notice that most of them are Free. Top Grossing AND Free?? wtf.

via RevMob Review – How I'm Pulling In $125 eCPM With RevMob.

Posted in Monetize Your App | Leave a comment

How Much Does It Cost To Develop an App | iPhone App Development Costs

Overview

In the past two years, the app market has exploded. In under 9 months the Apple store reported over a billion downloads, and then doubled that number in half the time. The app craze has spread to Android, Blackberry, and every other mobile market under the sun.

And for good reason. Having an app for your business or promotion or whatever it may be can be a game changingmarketing tool to drive traffic and revenue. On the highest end of the spectrum, you see Angry Birds making $50M off a simple game. Then you also see people who put out basic free apps and still get thousands of downloads for doing nothing. A lot of conversations I’ve had in the past year don’t even talk about apps because the client thinks it’s clearly going to be too expensive and they have no idea where to even start.

The good news? It’s not as expensive as you think and it’s really not hard to start.

Let’s talk about what goes into getting an app developed.

via How Much Does It Cost To Develop an App | iPhone App Development Costs.

Posted in iOS | Leave a comment

Finaly a Native YouTube Player API for Android Has Been Published

The news broke out on December 21st 2012m on YouTube API blog. Here is the intoduction to the article:
Adding a high-quality video experience to your Android application just got a whole lot easier. Starting today, you can embed and play YouTube videos in your app using the new YouTube Android Player API.

The API, which was pre-announced at Google I/O 2012, offers these benefits:

We are launching the API as experimental, though we do not expect major interface changes going forward.
Here are the links to learn about the API:
Learn More

If you would like to learn more about the YouTube Android Player API, the documentation is a great place to start. In addition, we have curated useful videos in this playlist. Please subscribe to the YouTube for Developers’ channel to keep up on the latest.

Check Out The Sample Code

We’ve prepared several code examples to make it easy for you to get started with the new API. You will find them on code.google.com. The description of the examples is available in our documentation. If you need additional help with the API feel free to use our support resources.

Introductory Videos

YouTube Developers Live: YouTube Android Player API Overview

or you can watch it here:


Posted in YouTube Player API for Android | Leave a comment

Kindle Publishing

Publishing electronic books on Amazon.com’s Kindle platform has many advantages. If you know what you are doing, you can write and publish and sell your books through Kindle, without ever having to pay for printing. This in itself is incredible. The best part is that Amazon will take money from you only when a book is sold, not before.

Kindle ebooks are the best way to publish your intelectual property and make money throughout the process.

If you have your own publishing idea, you may contact me to see whether I would be available to help you with the entire process, which also includes technical hurdles such as formatting for the Kindle, using the best promotaional strategy to see some money fast and so on.


Posted in Kindle | Tagged , , , | Leave a comment

iPhone and Android Apps Are Now Required to Have Privacy Policies

Major app makers and distributors are now forced to have privacy policy for their apps. Here is what arstechnica.com had to say about it:

The makers of the most widely used mobile app stores have agreed to comply with a California law requiring mobile apps that collect personal information to have a privacy policy. California Attorney General Kamala Harris announced the agreement today with Apple and Google, which run the two most popular mobile app stores, as well as Amazon, HP, Microsoft, and Research In Motion.

“These platforms have agreed to privacy principles designed to bring the industry in line with a California law requiring mobile apps that collect personal information to have a privacy policy,” Harris’s office said in a press release. “The majority of mobile apps sold today do not contain a privacy policy.”

The agreement doesn’t place restrictions on what types of data app makers may collect. But app makers must describe “how personal data is collected, used and shared,” and make their privacy policies easily found by users. App store listings will contain either the text of the privacy policy or a link to the policy.

There have been several controversies over mobile app privacy, and one of the most recent centered on the social network Path accessing and uploading iPhone users’ contact databases without permission. Harris noted that a Wall Street Journal report last year found “that 45 of the top 101 apps did not provide privacy policies either inside the application or on the application developer’s website,” despite the fact that most of the mobile apps were transmitting a phone’s unique device ID or location “to other companies without users’ awareness or consent.” Some apps were also transmitting the user’s age, gender, and other personal details.

This goes back to the following Google post Best Practices for Handling Android User Data . Here are the recommendations from that post:

As the use of mobile applications grows, people are paying more attention to how these applications use their data. While the Android platform contains extensive permissions designed to protect users, application developers are ultimately responsible for how they handle users’ information. It’s important for developers to understand the code they include, and consider the permissions they request, as mishandling these issues can result in users perceiving a violation of trust.

Maintaining a healthy and trustworthy ecosystem is in every Android developer’s best interest.

Here are a few tips for writing trustworthy Android applications:

  1. Maintain a privacy policy
  2. Minimize permissions
  3. Give your users a choice regarding data collection
  4. Don’t collect unnecessary information
  5. Don’t send data off the device
  6. … but if you have to, use encryption and data minimization
  7. Don’t use code you don’t understand
  8. Don’t log device or user specific information.

There is a new field in the developer’s console, when publishing an app to the Google Play field.

A new field in publishing apps for Android


Posted in Android | Leave a comment

Links for How To Build An Android App

Introduction how to install the Eclipse and Android system. 

Introduction to Android programming.

Further examples of programming for Anroid. 

How to open sample projects in Eclipse for Android.

How to import sample Android projects to Eclipse

Google Android tutorial part 1 – Conway’s Game of Life

unexpected error happened android error uploading

Get Started Developing For Android With Eclipse, Reloaded


Posted in Android | Tagged , | Leave a comment

Creating Apps With Curated RSS Feeds From iTunes, ClickBank, Facebook, Twitter, YouTube, Flickr, and WordPress Blogs

When creating apps, the main worry, as usual, is content. If we are to write all our content ourselves, then we are not publishers, but authors who self publish themselves, and unless your are Tolkien, that is not a surefire way to riches. So, why not use the content that is already out there, on Facebook, Twitter, WordPress and Blogger blogs, YouTube and so on. If an app is actually an ebook on the cell phone, then it will not be used much. A cell phone is a handheld computer in its own right, so why not extend the number of session times of your app with a new and fresh content. The answer to the “new and fresh content” technically is in RSS feeds, which are a series of items (articles, videos, podcasts) taken from one or more sites.

Every app builder offers a blog or RSS feed option, which means that you can just enter the link and the app will all of a sudden contain dozens of posts, individually available to tap into. If it is a feed from an active blog, the content of the app will update on its own, giving the user the air of freshness, activity and involvement. It may also be a very good reason for the user to keep your app on the phone, instead if uninstalling it quickly. The freshness of the feed is a stickyness factor, as they used to say for sites a couple of years ago.

iTunes RSS Feeds Creator

In certain cases, you will be able to insert your affiliate links into the feeds. Here is the link to Apple iTunes available feeds, and if you want to become their affiliate, you have to go through LinkShare.  LinkShare will let you in immediately, and then you have to choose the iTunes affiliate program — the real difficulty lies in persuading Apple to let you into their program. But, of course, you are making apps (are you? aren’t you!?), so you should be validated in the end.

Twitter Feeds

Twitter seems to be going away from RSS feeds, so no wonder cheat sheets started appearing. You can see the original post Twitter RSS feed creation cheat sheet here, by Valerie Forrestal. Here I’ll reproduce the cheat sheet main points:

Of course, replace the bold text in the search strings with your own search terms/parameters.)

Hashtag search:

http://search.twitter.com/search.atom?q=%23CiL2009

User mention search:

http://search.twitter.com/search.atom?q=%40scwLibrary

Keyword search:

http://search.twitter.com/search.atom?q=research+paper

Location + keyword search:

http://search.twitter.com/search.atom?geocode=40.744544%2C-74.027593%2C5.0mi&q=+research+paper+near%3A%22hoboken%2C+nj%22+within%3A5mi

If all this is a bit too technical for you, there is a special page with Twitter RSS feed generator.
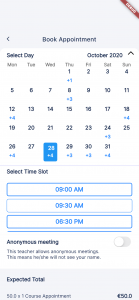
ClickBank Affiliate RSS Feeds With hopRSS.com

You may try to use automated service for generating RSS feeds with your own ClickBank ID, it is called

http://www.hoprss.com/

You will get a link such as

http://www.hoprss.com/clickbank-rss-feed.php?hoprss_keyword=rss&hoprss_results=10&hoprss_cbaffid=fendergen

in which you can change your own keywords or affid. In effect, you do not need that site anymore!

This feed is a real text, not some JavaScript, so it has an additional benefit of bringing in some real and fresh content into your site. And if somebody buys, you get the commision!

How to Use Twitter Feeds in Your Apps

One obvious way to use a Twitter feed in your apps would be to create a specialized button for Twitter search and as a search term, enter the name of your app, or the main keyword or keyphrase in your niche. This may bring a load of rubish into you app, because many people abuse Twitter, say, by repeating the same message twenty or thirty times within a day. So it may be wise to clean up the feed first, using Yahoo Pipes.

Another, perhaps more intimate way of using Twitter feed in your cell phone app, is to open a new account at Twitter and put the corresponding feed into the app only. Then it will all depend on you only to bring freshness to the feed. This may be a good solution if you are writing or curating a blog and you have linked blog posts to Twitter somehow.

This solution is good if you are pursuing one niche only, say, you own or manage a restaurant and want the potential customers to be informed of the “meal od the day” or some other novelty in your cuisine. If you are serial app maker and doing it on your own, this may not be the best option, unless you turn to a publisher kind of thinking, outsourcing the blog and Twitter content creation.

How To Create Blogger RSS Feeds in Your Apps

Blogger sites are, of course, blogs, so it should be easy to pull their respective RSS feeds out. Just add

/feeds/posts/default?alt=rss

to the basic blogger blog address, such as http://bestappbuilders.blogspot.com/, in order to get

http://bestappbuilders.blogspot.com//feeds/posts/default?alt=rss

In certain cases, users said that such feed pulled only comments from the blog, not the content, so you may want to put the feed through Yahoo Pipes and that usually rectifies everything.

How to Create Facebooks RSS Feeds in Your Apps

Facebook does not RSS feeds, so you have to circumvent, generally, creating another Yahoo Pipes program.

Here is a post from AppMakr.com forum:

Facebook RSS Feeds must be sanitized before they are added to your App. This process can be simplified using Yahoo Pipes.

To start, let’s browse to http://pipes.yahoo.com and click on Create A Pipe.

We are going to need three modules in order to sanitize these RSS Feeds so pull Fetch Feed from the Sources section, and both Regex and Create RSS modules from the Operators section onto the Pipe drawing board. You then need to connect Fetch Page to Regex to Create RSS to Pipe Output.

Unfortunately, the Facebook Group RSS feed is disabled to begin with so we need to figure out the unique identifier of the page and create our own. This is done by browsing to your Facebook Group page and clicking the RSS button next to URL in either Safari or Firefox. This will give you a link similar to <feed://www.facebook.com/feeds/page.php?format=atom10&id=202930534206>. Now you must take that ID number and substitute it in this URL <http://www.facebook.com/feeds/page.php?format=rss20&id=YOURIDHERE&alt=rss>. So a successful RSS feed for the AppMakr Facebook Group Page would be <http://www.facebook.com/feeds/page.php?format=rss20&id=20293053…>.

Now drop this new URL in your Fetch Page module.

In the RegEx module item.link should replace /posted.php with http://www.facebook.com/posted.php

The Create RSS module should follow convention for display.

Here is what the finished pipe should look like:


Use Yahoo pipes to obtain RSS feed from Facebook

With Yahoo pipes it is possible to get RSS feed from Facebook

Next save and run your Pipe. You should see an RSS feed for your page (here I used the Best App Builders fan page, of course).

When I run this pipe, it says:

This Pipe ran successfully but encountered some problems:

warning Error fetching site feed from http://www.facebook.com/feeds/page.php?format=rss20&id=40796308305: No link discovered in response

But when I entered the feed into iBuildApp.com’s builders, it rendered totally ok.

The Yahoo pipe I have created is called Facebook pipe and can be found here and you are free to use it for your own projects.

If  you run the pipe and it returns an error such as

This Pipe ran successfully but encountered some problems:

warning Error fetching site feed from http://www.facebook.com/feeds/page.php?format=rss20&id=40796308305: No link discovered in response

just right click on Get as RSS right from the orange RSS icon, and with Copy link location extract the RSS address. That is the link to your new feed and you could / should put it into your RSS reader, into FeedReader if you want to, and of course, into some kind of app builder program, which is our common goal here.

Additional Facebook Links for RSS Feeds

I’ve got many useful ideas from this page http://ahrengot.com/tutorials/facebook-rss-feed/. In a nutshell, here are the ideas from this page:

Getting your page id from Facebook

Everything on Facebook, from users to photos to events, has a numeric id. This id is used internally by Facebook to find different objects in its enormous database. When you request the RSS feed from a page, you’ll need to send the id of the page along with your request. That’s why the first thing you need to do is to find the id of your page. It’s pretty simple.

Open any Facebook page and click on the profile image. In the address bar you’ll see ‘http://www.facebook.com/album.php?profile=1&id=40796308305? where ’40796308305? will be the page id. Copy those numbers as we’ll need them in just a second.

===============

The complete URL of your Facebook RSS feed

I’ve used the ID from the Coca-Cola page to demonstrate the URL’s. Just replace the numeric ID at the end with the id you found in step 1.

Here’s the URL to the Coca-Cola Facebook page as an atom feed:
http://www.facebook.com/feeds/page.php?format=atom10&id=40796308305

And here’s the URL to the same page using RSS 2.0:
http://www.facebook.com/feeds/page.php?format=rss20&id=40796308305

Adding your Facebook RSS feed to Google Reader

Just paste the URL of the page into Google Reader. For instance http://www.facebook.com/cocacola

Adding your Facebook RSS feed to FeedBurner

Same as google reader …

Adding your Facebook RSS feed in Firefox

Go to the Facebook page and click the “Add Subscription” button in the address bar.

You can get your personal feed as RSS too!

If you want your own(or any of your friends) wall feed as RSS you can do that via the FB RSS Facebook application. Thanks to Peter for pointing this one out in the comments.

Another way would be this site http://simplepie.org/demo.

You can access the RSS feed of your Facebook Group through http://groupfeed.climatesceptics.org/.

Finally, here are the more granularized Facebook RSS links:

Friends’ links:
https://www.facebook.com/feeds/share_friends_posts.php?id=MYID&key=MYSECRET&format=rss20

Friends’ notes:
https://www.facebook.com/feeds/friends_notes.php?id=MYID&key=MYSECRET&format=rss20

Notifications (so and so liked your status, etc.)
https://www.facebook.com/feeds/notifications.php?id=MYID&viewer=MYID&key=MYSECRET&format=rss20

Friends’ statuses:
https://www.facebook.com/feeds/friends_status.php?id=MYID&key=MYSECRET&format=rss20

MYID and MYSECRET can be found by going to:
https://www.facebook.com/notifications
and clicking on the Get Notifications via RSS.
Look in the URL for the id=XXX and key=XXX

Taking RSS Feeds From YouTube

Here is the full list of YouTube RSS feeds;  that document is intended for programmers who are writing client applications that interact with YouTube.

Here is a more practical list of YouTube Feeds, more or less ready to enter into your apps. It is  from GoogleSystem blog:

YouTube has never offered too many feeds and they were usually difficult to find. The new YouTube API changed that, but the feeds are still inaccessible from the interface. This why I decided to compile a list of the most useful YouTube feeds you may want to add in your favorite feed reader:

1. Search feeds
http://gdata.youtube.com/feeds/api/videos?orderby=updated&vq=mapreduce
(replace mapreduce with your query)

2. Search in a category
http://gdata.youtube.com/feeds/api/videos/-/Film/?vq=michel%20gondry&orderby=updated
(Film is the category, while michel gondry is the query – you need to replace the space with %20. Other categories: Music, Comedy, News, Sports, Autos, Howto.)

3. The latest videos from a channel
http://gdata.youtube.com/feeds/api/users/radiohead/uploads?orderby=updated
(replace radiohead with your channel)

…or only the videos that match your keywords:
http://gdata.youtube.com/feeds/api/users/radiohead/uploads?orderby=updated&vq=jigsaw

4. Feeds for favorite videos
http://gdata.youtube.com/feeds/api/users/garyferro/favorites?orderby=updated
(replace garyferro with your favorite username)

5. Your subscriptions
This is not a feed that comes directly from YouTube, it’s a Yahoo Pipe.
http://pipes.yahoo.com/pipes/pipe.run?YouTubeUsername=google&
_id=28303b479f11e24199be4cafced31ad9&_render=rss&itemLimit=20
(concatenate the two lines and replace google with your username)

The feed above shows the latest videos from the first 25 subscriptions. For those who have more subscriptions, I created a new version of the pipe that shows the videos from up to 500 subscriptions:

http://pipes.yahoo.com/pipes/pipe.run?YouTubeUsername=MotherTalking&
_id=58e4f59f9e5e3282aaffdcbaf05ba68d&_render=rss&itemLimit=50
(concatenate the two lines and replace MotherTalking with your username)

6. Playlists
http://gdata.youtube.com/feeds/api/playlists/50653251EDB4E764
(the code in italic can be obtained from the playlists’s URL (e.g.: Eric Speaks)

YouTube RSS Feed (Just replace ‘KEYWORDGOESHERE‘):

http://gdata.youtube.com/feeds/base/videos?q=KEYWORDGOESHERE&client=ytapi-youtube-search&alt=rss&v=2

IMPORTANT: On page they explain how to take the playlist number and use it to create an RSS feed:

However, I just wanted to leave a note here that that when you browse YouTube to get your playlist ID from the URL they are a bit tricky.

If you go to a playlist for example: https://www.youtube.com/playlist?list=PL26D021A7580EA83F The last part of it is as said in the correct answer the playlist ID, however if you take PL26D021A7580EA83F and input that in gdata.youtube.com you will be told it’s invalid. What you have to do is remove the first two letters in the ID, the PL, so PL26D021A7580EA83F becomes 26D021A7580EA83F. After that it will work.

Here is an example of a raw YouTube feed for keywords wordpress+rss:

[cetsEmbedRSS id=’http://gdata.youtube.com/feeds/base/videos?q=wordpress+rss&client=ytapi-youtube-search&alt=rss&v=2′ itemcount=’5′ itemauthor=’1′ itemdate=’1′ itemcontent=’1′]

Yahoo RSS Feeds

Here is a list of Yahoo RSS feeds, available from the site:

Following are the different feed addresses for Yahoo! – just replace keyword with your own search query or phrase before subscribing to that feed.

Web Search: http://search.yahooapis.com/WebSearchService/rss/webSearch.xml? appid=yahoosearchwebrss&query=keyword

Videos: http://search.yahooapis.com/VideoSearchService/rss/videoSearch.xml? appid=ysearchblog&format=mpeg&query=keyword

Images: http://search.yahooapis.com/ImageSearchService/rss/imageSearch.xml? appid=yahoosearchimagerss&query=keyword

Yahoo! News: http://news.search.yahoo.com/news/rss?p=keyword

The images and video clips are available as media enclosures in the RSS feed so you can directly download them locally via any pod-catcher or your news reader itself.

This list originated in Digital Inspiration blog.

The Last But Not Least… Flickr!

Here is a list of all RSS feeds available in Flickr.

As a practical example, here is a Flickr Photos RSS Feed (Just replace ‘KEYWORDGOESHERE’):

http://api.flickr.com/services/feeds/photos_public.gne?tags=KEYWORDGOESHERE&lang=en-us&format=rss_200

In the following example we have a raw Flickr feed for keywords rss+feed (the yellow background is not part of the feed per se):

[cetsEmbedRSS id=’http://api.flickr.com/services/feeds/photos_public.gne?tags=rss+feed&lang=en-us&format=rss_200′ itemcount=’5′ itemauthor=’1′ itemdate=’1′ itemcontent=’1′]

Also visit the Flickr App Garden page, where you will have to ask for a permission to use their feeds.

Finally, How To Curate the Feeds

Our next goal is to create one feed from YouTube and Flickr and present it to iBuildApp builder, or any other builder that you happen to be using right now. We do that by going to Yahoo Pipes and there we

1) Merge the two feeds into one union, and then

2) Enforce that the resulting feed must contain words wordpress, site or feed, as shown on this Yahoo Pipes image:

Force positive words for an RSS feed

Force positive words for an RSS feed

3) To see the resulting feed in this blog post, I installed something called HungryFeed, a WordPress plugin and entered the shortcode into the post. I also put cache time to 0, otherwise the SimplePIE library would report an error. The feed from Yahoo Pipes is

http://pipes.yahoo.com/pipes/pipe.run?_id=3324dc739f0b478ce52dc2c3b8a0bf39&_render=rss

This is the resulting feed:

[hungryfeed url=”http://pipes.yahoo.com/pipes/pipe.run?_id=3324dc739f0b478ce52dc2c3b8a0bf39&_render=rss”]

You should also check whether the feed is valid, and if it isn’t, you can go to FeedBurner and create a safe feed, ready to be shown everywhere.

4) Finally, here is what we have when we enter that curated feed into the app biuilder of our choice:


Curated RSS feed displays well in iBuildApp.com

Curated RSS feed displays well in iBuildApp.com

Posted in RSS feeds | Tagged , , , , , , , , , | Leave a comment

How To Create iPhone Apps Icons With Gimp

When creating apps, you need several graphic elements. The three most important are

— the icon which will be visible in the app store,

— the splash screen, which will be visible after the app starts, and

— the header graphics, which will be the header inside the app.

The best tool for graphics work is of course Photoshop, but it is expensive.  A free alternative is GIMP, which can be downloaded from its site, http://www.gimp.org/.

GIMP TUTORIAL – How to make an iPhone app icon in Gimp

Creating an icon in the Gimp is not very difficult, as the following video goes on the show:

Posted in Graphics for apps | Tagged , , , , , | Leave a comment

How To Teach Your Android Device to Access the Official Android Market

Here is a very good video how to change the internal settings of your Android tablet so that it can access the official Android Market.


YouTube Direct

Posted in Android devices | Tagged , , , | Leave a comment

In Order To produce iPhone Apps Do I Have To Have All Apple Equipment?

This entry is part of 6 in the series Website Policies

Here is a question that appears quite often on forums:

In order to produce iPhone apps do i have to have all Apple equipment? Do i have to have an iPhone? Do i have to have a Mac? Do i have to have both? Should I invest $$$$ before any real success with apps?

It is quite possible to run Mac OS on some kind of a PC.

Option 1

Invest in basic Lion or Leopard DVD, which will cost a not so formidable $29, and install it

A

either as a dual boot, or

B

under VMWare emulator.

Option 2

Find the Mac OS on torrent sites, and download it from there. Then suboptions A or B apply just as above.

Currently I run Mac OS Leopard under VMware workstation; the workstation software I downloaded for free from their basic site, http://www.vmware.com/products/workstation/.

Other links to visit for this installation are:

A wiki on how to install Mac OS X on a Windows PC.

Download VMware server for free.

The best solution is always to buy the software that you need and use. Treat these hacks as a free trial!

Here is a video with a similar process (note, the music is terrible!):


YouTube Direct


How MacOS Runs Under VMware Server

The Leopard under the emulator works, albeit very slowly. Dual boots is also a possibility, I did it before with Windows and Ubuntu, but I prefer the simplicity of Windows booting directly, it is much faster.

The leap to “Mac only” is too much for me. Money aside, I do not want to have two physical computers to work with. And please let this not be a call for Mac evangelists to try to prove to me how that better is.

Mobile Apps As A Business

I do not have an iPhone but I most certainly will have it in the near future. It will probably be second hand, for apps testing purposes mainly. In my contry, I can buy whatever phone I want and use it with any of the three operators. In other countries it will probably be different, having an iPhone may tie you to an operator that you do not want to be tied to.

Let us treat this as a business. If you can make applications that make you money (more than 1K, say), you are in the business; if not, then you are not in this business.

You will not know until you try.

You may also concentrate only on Android devices, see what works for you there and later, if it brings on some money, try to diversify toward Apple products and markets.

Posted in Apps As a Business | Tagged , , , | Leave a comment

iPhone Tips And Tricks – How To Record Screen On iPhone


YouTube Direct

Posted in iOS | Tagged , , | Leave a comment

Links And Resources

This is a list links and resources that I like so far.


Posted in Links and resources | Tagged , , , , , , , | Leave a comment

Anti Spam Policy

This Anti-Spam Policy Notice governs the use of the web page at and its associated services, web pages, domains and sub-domains, which are owned and operated by Dusko Savic (“Owner”). Wherever this Notice refers to “users” it means “you”, while “we” or “our” refer to Dusko Savic and “Web Site” refers to http://www.BestAppBuilders.com.

This sets forth our policy with regard to the use of “Spam” marketing techniques in connection with Internet Marketing. In the event that we deem you to be in violation of these policies, we shall immediately revoke your rights and close any active account.

We have a strict policy against spamming. We forbid the sending of unsolicited mass Emails or unsolicited Emails of any kind in connection with the marketing of our programs, products and services.

We reserve the right to terminate your account and participation in our programs “for cause” if we deem you to be in violation of our anti-spamming policies. We also reserve the right to suspend your account and participation pending review upon receipt of any complaint or other evidence that you may be engaging in any spamming activity.

We consider spamming to be any activity whereby you directly or indirectly transmit email messages to any email address that has not solicited such email and does not consent to such transmission. We also consider spamming to constitute posting advertisements in newsgroups in violation of the terms of participation in such newsgroup, that are off topic, or in newsgroups that do not specifically permit advertisements. We also consider it spamming when advertisements are placed on message boards or in chat rooms when they are not permitted by the terms of participation in such message boards and chat rooms.

If you are “spammed” by anyone regarding our products, services, web site, or any other matters, please report this activity to Dusko Savic by visiting the web page at http://www.BestAppBuilders.com.

Posted in Website Policies | Tagged | Leave a comment

Copyright Notice

Copyright © 2005-2011 by Dusko Savic. All rights reserved.

1. This Copyright Notice governs the use of the web page at and its associated services, web pages, domains and sub-domains, which are owned and operated by Dusko Savic (“Owner”). Wherever this Notice refers to “users” it means “you”, while “we” or “our” refer to Dusko Savic and “Web Site” refers to http://www.BestAppBuilders.com. If at any time the terms and conditions of this Copyright Notice no longer acceptable to you, you should immediately cease use of the web site where is located.

2. You acknowledge that the web page contains information and/ or software, photographs, audio and video clips, graphics, links and other material that are protected by copyright, trademark or other proprietary rights of Dusko Savic or third parties, including but not limited to product names, logos, designs, titles, and words or phrases which may be registered in certain jurisdictions (collectively, the “Content”). You agree to comply with any additional copyright notices, information, or restrictions contained in any Content available on or accessed through. If you want to use any content of for any reason you must obtain prior express written permission of Dusko Savic.

3. You may not modify, publish, transmit, transfer or sell, reproduce, create derivative works from, distribute, perform, display, or in any way exploit any of the content, in whole or in part. Content consisting of downloadable software may not be reverse-engineered unless specifically authorized by Dusko Savic or the owner of the software’s patent and or copyright. Subject to the provisions of this Copyright Notice, you may post on the any content owned by you (such as your original statements), content for which you have received express permission from Dusko Savic, and content in the public domain. You assume all right and responsibility for determining whether any content is in the public domain. You grant to Dusko Savic the right to edit, copy, publish, distribute, translate and otherwise use in any medium and for any purpose any content that you place on without compensation to you. You represent and warrant that you are authorized to grant all rights set forth in the preceding sentence.

4. You may not download content on that is indicated to be for sale except under the terms of the sale. Such content is the protected and copyrightable property of Dusko Savic. “Free” content may be downloaded for your personal use or non-commercial distribution consistent with the terms defined in this Copyright Notice. When using both purchased and “free” content, you will maintain and include all copyright and other notices contained in such content. Except as expressly permitted by the copyright laws, no copying, storage, redistribution or publication of any content is permitted without the express permission of Dusko Savic or the owners of such content or their authorized persons if other than Dusko Savic.

5. We are confident that you have understood your rights and obligations in concern to the use of and that you agree with the terms described above.

Regarding Images Found on this Site

The photos and information contained on this site are considered to be in the public domain, as they were found in various places on the Internet. Some pictures were edited, enhanced or otherwise modified to transform them into true desktop images.

This site in no way wishes to infringe on anyone’s copyright. If you have found anything that you feel infringes on your rights I request that you email me and I gurantee the item will be removed or altered to fit your wishes immediately.

Please be as detailed as possible when contacting me, as to on which page the picture is, the reasons why copyright has been violated, etc. I promise to be quick and efficient in resolving any copyright matter.

If you have any questions concerning the disclaimer of BestAppBuilders.com which are not covered in this statement, please contact me with your questions here.

Your viewing this site confirms your acceptance of our disclaimer.

Posted in Website Policies | Leave a comment

Terms of Service

BestAppBuilders.com is an online information and communications service (the “Service”) provided by author and app developer Dusko Savic, as well as from other sources. Use of the Service is governed by the terms and conditions of this Agreement. Please read this Agreement carefully before accessing or using the Service. Throughout this Agreement, site BestAppBuilders.com is referred to as “we” or “us.”

General terms and conditions

Your access and use of this site and its services bind you to this Agreement. If you do not agree to the Terms and Conditions of Use for this site, you may not use the site or its services.

We may modify this Agreement at any time. Any modifications made to this Agreement will be effective immediately upon posting on the site. By accessing or using the Service, you agree to be bound by all of the terms and conditions of the Agreement as posted on the Service at the time of your access or use. You agree to review the Agreement posted on the Service each time you use the Service so that you are aware of any modifications made to this Agreement.

Disclaimer

THE SERVICE AND ANY INFORMATION CONTAINED ON OR PROVIDED THROUGH THE SERVICE IS PROVIDED ON AN “AS IS” BASIS. THAT MEANS THAT THE INFORMATION CONTAINED ON OR PROVIDED THROUGH THIS SERVICE IS INTENDED FOR GENERAL CONSUMER UNDERSTANDING AND EDUCATION. ANY ACCESS TO THIS SITE IS VOLUNTARY. WE WILL REGARD ALL ACCESS AS VOLUNTARY AND AT THE SOLE RISK OF THE USER.

This site and its services are for consumer educational use only. Nothing contained in this site is or should be considered, or used as a substitute for, medical advice, diagnosis or treatment. The services provided on this site are here to educate consumers on the astrological views on getting pregnant. This site and its services do not constitute the practice of any medical, nursing or other professional health care advice, diagnosis or treatment.

Because of the designated purpose of this site and the services it provides, you agree that BestAppBuilders.com does not constitute a service that targets any one community, user group, business or industry. Because the site is designed for educational purposes, you also agree that it does not constitute “doing business” in any specific jurisdiction or soliciting business for us or any of our affiliated companies.

We advise users to always seek the advice of a physician or other qualified health care provider with any questions regarding personal health or medical conditions. Never disregard, avoid or delay in obtaining medical advice from your doctor or other qualified health care provider because of something you have read on this site. If you have or suspect that you have a medical problem or condition, please contact a qualified health care professional immediately. If you are in the United States and are experiencing a medical emergency, please call 911 or call for emergency medical help on the nearest telephone.

We do not operate, control, supply, endorse, warrant or guarantee any information, products, services or merchandise that is not clearly identified as information, products, services or merchandise supplied by us. We also do not warrant or guarantee that files available for downloading through the Service will be free of infections or viruses, worms, Trojan horses or other code that contains contaminating or destructive properties.

We, and our content providers, cannot and do not guarantee or warrant against errors, omissions, delays, interruptions or losses, including loss of data. Users of this site are responsible for maintaining a means external to BestAppBuilders.com for the reconstruction of any lost data.

We reserve the right at any time and from time to time to modify or discontinue, temporarily or permanently, this site, or any part thereof, with or without notice.

Warranties and limitation of liability

WE DO NOT MAKE ANY EXPRESS OR IMPLIED WARRANTIES, REPRESENTATIONS OR ENDORSEMENTS OF ANY KIND WHATSOEVER (INCLUDING WITHOUT LIMITATION, WARRANTIES OF TITLE OR NONINFRINGEMENT, OR ANY WARRANTIES OF MERCHANTABILITY OR FITNESS FOR A PARTICULAR PURPOSE) WITH REGARD TO THE SERVICE, OR WITH RESPECT TO ANY INFORMATION, PRODUCT, SERVICE, MERCHANDISE OR OTHER MATERIAL PROVIDED ON OR THROUGH THE SERVICE. WE DO NOT WARRANT OR GUARANTEE THE ACCURACY, COMPLETENESS, CORRECTNESS, TIMELINESS OR USEFULNESS OF ANY INFORMATION, PRODUCTS, SERVICES, MERCHANDISE OR OTHER MATERIAL PROVIDED THROUGH THE SERVICE OR ON THE INTERNET GENERALLY. WE MAKE NO WARRANTY OR GUARANTEE THAT THE SERVICE WILL BE UNINTERRUPTED, TIMELY, SECURE OR ERROR-FREE.

WE ARE NOT LIABLE TO ANY USER OR ANYONE ELSE FOR ANY DECISION MADE OR ACTION TAKEN BY BASED ON RELIANCE UPON THE INFORMATION CONTAINED ON OR PROVIDED THROUGH THE SERVICE.

Users’ agreement

Users will not upload or transmit any communications or content of any type that infringes or violates any rights of any party.

Users will not use this site for any purpose in violation of local, state, national or international laws.

Users will not use this site as a means to distribute advertising or other unsolicited material to any third party.

Users will not post material that is unlawful, obscene, defamatory, threatening, harassing, abusive, slanderous, hateful or embarrassing to any other person or entity as determined by us in our sole discretion.

Users will not impersonate another person.

Users will not hold us or any of our affiliates, subsidiaries or parent company liable for damages including (but not limited to) loss of wages, revenue or business because of any services related to or provided by this site. The sole and exclusive remedy for dissatisfaction with the services of this site will be to stop using the Service.

Users will indemnify us and any of our parent or subsidiary companies or organizations, and any of our successors, assigns or licensees, together with any of their respective officers, directors and employees, against any damages, losses, liabilities, judgments, costs or expenses (including reasonable attorneys’ fees and costs) arising out of a claim by a third party relating to use of the Service, or any breach or violation of this Agreement or any other term or condition contained on the Service.

Users agree to comply with all user responsibilities and obligations as stated in these Terms of Service.

Users’ representations

All site users represent and warrant that they are at least 18 years of age and that they possess the legal right and ability to agree to these Terms of Service and to use this site in accordance with these Terms of Service.

Conflict resolution

You agree that this Agreement is entered into between you and us in Serbia, and is performed within Serbia and governed by and shall be construed in all respects under the laws of the Serbia, exclusive of its choice of law or conflict of laws provisions. In any claim or action by you directly or indirectly arising under this Agreement or related to the Service, you and we each irrevocably agree to submit to the exclusive personal jurisdiction of the Serbian courts.

If any of the provisions of this Agreement are held to be not enforceable by a court or other tribunal of competent jurisdiction, then such provisions shall be limited or eliminated to the minimum extent necessary so that this Agreement shall otherwise remain in full force and effect.

This Agreement constitutes the entire agreement between you and us relating to the access and use of the site and any of its services. This Agreement may not be modified, in whole or in part, except as described elsewhere in this Agreement. Anything contained on the Service inconsistent with or conflicting with the terms of this Agreement is superseded by the terms of this Agreement.

Termination of services

If you violate these Terms and Conditions of Use, your use of this site will terminate. We may notify you that you have breached the Agreement. We may, in our sole discretion, terminate your access to this site, or any portion thereof, or discontinue providing the site, or any portion thereof. These actions are in addition to and not in lieu or limitation of any other right or remedy we may have available at law. Further, we shall not be liable to you or any third party for any such termination or discontinuance.

General

We do not guarantee continuous, uninterrupted or secure access to our services, and operation of this site may be interfered with by numerous factors outside of our control. You agree that these Terms and Conditions of Use and all incorporated agreements between us and you may be automatically assigned by us, in our sole discretion, to a third party in the event of a merger, acquisition or liquidation.
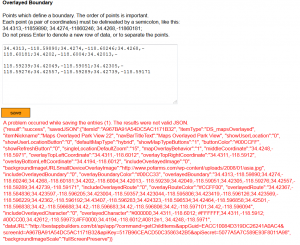
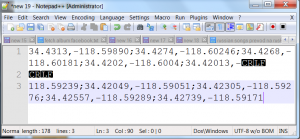
Our failure to act with respect to a breach by you or others of these Terms and Conditions of Use does not waive our right to act with respect to subsequent or similar breaches. These Terms and Conditions of Use set forth the entire understanding and agreement between us and any site user with respect to the site, its uses and services.

Copyright and trademarks

The materials on the site are copyrighted by us and/or other applicable rights holders. You may download and reprint a single copy of the materials from the Service for your own personal, noncommercial use only, provided you include all applicable notices and disclaimers. Any other use of the materials is strictly prohibited without our prior written permission and the permission of the applicable rights holder(s).

Use of cookies

See Privacy policy for information regarding cookies and their use on our site.

Contact information

If you have any questions about the Service, please contact us at here.

Posted in Website Policies | Leave a comment

Privacy Policy

If you require any more information or have any questions about our privacy policy, please feel free to contact us by email.
At www.BestAppBuilders.com, the privacy of our visitors is of extreme importance to us. This privacy policy document outlines the types of personal information is received and collected by www.BestAppBuilders.com and how it is used.

Log Files
Like many other Web sites, www.BestAppBuilders.com makes use of log files. The information inside the log files includes internet protocol ( IP ) addresses, type of browser, Internet Service Provider ( ISP ), date/time stamp, referring/exit pages, and number of clicks to analyze trends, administer the site, track user’s movement around the site, and gather demographic information. IP addresses, and other such information are not linked to any information that is personally identifiable.

Cookies and Web Beacons

www.BestAppBuilders.com does use cookies to store information about visitors preferences, record user-specific information on which pages the user access or visit, customize Web page content based on visitors browser type or other information that the visitor sends via their browser.

DoubleClick DART Cookie

.:: Google, as a third party vendor, uses cookies to serve ads on your site.
.:: Google’s use of the DART cookie enables it to serve ads to your users based on their visit to your sites and other sites on the Internet.
.:: Users may opt out of the use of the DART cookie by visiting the Google ad and content network privacy policy at the following URL – http://www.google.com/privacy_ads.html

Some of our advertising partners may use cookies and web beacons on our site. Our advertising partners include …….

Google Adsense

Commission Junction

Widget Bucks

Adbrite

Clickbank

Azoogle

Chitika

Linkshare

Amazon

Kontera

These third-party ad servers or ad networks use technology to the advertisements and links that appear on www.BestAppBuilders.com send directly to your browsers. They automatically receive your IP address when this occurs. Other technologies ( such as cookies, JavaScript, or Web Beacons ) may also be used by the third-party ad networks to measure the effectiveness of their advertisements and / or to personalize the advertising content that you see.

www.BestAppBuilders.com has no access to or control over these cookies that are used by third-party advertisers.

You should consult the respective privacy policies of these third-party ad servers for more detailed information on their practices as well as for instructions about how to opt-out of certain practices. www.BestAppBuilders.com’s privacy policy does not apply to, and we cannot control the activities of, such other advertisers or web sites.

If you wish to disable cookies, you may do so through your individual browser options. More detailed information about cookie management with specific web browsers can be found at the browsers’ respective websites.

Posted in Website Policies | Tagged , , , , , , , | Leave a comment

About Me

“About Dusko Savic” page is kind of my business resume. For the whole of my life, I have been involved in something new, experimental, innovative, electronic and the like. I also write a lot. You can go to www.amazon.com and type in “dusko savic” and you will see at least two of my paper books still in there. Interestingly enough, my first three books were published in English by UK publishers, although English is not my mother’s tongue.

All in all I have written, published, marketed, and sold some 25 books of my own. For many years I also worked as a computing journalist and editor (I published more than 300 articles) and had about 70 appearances in various TV shows on computers (this was all from 1986 to 1990). I have also taken part in various radio shows on computers since 1994 to 2000. I do have a publishing company called “PC Program”, and from 1996-1999 it published 27 books about popular computer games, Windows, MS Office, Internet and the like. I stopped doing publishing in 1999.

Since 2003 I am active on the Internet and have quite a few of successful sites. All of my earning comes through the Internet for several years by now. I am now on this blog, because I find mobile apps to be engaging, exciting, and a true match for me as a designer, marketeer and software developer.

You can hire me to create you a mobile app for your site, as well as to add a mobile version to your already existing site.

To contact me personally, click here for my contact page.

Posted in Contact Us, Website Policies | Leave a comment

Contact

This entry is part 9 of 6 in the series Website Policies

Contact Dusko Savic

Please fill in the following form to contact me:

I shall try to answer as soon as possible, usually within one day, but there are no guarantees.

Posted in Website Policies | Leave a comment

Anti Spam Policy

This entry is part 8 of 6 in the series Website Policies

This Anti-Spam Policy Notice governs the use of the web page at and its associated services, web pages, domains and sub-domains, which are owned and operated by Dusko Savic (“Owner”). Wherever this Notice refers to “users” it means “you”, while “we” or “our” refer to Dusko Savic and “Web Site” refers to http://www.DuskoSavic.com.

This sets forth our policy with regard to the use of “Spam” marketing techniques in connection with Internet Marketing. In the event that we deem you to be in violation of these policies, we shall immediately revoke your rights and close any active account.

We have a strict policy against spamming. We forbid the sending of unsolicited mass Emails or unsolicited Emails of any kind in connection with the marketing of our programs, products and services.

We reserve the right to terminate your account and participation in our programs “for cause” if we deem you to be in violation of our anti-spamming policies. We also reserve the right to suspend your account and participation pending review upon receipt of any complaint or other evidence that you may be engaging in any spamming activity.

We consider spamming to be any activity whereby you directly or indirectly transmit email messages to any email address that has not solicited such email and does not consent to such transmission. We also consider spamming to constitute posting advertisements in newsgroups in violation of the terms of participation in such newsgroup, that are off topic, or in newsgroups that do not specifically permit advertisements. We also consider it spamming when advertisements are placed on message boards or in chat rooms when they are not permitted by the terms of participation in such message boards and chat rooms.

If you are “spammed” by anyone regarding our products, services, web site, or any other matters, please report this activity to Dusko Savic by visiting the web page at http://www.duskosavic.com

Posted in Website Policies | Leave a comment

Copyright Notice

This entry is part 7 of 6 in the series Website Policies

Copyright © 2005-2011 by Dusko Savic. All rights reserved.

1. This Copyright Notice governs the use of the web page at and its associated services, web pages, domains and sub-domains, which are owned and operated by Dusko Savic (“Owner”). Wherever this Notice refers to “users” it means “you”, while “we” or “our” refer to Dusko Savic and “Web Site” refers to http://www.DuskoSavic.com. If at any time the terms and conditions of this Copyright Notice no longer acceptable to you, you should immediately cease use of the web site where is located.

2. You acknowledge that the web page contains information and/ or software, photographs, audio and video clips, graphics, links and other material that are protected by copyright, trademark or other proprietary rights of Dusko Savic or third parties, including but not limited to product names, logos, designs, titles, and words or phrases which may be registered in certain jurisdictions (collectively, the “Content”). You agree to comply with any additional copyright notices, information, or restrictions contained in any Content available on or accessed through. If you want to use any content of for any reason you must obtain prior express written permission of Dusko Savic.

3. You may not modify, publish, transmit, transfer or sell, reproduce, create derivative works from, distribute, perform, display, or in any way exploit any of the content, in whole or in part. Content consisting of downloadable software may not be reverse-engineered unless specifically authorized by Dusko Savic or the owner of the software’s patent and or copyright. Subject to the provisions of this Copyright Notice, you may post on the any content owned by you (such as your original statements), content for which you have received express permission from Dusko Savic, and content in the public domain. You assume all right and responsibility for determining whether any content is in the public domain. You grant to Dusko Savic the right to edit, copy, publish, distribute, translate and otherwise use in any medium and for any purpose any content that you place on without compensation to you. You represent and warrant that you are authorized to grant all rights set forth in the preceding sentence.

4. You may not download content on that is indicated to be for sale except under the terms of the sale. Such content is the protected and copyrightable property of Dusko Savic. “Free” content may be downloaded for your personal use or non-commercial distribution consistent with the terms defined in this Copyright Notice. When using both purchased and “free” content, you will maintain and include all copyright and other notices contained in such content. Except as expressly permitted by the copyright laws, no copying, storage, redistribution or publication of any content is permitted without the express permission of Dusko Savic or the owners of such content or their authorized persons if other than Dusko Savic.

5. We are confident that you have understood your rights and obligations in concern to the use of and that you agree with the terms described above.

Regarding Images Found on this Site

The photos and information contained on this site are considered to be in the public domain, as they were found in various places on the Internet. Some pictures were edited, enhanced or otherwise modified to transform them into true desktop images.

This site in no way wishes to infringe on anyone’s copyright. If you have found anything that you feel infringes on your rights I request that you email me and I gurantee the item will be removed or altered to fit your wishes immediately.

Please be as detailed as possible when contacting me, as to on which page the picture is, the reasons why copyright has been violated, etc. I promise to be quick and efficient in resolving any copyright matter.

If you have any questions concerning the disclaimer of DuskoSavic.com which are not covered in this statement, please contact me with your questions here.

Your viewing this site confirms your acceptance of our disclaimer.

Posted in Website Policies | Leave a comment

Terms of Service of Use

This entry is part 3 of 6 in the series Website Policies

DuskoSavic.com is an online information and communications service (the “Service”) provided by author, astrologer and programmer Dusko Savic and from other sources. Use of the Service is governed by the terms and conditions of this Agreement. Please read this Agreement carefully before accessing or using the Service. Throughout this Agreement, site DuskoSavic.com is referred to as “we” or “us.”

General terms and conditions

Your access and use of this site and its services bind you to this Agreement. If you do not agree to the Terms and Conditions of Use for this site, you may not use the site or its services.

We may modify this Agreement at any time. Any modifications made to this Agreement will be effective immediately upon posting on the site. By accessing or using the Service, you agree to be bound by all of the terms and conditions of the Agreement as posted on the Service at the time of your access or use. You agree to review the Agreement posted on the Service each time you use the Service so that you are aware of any modifications made to this Agreement.

Disclaimer

THE SERVICE AND ANY INFORMATION CONTAINED ON OR PROVIDED THROUGH THE SERVICE IS PROVIDED ON AN “AS IS” BASIS. THAT MEANS THAT THE INFORMATION CONTAINED ON OR PROVIDED THROUGH THIS SERVICE IS INTENDED FOR GENERAL CONSUMER UNDERSTANDING AND EDUCATION. ANY ACCESS TO THIS SITE IS VOLUNTARY. WE WILL REGARD ALL ACCESS AS VOLUNTARY AND AT THE SOLE RISK OF THE USER.

This site and its services are for consumer educational use only. Nothing contained in this site is or should be considered, or used as a substitute for, medical advice, diagnosis or treatment. The services provided on this site are here to educate consumers on the astrological views on getting pregnant. This site and its services do not constitute the practice of any medical, nursing or other professional health care advice, diagnosis or treatment.

Because of the designated purpose of this site and the services it provides, you agree that DuskoSavic.com does not constitute a service that targets any one community, user group, business or industry. Because the site is designed for educational purposes, you also agree that it does not constitute “doing business” in any specific jurisdiction or soliciting business for us or any of our affiliated companies.

We advise users to always seek the advice of a physician or other qualified health care provider with any questions regarding personal health or medical conditions. Never disregard, avoid or delay in obtaining medical advice from your doctor or other qualified health care provider because of something you have read on this site. If you have or suspect that you have a medical problem or condition, please contact a qualified health care professional immediately. If you are in the United States and are experiencing a medical emergency, please call 911 or call for emergency medical help on the nearest telephone.

We do not operate, control, supply, endorse, warrant or guarantee any information, products, services or merchandise that is not clearly identified as information, products, services or merchandise supplied by us. We also do not warrant or guarantee that files available for downloading through the Service will be free of infections or viruses, worms, Trojan horses or other code that contains contaminating or destructive properties.

We, and our content providers, cannot and do not guarantee or warrant against errors, omissions, delays, interruptions or losses, including loss of data. Users of this site are responsible for maintaining a means external to DuskoSavic.com for the reconstruction of any lost data.

We reserve the right at any time and from time to time to modify or discontinue, temporarily or permanently, this site, or any part thereof, with or without notice.

Warranties and limitation of liability

WE DO NOT MAKE ANY EXPRESS OR IMPLIED WARRANTIES, REPRESENTATIONS OR ENDORSEMENTS OF ANY KIND WHATSOEVER (INCLUDING WITHOUT LIMITATION, WARRANTIES OF TITLE OR NONINFRINGEMENT, OR ANY WARRANTIES OF MERCHANTABILITY OR FITNESS FOR A PARTICULAR PURPOSE) WITH REGARD TO THE SERVICE, OR WITH RESPECT TO ANY INFORMATION, PRODUCT, SERVICE, MERCHANDISE OR OTHER MATERIAL PROVIDED ON OR THROUGH THE SERVICE. WE DO NOT WARRANT OR GUARANTEE THE ACCURACY, COMPLETENESS, CORRECTNESS, TIMELINESS OR USEFULNESS OF ANY INFORMATION, PRODUCTS, SERVICES, MERCHANDISE OR OTHER MATERIAL PROVIDED THROUGH THE SERVICE OR ON THE INTERNET GENERALLY. WE MAKE NO WARRANTY OR GUARANTEE THAT THE SERVICE WILL BE UNINTERRUPTED, TIMELY, SECURE OR ERROR-FREE.

WE ARE NOT LIABLE TO ANY USER OR ANYONE ELSE FOR ANY DECISION MADE OR ACTION TAKEN BY BASED ON RELIANCE UPON THE INFORMATION CONTAINED ON OR PROVIDED THROUGH THE SERVICE.

Users’ agreement

Users will not upload or transmit any communications or content of any type that infringes or violates any rights of any party.

Users will not use this site for any purpose in violation of local, state, national or international laws.

Users will not use this site as a means to distribute advertising or other unsolicited material to any third party.

Users will not post material that is unlawful, obscene, defamatory, threatening, harassing, abusive, slanderous, hateful or embarrassing to any other person or entity as determined by us in our sole discretion.

Users will not impersonate another person.

Users will not hold us or any of our affiliates, subsidiaries or parent company liable for damages including (but not limited to) loss of wages, revenue or business because of any services related to or provided by this site. The sole and exclusive remedy for dissatisfaction with the services of this site will be to stop using the Service.

Users will indemnify us and any of our parent or subsidiary companies or organizations, and any of our successors, assigns or licensees, together with any of their respective officers, directors and employees, against any damages, losses, liabilities, judgments, costs or expenses (including reasonable attorneys’ fees and costs) arising out of a claim by a third party relating to use of the Service, or any breach or violation of this Agreement or any other term or condition contained on the Service.

Users agree to comply with all user responsibilities and obligations as stated in these Terms of Service.

Users’ representations

All site users represent and warrant that they are at least 18 years of age and that they possess the legal right and ability to agree to these Terms of Service and to use this site in accordance with these Terms of Service.

Conflict resolution

You agree that this Agreement is entered into between you and us in Serbia, and is performed within Serbia and governed by and shall be construed in all respects under the laws of the Serbia, exclusive of its choice of law or conflict of laws provisions. In any claim or action by you directly or indirectly arising under this Agreement or related to the Service, you and we each irrevocably agree to submit to the exclusive personal jurisdiction of the Serbian courts.

If any of the provisions of this Agreement are held to be not enforceable by a court or other tribunal of competent jurisdiction, then such provisions shall be limited or eliminated to the minimum extent necessary so that this Agreement shall otherwise remain in full force and effect.

This Agreement constitutes the entire agreement between you and us relating to the access and use of the site and any of its services. This Agreement may not be modified, in whole or in part, except as described elsewhere in this Agreement. Anything contained on the Service inconsistent with or conflicting with the terms of this Agreement is superseded by the terms of this Agreement.

Termination of services

If you violate these Terms and Conditions of Use, your use of this site will terminate. We may notify you that you have breached the Agreement. We may, in our sole discretion, terminate your access to this site, or any portion thereof, or discontinue providing the site, or any portion thereof. These actions are in addition to and not in lieu or limitation of any other right or remedy we may have available at law. Further, we shall not be liable to you or any third party for any such termination or discontinuance.

General

We do not guarantee continuous, uninterrupted or secure access to our services, and operation of this site may be interfered with by numerous factors outside of our control. You agree that these Terms and Conditions of Use and all incorporated agreements between us and you may be automatically assigned by us, in our sole discretion, to a third party in the event of a merger, acquisition or liquidation.

Our failure to act with respect to a breach by you or others of these Terms and Conditions of Use does not waive our right to act with respect to subsequent or similar breaches. These Terms and Conditions of Use set forth the entire understanding and agreement between us and any site user with respect to the site, its uses and services.

Copyright and trademarks

The materials on the site are copyrighted by us and/or other applicable rights holders. You may download and reprint a single copy of the materials from the Service for your own personal, noncommercial use only, provided you include all applicable notices and disclaimers. Any other use of the materials is strictly prohibited without our prior written permission and the permission of the applicable rights holder(s).

Use of cookies

See Privacy policy for information regarding cookies and their use on our site.

Contact information

If you have any questions about the Service, please contact us at here.

Posted in Website Policies | Leave a comment

Privacy Policy For DuskoSavic.com

This entry is part 1 of 6 in the series Website Policies

If you require any more information or have any questions about our privacy policy, please feel free to contact us by email.
At www.DuskoSavic.com, the privacy of our visitors is of extreme importance to us. This privacy policy document outlines the types of personal information is received and collected by www.DuskoSavic.com and how it is used.

Log Files
Like many other Web sites, www.DuskoSavic.com makes use of log files. The information inside the log files includes internet protocol ( IP ) addresses, type of browser, Internet Service Provider ( ISP ), date/time stamp, referring/exit pages, and number of clicks to analyze trends, administer the site, track user’s movement around the site, and gather demographic information. IP addresses, and other such information are not linked to any information that is personally identifiable.

Cookies and Web Beacons
www.DuskoSavic.com does use cookies to store information about visitors preferences, record user-specific information on which pages the user access or visit, customize Web page content based on visitors browser type or other information that the visitor sends via their browser.

DoubleClick DART Cookie

.:: Google, as a third party vendor, uses cookies to serve ads on your site.
.:: Google’s use of the DART cookie enables it to serve ads to your users based on their visit to your sites and other sites on the Internet.
.:: Users may opt out of the use of the DART cookie by visiting the Google ad and content network privacy policy at the following URL – http://www.google.com/privacy_ads.html

Some of our advertising partners may use cookies and web beacons on our site. Our advertising partners include …….
Google Adsense

Commission Junction

Widget Bucks

Adbrite

Clickbank

Azoogle

Chitika

Linkshare

Amazon

Kontera

These third-party ad servers or ad networks use technology to the advertisements and links that appear on www.DuskoSavic.com send directly to your browsers. They automatically receive your IP address when this occurs. Other technologies ( such as cookies, JavaScript, or Web Beacons ) may also be used by the third-party ad networks to measure the effectiveness of their advertisements and / or to personalize the advertising content that you see.

www.DuskoSavic.com has no access to or control over these cookies that are used by third-party advertisers.

You should consult the respective privacy policies of these third-party ad servers for more detailed information on their practices as well as for instructions about how to opt-out of certain practices. www.DuskoSavic.com’s privacy policy does not apply to, and we cannot control the activities of, such other advertisers or web sites.

If you wish to disable cookies, you may do so through your individual browser options. More detailed information about cookie management with specific web browsers can be found at the browsers’ respective websites.

Posted in Website Policies | Leave a comment

Contact Us

If you need to contact us, please fill all the fields above.

We would be very happy to help you.

Error: Contact form not found.

Posted in Contact Us | Tagged , , , , , , | Leave a comment

I dalje radim horoskope…

Ako ste dovde došli preko Googla, znajte da i dalje radim horoskope, jedino što se to dešava na sajtu AstroDule.com. No možemo biti i malo precizniji:

Kliknite ovde ako vas sa sajta AstroDule interesuje medicinska astrologija.

Kliknite ovde ako vas sa sajta AstroKursevi.com interesuje Reiki terapija ili
kurs za Reiki.

Kliknite ovde ako vas sa sajta AstroDule interesuju ljubavni horoskopi, brak i razvod.

Posted in Astrologija i horoskopi | Tagged , , , , , , , | Leave a comment