Once you have found me, I read you job requirement, maybe we then talked on Zoom or Skype, and agreed to do it together, there will be a list of things to do, sites to visit, accounts to open and so on, in order to build an infrastructure for the new app.
The Importance of Having Accounts in the App Stores
As the owner of the app, you will need to reserve place for your app in the app stores. There are two main platforms, Android by Google and iOS by Apple, and they both have their own app stores. The app stores are important because each phone and table comes with icons for their respective store. On Android, there will be an icon for the Google’s Play Store, as it is officially called, and on the iPhone and iPad, there will be an icon that leads to the App Store, as the Apple’s app store is officially called.
|
App Store Icon |
 Play Store Icon on Android devices |
It is very easy for users to tap on those icons, get to the store and search for the apps. On Android, you can download and install apps from other sources, be it from a direct link, from the other “app stores” with Android apps and so on. On iOS, the only way to install a new app is to visit the App Store and download it from there.
Again, it is not mandatory, but most of the Android apps are installed from the Play Store. For commercial use, it is a must to launch the app in the stores. You cannot ignore them because they are giving you free access to potential users of your apps. The stores are just like a “normal” search engine but for apps only. You should craft the app presence in the store so that visitors can find it through searching directly in the store.
Creating a Developer Account in Google Play Store
You can start by visiting this link:
https://play.google.com/apps/publish/signup/
In the end, it will ask you to $25, once in a life time, so it is kind of cheap as compared to creating a developer account in the App Store, where you will be charged $99 each year.
It can take up one week to get your new account ready. In times of crisis, it may take even longer.
Creating a Developer Account in the App Store
You can start creating your iPhone developer account by visiting this link:
https://developer.apple.com/enroll
and click “Start your Enrollment’.
The official Apple documentation is here:
https://developer.apple.com/programs/how-it-works/
As mentioned, the yearly fee for Apple Developer Program is $99. You should be paying it as long as you want to have your apps in the store.
Be careful though, if you want your company to be the owner of the account. The sites will ask for different documentation in that case and it will take longer for the application to come through. Be prepared to supply various documents, both personal and for the company, and send the photos of them to Google and Apple.
So, if you want to publish your app, say, in the next three or four weeks, you should better start getting these accounts just about now.
The Email Address For the Accounts
You can use any valid email address for the account, in both stores. You may use one and the same address for both accounts, or they may be completely different. A practical way of doing it is to create a special Gmail address and use it only for the communication with the stores.
Since I will be creating the app for you, I will need to see those messages from the stores say, if the app is not admitted to the store, if a continued conversation with the support is needed and so on. So it is best not to mix this address with any standard personal address that you own.
If you are in the company, one person can create the Gmail address and then give access to other persons. In general, I require that I be given access to it to, as your developer. That will cut down your support time and be just more efficient way of communicating with the stores.
Please note that you can give me login details of your Gmail account but Google will send a special code to your phone and you will then send the code to me. In that way I will be able to enter the email account.
Access to the Stores Accounts
As your developer, and especially if this is your first app, I’ll be filling in all the details that the stores need to publish the app. Once you have access to your account, the next step is to “let me in”, by inviting me as your administrator.
Click here to read documentation how to add me as a developer to Google Play account.
Click here to read documentation how to add me as a developer to your App Store account.
In case of Apple, I will also need to enter your Certificates part of the account and for that, you will need to give me access to the entire account. When I try to enter, Apple will send you a six digit code and you have to send it to me and then I’ll be admitted to the account. Seems that that the permission is only valid for a month, so if I need it again, the entire procedure needs to be repeated.
For this exchange to succeed, we both have to be online at the same time, so we have to adjust the time zones correctly. I am in Belgrade, Serbia, Europe, at GMT+1, so if you are in the USA, it will be my afternoon when you start your business day.
Also note that you will need to supply the six digit code at least two times and sometimes even three times, as I have to
- enter the account,
- create the certificates and then
- download and import them into Xcode.
When importing into Xcode, it will ask for the code for the second time. The problem is that the codes that the Apple is sending are valid for only a couple of minutes, so you have to send them to me real quick and I have to enter them without error, also real quick.
Domain For the App
In general, it will be best if you purchased a special domain name for hosting of the app.
Popular apps may have millions of API calls to the server every month and you should be able to step up your hosting later on down the road. It will be much easier if your sites were separate from the very start. Suppose you have a normal WordPress blog, maybe with some sneaky plugins, maybe you already have payments on that site as well and it is just wise not to risk stopping that money making site because of some problem with the back end of the app.
For domain name, go to your usual domain registrar. Be careful though, some sites, say, GoDaddy will try to make you buy both the hosting and the domain name with them, while you may find out that you can host your app somewhere else, with much more bang for your buck.
Hosting For the App
If your app is any good, it will store and read its data from a remote server, which is actually the same as a web server for sites. So you need to shop for hosting. If you have hosting that is working for you, and you know how to create a server, a MySQL database, install PHP and the such, then just stay at the same hosting company and I’ll adjust. Centos, Ubuntu, or Debian, it does not matter to me, I am equally at home with all of them. I’ll need login details for the server, its password, FTP access, MySQL password and access and so on.
If you do not have any hosting preferences now, let me suggest you buy hosting at DigitalOcean.com, which is where I host both my own sites as well as servers for my own apps. You can click on my referral link here and get $100 in credit over 60 days for hosting, or you can just click the direct link here.
Once you have created your DO account, click here to add my account to your team.
After that, whenever I log into my original account, I will be able to log into your account and then work in it.
At DigitalOcean.com, prices start at $5 for the simplest (but powerful) SSD hosting and then go up to hundreds of dollars of worth if you want to. Since this is your very first app, just pay 5 bucks to enter the game and if the app gets really popular, and gathers millions of users, you will always be able to step up the hosting both with DigitalOcean and with any other large hosting company.
Setting Up Your Apps Server
In general, I’ll set up a LAMP stack on the server, create the databases for the app and install my membership site which will be your main hub for all things connected to your app. It will become a kind of an app center, where you will see everything that is going on with your users, with the usage of your app and so on.
The acronym LAMP means that following pieces of software will be installed for you:
- Linux operating system,
- Apache as the web server,
- MySQL as the database, and
- PHP, the object-oriented scripting language.
Previously, the “P” in LAMP always used to mean PHP, but now it can also mean programming languages Perl or Python.
Just to be clear, I always use PHP for the apps servers. The reason is a flavor of PHP, called CakePHP. It is a framework, kind of a new language written using the original PHP, so you can both write code in pure PHP as well as in CakePHP. CakePHP is excellent in structuring your code and it will make using the database in MySQL a breeze. Over the top of that I am licencing a special plugin written in CakePHP, which is called User Management Plugin. That plugin sets up the structure of your apps site.
User Roles in Your Apps Center
There are five user roles that you get from the get go (and you can still define your own, if needed).
Here is what typical set up for user roles looks like:
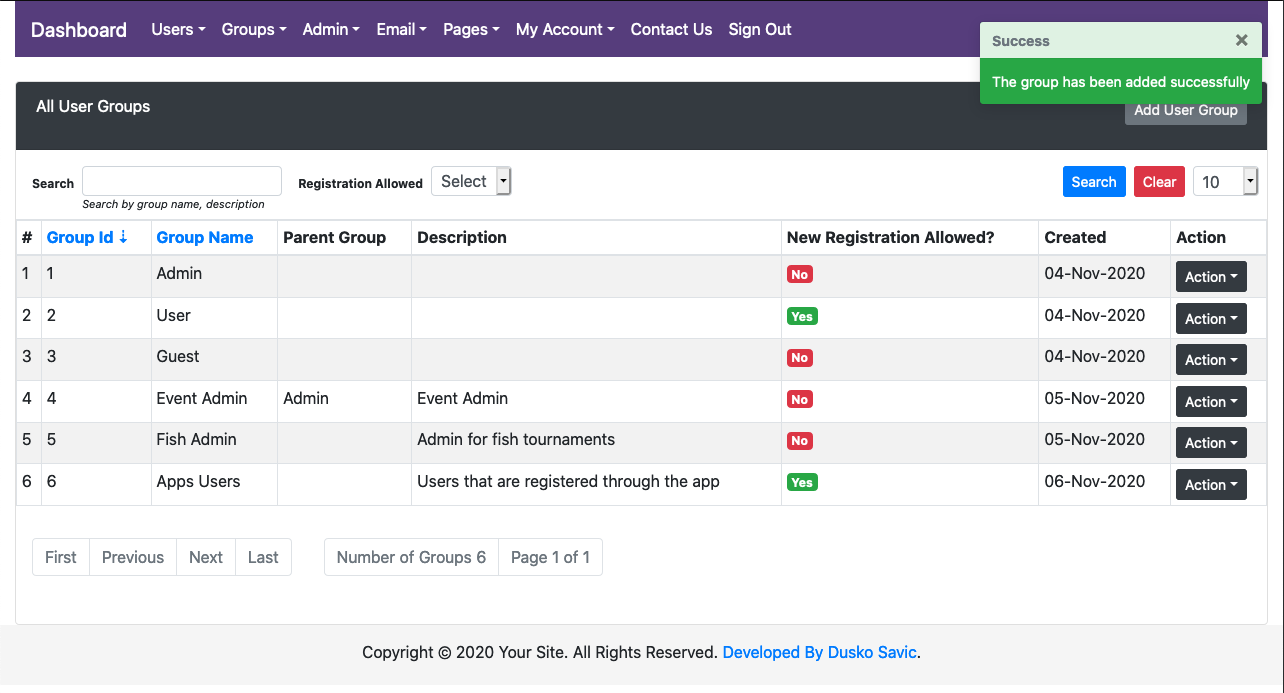
Roles in App Center
Super Admin Role
You, as the owner of the app, will be the omnipotent Admin (or, we can call you a Super Admin if you like that feeling of grandeur around you). The super admin can do everything they want:
— add new users, both for the site and for the app,
— edit their data,
— delete them from the site and/or app,
— set up technicalities of the site: which time zone the site will operate in, whether to use http: or https: as site address and much, much more,
— create groups of users,
— create subgroups of existing groups,
— send emails, either individually, or to a selected group of users,
and so on.
Here is how the Super Admin might allow for using Facebook account for sign in to the app:
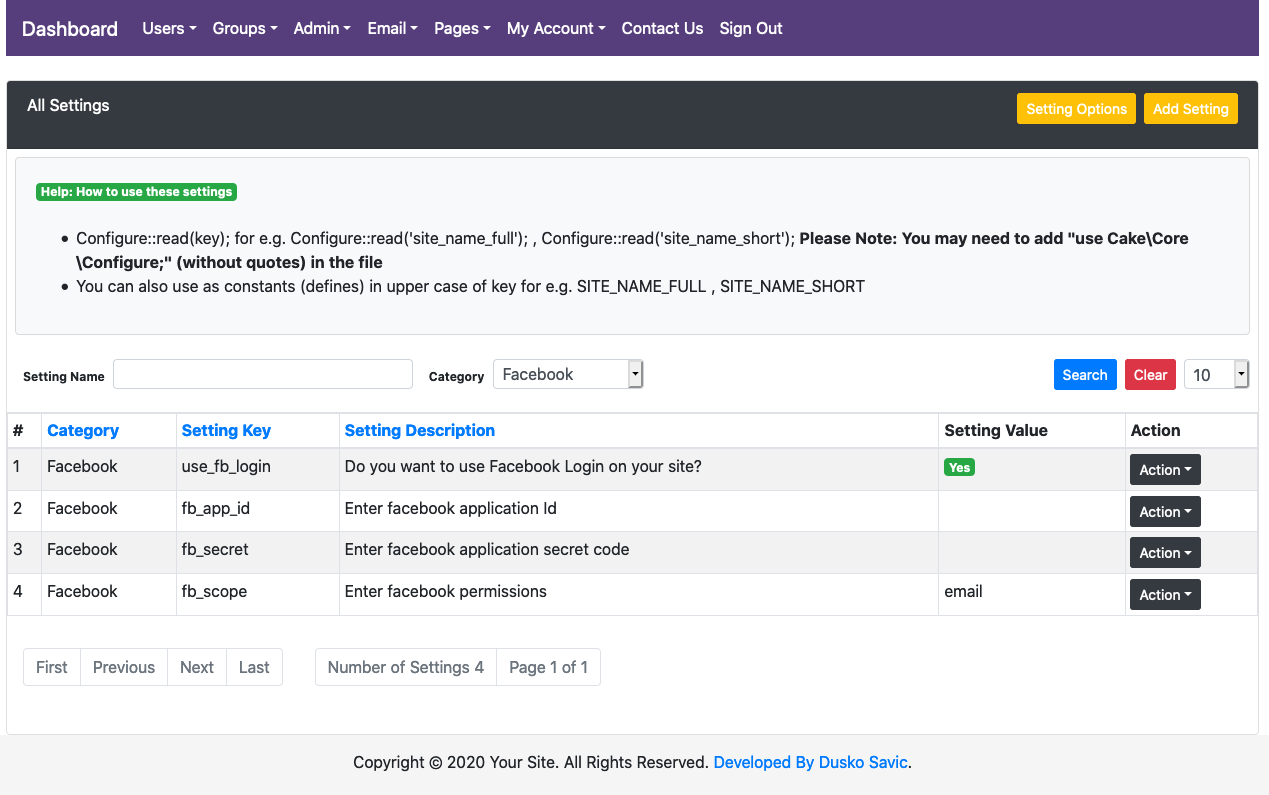
Setting up Facebook account for Sign In screen
User Role
User role in this context is the user of this web app, that is, being the member of the membership site that the apps center actually is.
To become a user of the site, you have to register yourself first. Here is what a sign in screen looks like (Sign Up screen is similar and shown here).
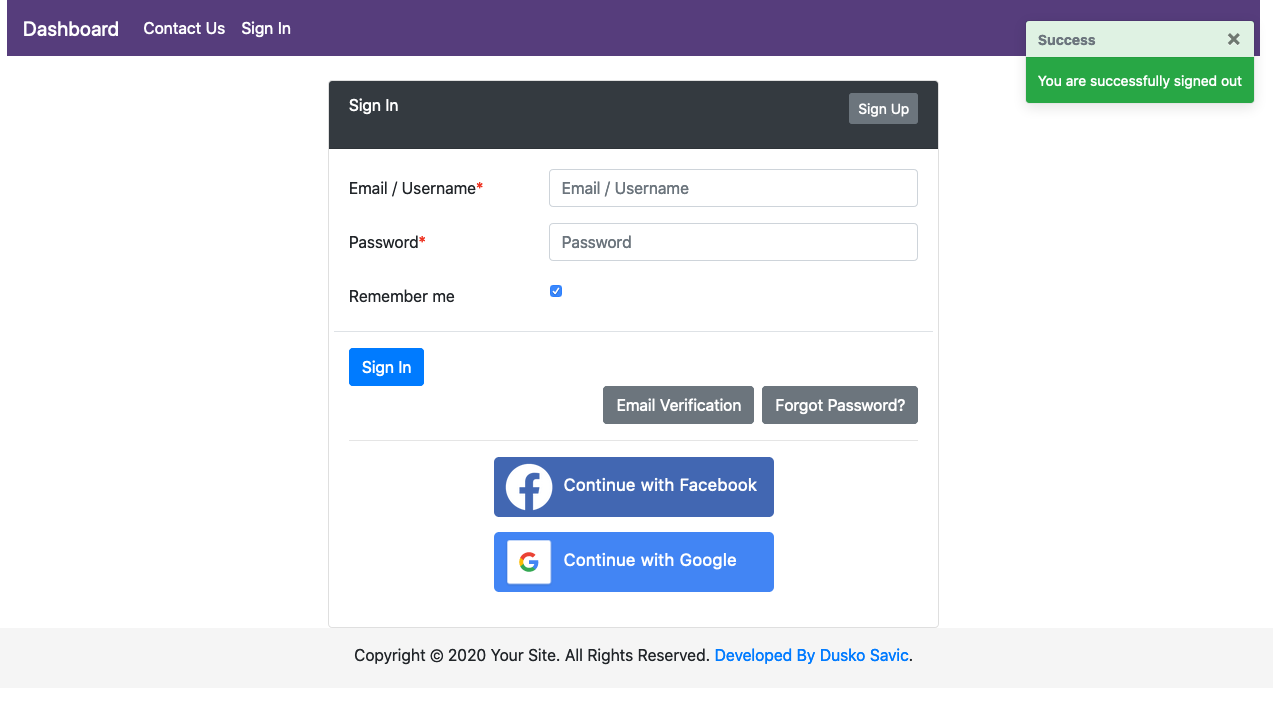
Sign In with email address, Facebook or Google accounts
NOTE. The Facebook and Google buttons will be seen only the Super Admin had already had managed to set them up in the Settings section, as shown above.
Usually, this role is for the consumer — someone who enters the site, reads, listens, watches, comments and so on, like in Facebook, YouTube and the like.
If you were, say, creating an app for fishing tournaments, this type of user could see the results, watch videos, cheer up the members of the team they are supporting and so on.
In an astrology site, this type of user would be able to create a natal chart, read the delineations, compare two charts and so on.
If case of an events manager site, this type of user would be able to see which events are being planned, buy tickets, reserve their place in the venues and the like.
Guest Role
This is the visitor of the site, no registering needed.
If your site is the dedicated apps server, the guest will not be able to see much when they come to the site. This role actually is for the user of the mobile app and serves only to allow access to the back end server, when the API is called from the mobile app.
On the other hand, if you wanted to, you could create your own pages on the site that this type of user could see. This framework I am using is quite flexible, it can also be a membership site, a back end server, and a plain normal site for the usual visitors.
App User Role
This is the user that has registered through the app. That would be the majority of users in the web server anyway.
Super admin also has the ability to manually register this type of user, if there is need.
Admin Role
This role is weaker than the Super Admin but stronger than the User role. In the beginning, there may be just one owner of the app and he or she would be doing all the admin chores. Given time and provided the app would become popular, there might occur a need for additional hands. Maybe you are selling merch and there is a place for an admin that will oversee that, but still not have all the rights of a Super Admin. The Admin Role is exactly that place in the middle — have some authority in one part of the business, but not overall.
What will exactly the Admin be able to do, will depend on Super Admin’s decisions. There may be on Admin for ecommerce, and another for customer support (customer admins are apps users in this case), and yet another for advertisements, and so on. Super Admin can always create new Admin role and define what the role will be able to do or not.
In one of the images above, there are groups called Event Admin and Fish Admin.
Sites For Login Buttons
If you want the user to sign up or sign in using Facebook or Google cookies, you can. You have to register your apps as if it were a native part of Facebook and / or Google. For Facebook, go here:
https://developers.facebook.com/
Go here
https://developers.google.com/identity/sign-in/web/sign-in#create_authorization_credentials
to get Google authorization credentials.
If your app is using Firebase, here is how to claim space for your app over there:
https://console.firebase.google.com/?pli=1
Please bear in mind that you are working with three separate apps:
- the web app on the server,
- the Android app, and
- the iOS app.
To sites such as Google, Facebook, Twitter, and Apple, these applications will be totally separate and you will have to obtain codes for each of them separately.
Once you have the codes, send them to me and I shall deploy them into the source code and other data of the apps — it has to be done only once per app.
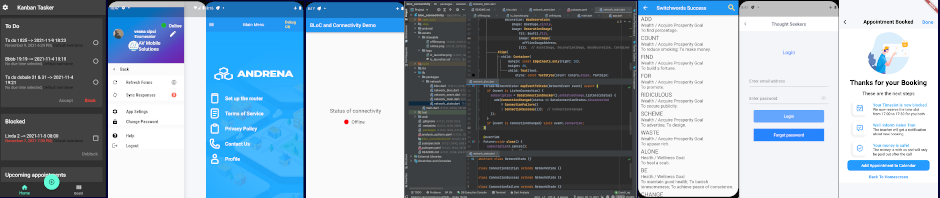
Testing the App During Development
Once the first phase is done, i.e. the project in Flutter is formed and some coding has been written, a testing phase begins. You will, naturally, want to see whether am I working on your app, and what is the progress. The best way to see it is to install the app on your phone. Every day or maybe every other day, depending on the circumstances, during the business week, I will send you new versions of the app, for inspection.
Receiving New Versions Through Diawi.com
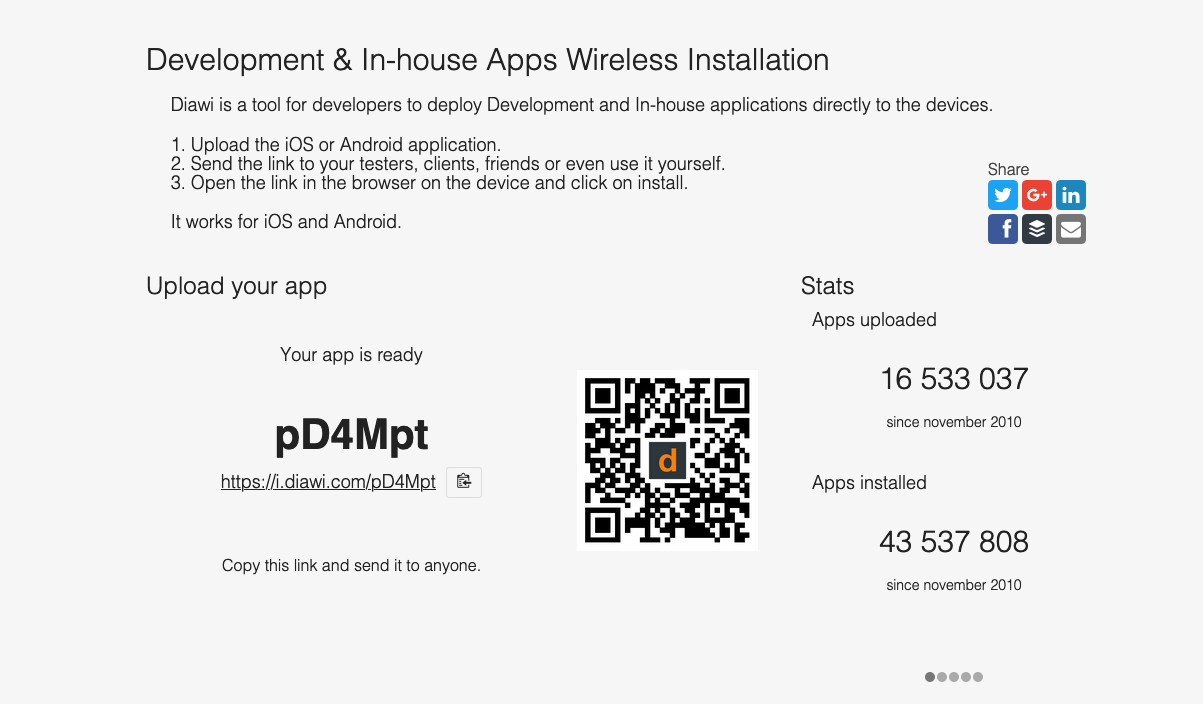
Diawi.com
This the easiest way of receiving new versions. You get a link and type it in your browser on the mobile device. The link is short so no problem entering it. It will then ask you to allow installing the app on your device, and that’s it.
This will work on Android right out of the box. For iOS, you have to supply the UDID code of your iPhone or iPad. With that, I go to developer.apple.com, enter the UDID code and create a development certificate. Then it will work but just on devices with those UDID codes. If you want to test on two or more devices, just send me all the UDID codes of those devices.
This procedure has to be done just once, and if you change the device for testing, then I have to enter the new UDID code and so on.
The link for downloading the app through diawi.com will last for a couple of hours, so be sure to download it as soon as possible.
Receiving New Versions Through the App Stores
Both stores have sophisticated procedures for testing. You can gather thousands of testers and get their feedback, which is a must for popular games, for instance. If you are just starting and nobody has heard of your app, you may relay on friends and family for testing, at first.
In theory, you should devote a lot of time to testing. In real life, especially when just starting, not so much, so in most cases this phase is often skipped. But you can still use the testing parts of the stores to get the developing app to download “from the Internet”.
Using Git Sites to Test the App
If you are technically savvy, you can set up a project on one of the git-based sites. The most popular are GitHub, GitLab, and BitBucket. I have been working with all these sites so you just create the project and let me in, so to speak. In time, I shall be posting new source code as it is written and tested out. You can then download source code to your computer and — after you have installed Flutter and one of its editors — you can compile the app and run it on a device that is attached to the computer.
You do not have to do that right away and you can even be totally not interested in having the source code for the app at your disposal.
Or, you may set it up at the end of the development just to have to source in one place.
If you do set up your git account somewhere (or you already have it somewhere), ask for my address on that site and then give me access to the project.
Publishing the App in the Stores
Finally, that day will come. The app is tested and I am going to publish it to the stores for you. There is quite of lot details to all of it, and the most important part is to write the store listing — the text that explains why the visitor of the page should download the app. Let me repeat it: the only function of the listing, images etc. is to make the user want to download the app and try it out. So the listing has to be really successful in convincing them to try out the app.
I shall upload the images for the listing and both stores will allow you to put up a video. On the Play Store, it is a normal YouTube video, while in the App Store, you can have three videos up to 30 seconds long. In first iteration, many app owners choose not to produce any video, although that is highly recommended, of course.
In both stores, there will be a delay between uploading the listing and the actual existence of the app in the store. Apple is well know for the scrutiny of the submitted apps, while Google used to be more relaxed. That has changed so it is getting more difficult to publish the app on the Play Store as well.